


March 27, 2023

You must read the warnings and instructions which are contained in the safety section of this manual. Before you perform any operation or maintenance procedures ensure you understand the warnings and instructions.
Caterpillar ET 2023A & 2019C Electronic Technician Diagnostic Software
Check Condition
1. Park the machine on level ground. Fully retract the boom and lower the boom.
2. Remove the cover from the rear of the chassis.
3. A limited inspection of the chains can be made through the rear of the boom. The boom extension chain can be inspected by fully extending the boom and looking on top of the intermediate section. If the chains are corroded, the chains must be removed from the boom for cleaning and a full inspection. If the chains require lubricant, the chains must be removed from the boom for cleaning and a full inspection. Refer to the Hydraulic System Systems Operation, Testing and Adjusting, "Boom Chain – Clean/Inspect/Lubricate”or consult your Caterpillar dealer
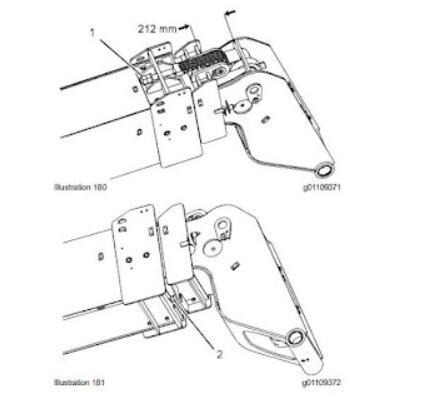
4. Set the minimum distance to 224 mm (8.8 inch) between boom section 2 and boom section 3. The maximum allowable distance is 234 mm (9.2 inch). Tighten extension chain (1) in order to move section 3 outward. Tighten retraction chain (2) in order to move section 3 inward. If the distance is significantly more than 224 mm (8.8 inch), slacken both chains and refer to Step 1.
5. After setting the distance to the required tolerance, tighten the extension chain to 20 N-m (15 lb ft).
6. Tighten the retraction chain to 18 N-m (13 lb ft).
7. Tighten the extension chain to 105 ± 5 Nm (77 ± 4 lb ft).
8. Tighten the retraction chain to 70 ± 5 Nm (52 ± 4 lb ft).
9. Extend the boom and retract the boom several times. Check the torque for the extension chain. Check the torque for the retraction chain.
10. Install the locknut for the extension chain. Torque the locknut for the extension chain to 105 ± 5 Nm (77 ± 4 lb ft).
10.2021 Caterpillar SIS EPC+Service Manual download & Full Installation Service
11. Install the locknut for the retraction chain. Torque the locknut for the retraction chain to 70 ± 5 Nm (52 ±
4 lb ft).
12. Check the shackles on both chains. If necessary, adjust the shackles in order to set the shackles horizontally.
13. Remove the stand and lower the boom.
Posted by: Emily white at
02:40 AM
| No Comments
| Add Comment
Post contains 423 words, total size 4 kb.
March 20, 2023

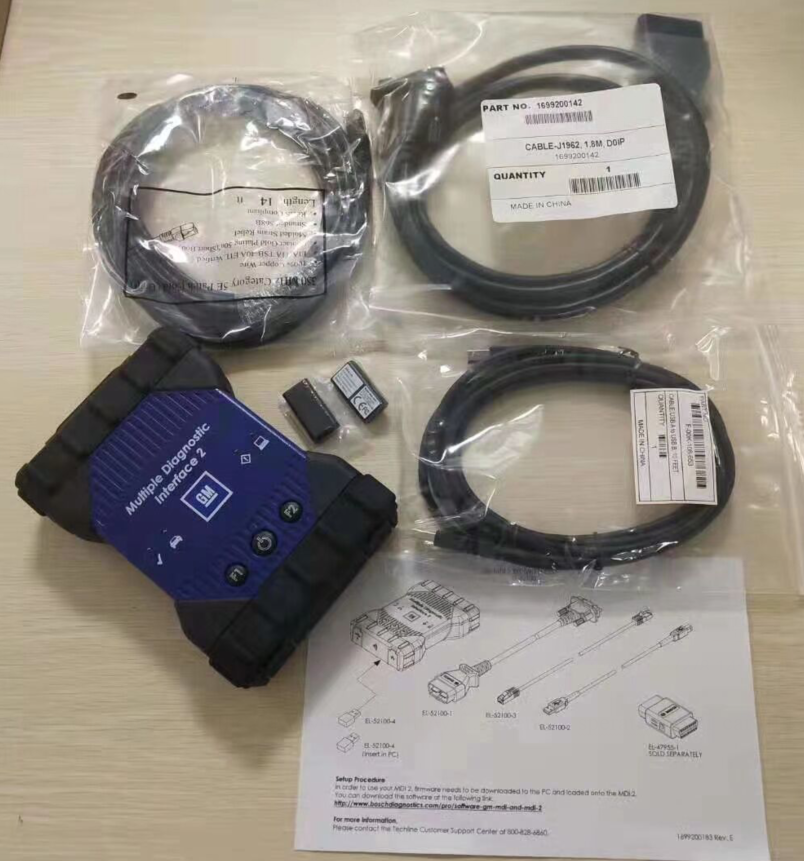
Now there are two models of theGM MDI 2the market ,One is copy cheaper, another one is original expensive.
1: GM MDI 2 Diagnostic Tool Multiple Diagnostic Interface this model is copy cheaper, if you need this model you can choose you need wifi or not. If you need the wifi. Pls note, the wifi we have put it on the mother board, there is no other extra wifi card to provide. If you choose the wifi,but when you run it, you do not know how to connect with the wifi, attached the setup video for your reference, you can setup the wifi according the video.
Function :
MDI scan tool is the Multi Diagnostics Interface
Works as the high-quality Vauxhall / Opel dealer diagnostic interface
Can be used with Global TIS, GDS 2, Tech2Win software on a new laptop
Provides full dealer level diagnostics and programming
Supports all Vauxhall /Opel 16 pin vehicles from 1996 to 2022
Perfoms quickly and used easily to make customers happy and win new business by offering the exact same functions as the main dealers, including:
* Automatic vehicle recognition
* DTC reading and removal
* Complete list of live data streaming for all main ECU
* Recordable / playback of live data
* New software flash for existing ECU to fix drivability issues
* Programming and installation of new ECU (PCM, ABS, Instrument cluster, air bag, fuel pumps etc.,)
* Programming new keys
* Setting / removing speed limiters
* J2534 pass thru offering ECU re-flash and diagnostics for other vehicle manufacturers, when subscribed to their specified software
* More dealer specific functions
2: Some customer said theGM MDI 2 with wifi. There is sperately wifi card like below picture.
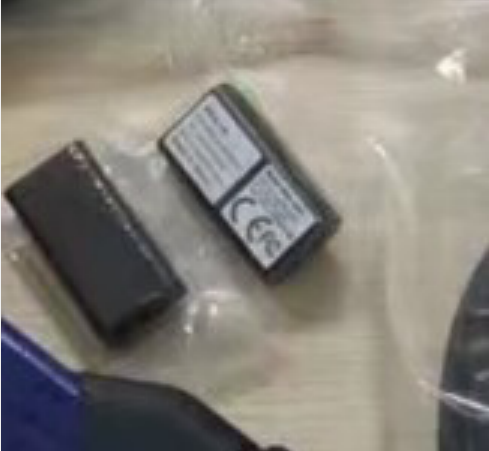
Yes, We have this model, this model is expensive original, just the wifi card need 300usd.the copy one with the wifi without the wifi card, have set the wifi on the motherboard. How to setup the wifi,we have attached the video before.
Fuction:
* Automatic vehicle recognition
* DTC reading and removal
* Complete list of live data streaming for all main ECU
* Recordable/playback of live data
* New software flash for existing ECU to fix drivability issues
* Programming and installation of new ECU (PCM, ABS, Instrument cluster, airbag, fuel pumps etc.,)
* Programming new keys
* Setting / removing speed limiters
* J2534 pass-thru ECU re-flash and diagnostics for other vehicle manufacturers, when subscribed to their specified software
* More dealer specific functions
If you need learn more, you can contact with us sales@obd2tool.com or you can search on our store:https://www.obd2tool.com
Posted by: Emily white at
03:07 AM
| No Comments
| Add Comment
Post contains 437 words, total size 5 kb.
March 09, 2023

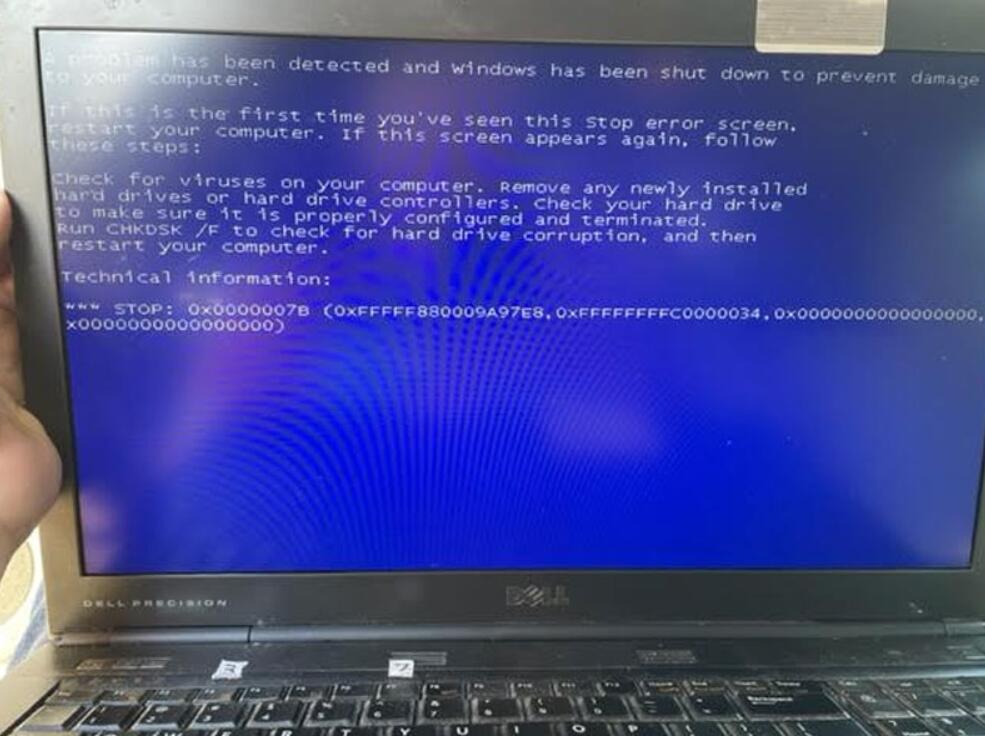
Recently, some customers gave feedbacks that it turned to blue screen when useGM MDIGDS tech2 Win software HDD. Screen as below:
"A problem has been detected and windows has been shut down to prevent damage to your computer.”
"Check for viruses on your computer. Remove any newly installed hard drives or hard controller. Check your hard drive to make sure it is properly configured and terminated. Run CHKDSK/ F to check for hard drive corruption, and then restart your computer.”
Technical information:
STOP: 0x0000007B(0xFFFFF880009A97E8. 0xFFFFFFFFC0000034. 0x0000000000000000. 0x0000000000000000)
Reason 1
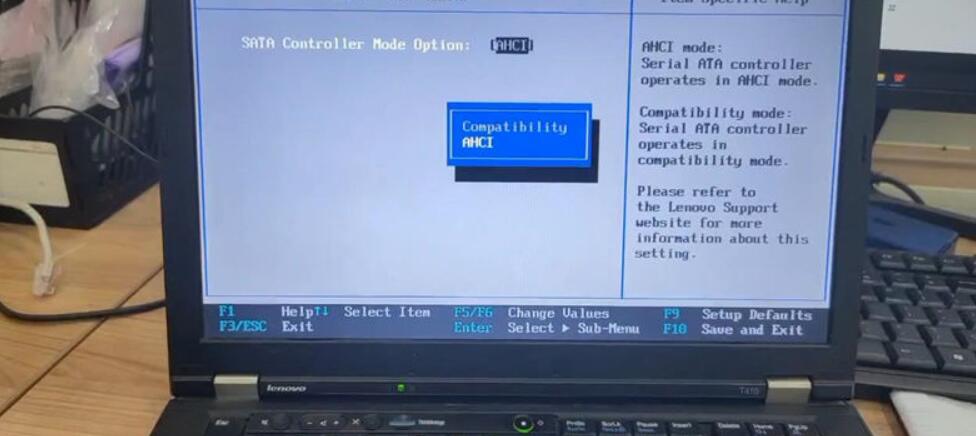
The reason to cause the problem is because of incorrect HDD format. Through changing Hard Disk Format to AHCI in bios can solve it.
How to change hard disk format to AHCI?
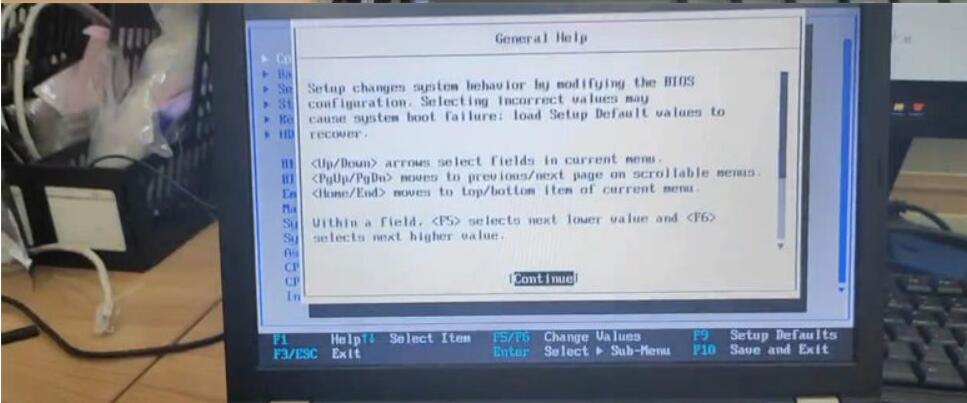
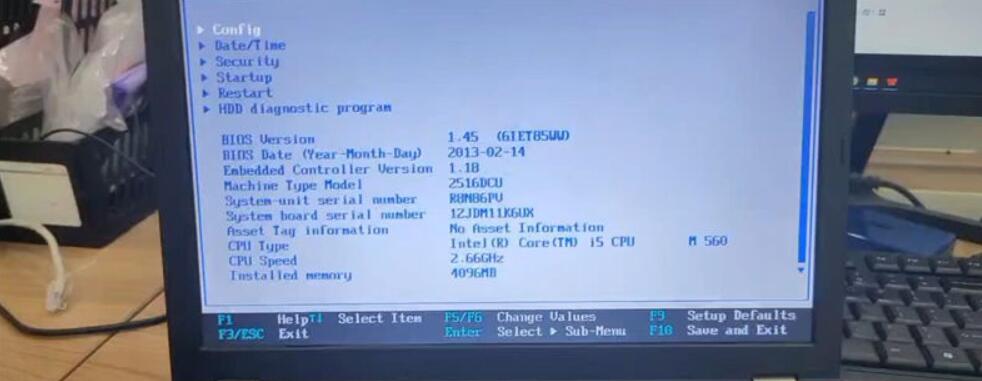
Step1. Restart computer, continuous press F1/F4/F12 button to access bios version.
(*Different computers may need to press different buttons. )
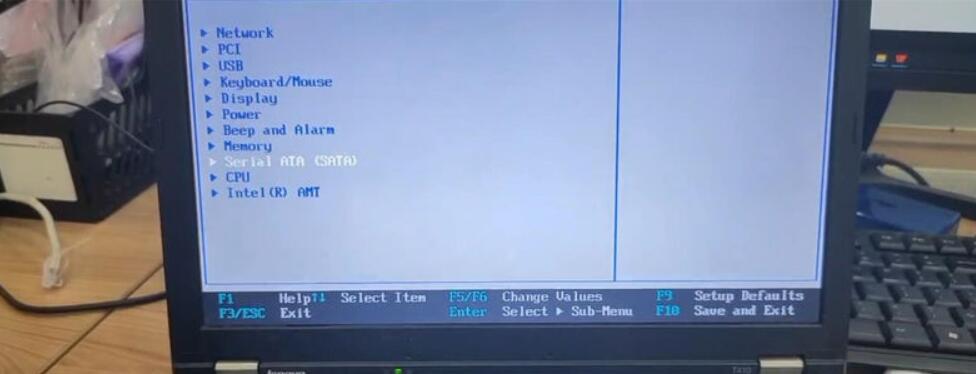
Step2. Continue >> Config >> Serial ATA(SATA) >> SATA Controller Mode Option: AHCI >> Change value to AHCI

Reason 2
GM MDI GDS Tech2 Used for pass-through programming and uses J2534 to provide faster programming speed. Depending on the vehicle’s structure, MDI’s communication speed is 20% to 70% faster than Tech 2.
Solution Program
But The compatibility of this GM MDI HDD is not very strong, so it may cause blue screen error when booting.
Please use the computer with the following requirements:
1.CPU: Intel
2.The computer should not be too old.Configuration Computer system requirements is best : 4GB RAM after 2008.
3 Please make sure your computer supports Win7 64-bit system.
4.The second hand D630 cannot be used with this HDD.
5 The computer format: AHCI :If the computer fails to boot, please enter the BOIS system and change the SATA driver to AHCI. Package includes: 1 x 500GBGM MDI 22.5-inch SATA HDD.
How to install Tech2Win on Windows 7 or XP:
1. Run Tech2Win \ AutoInstall.exe and everything will be done.
2. Install VX Manager.
3. Open VX Manager and install the GM driver.
How to installGDS 2with VMWare:
1. Install VMware-player-6.0.6-2700073.exe
2. copy GDS2 VM to harddisk.
3. open GDS2 VM with VMware Playe
If you want to know more aboutGM Scanner, please visithttps://www.obd2tool.com
Posted by: Emily white at
01:50 PM
| No Comments
| Add Comment
Post contains 365 words, total size 7 kb.
32 queries taking 0.0455 seconds, 162 records returned.
Powered by Minx 1.1.6c-pink.

