


June 30, 2019
Important Notice. Installation and activation are possible only with remote assistance using Teamviewer.
You are buying John Deere Service Advisor v5.2 for Construction and Forestry equipment online on USB HDD with international delivery or easy digital download! If you want to download the program. The download link along with PDF instruction file emailed to your email address within 2 hours (up to 12 hours in a weekend) of your purchase. If you would like the same software shipped to you on a USB HDD please select appropriate delivery method during checkout.
The John Deere Service Advisor combines several versions of the program. As well as a number of related programs and diagnostic equipment
For Agriculture division please check theHeavy Duty Scanner John Deere Service Advisor 5.2 2018 Agriculture Equipment Division product link
Before you proceed, please check the product requirements below.
John Deere Service Advisor 5.2 System requirements:
– O.S.: Windows 7 Pro/Ultimate; Windows 8 Pro, Windows 8.1 Pro, Windows 10 Pro/Home
– CPU: Any CPU for Windows platform
– RAM: 8 GB of system memory (Recommended), 4 GB is the Minimum required amount.
– Hard Drive: 150 GB of available space + ~110 Gb for the setup files if you want to Download the software.
JD Service Advisor v5.2 support only Genuine JD EDL V3/V2 DLA Adapter kit (The previous version V2 USB and BT is also supported). If you’re using any other diagnostics tool we do not make any warranties
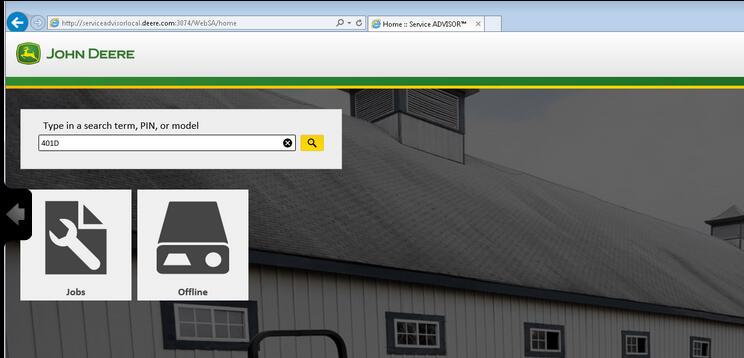
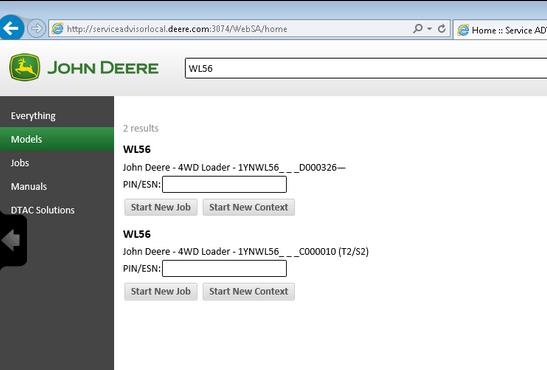
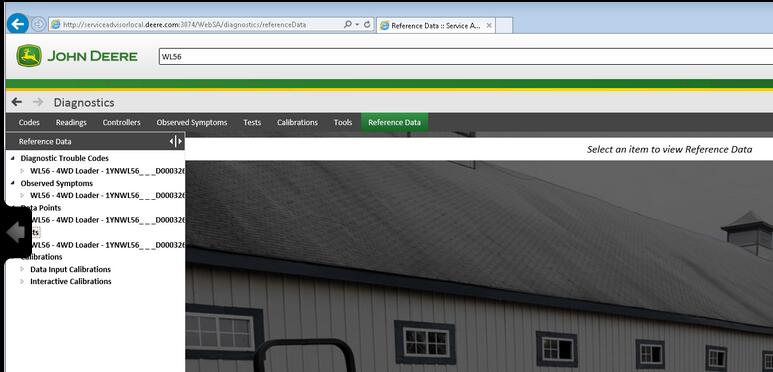
The new version of Service Advisor comes as a complete solution for those who do a repair, diagnostics, and maintenance of all John Deere construction and forestry equipment. It’s completely different from its previous version 4.2. JD Service Advisor functions are available from Internet Explorer Web browser. At this moment this is only one officially supported browser version. To start work with any model, you need to enter the model name or its PIN.
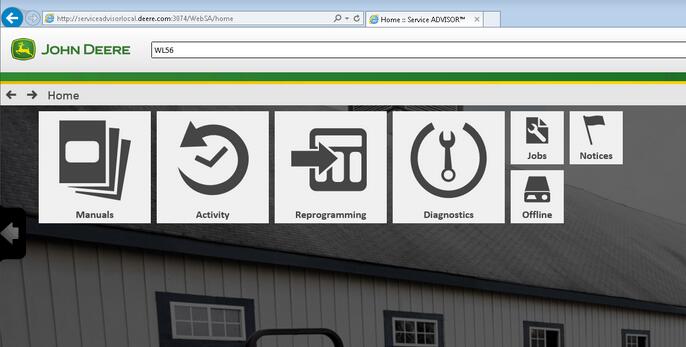
Available program futures divided into a few main sections: – Manuals – Reprogramming – Diagnostics
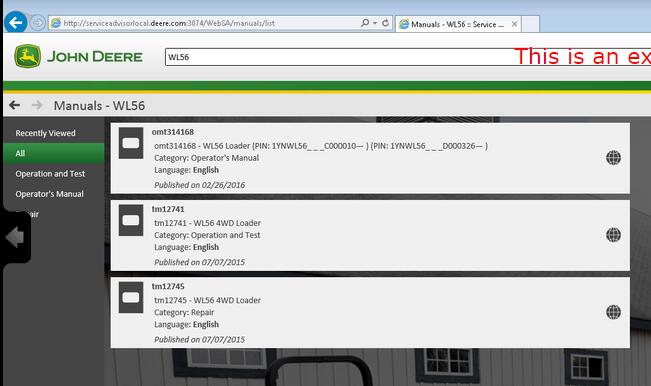
Manuals Section. First of all, most of the manuals now have a more convenient web interface and you can read/print all you want using Internet Explorer. A part of the manual is still available as pdf files only. So you need Adobe Reader installed.
Reprogramming section requires dealer credentials to access the payload database. At this moment this future is not available.
Diagnostics section. The avaiable menus are
– Codes – Readings – Controllers – Observed Symptoms – Tests – Calibrations
John Deere Service Advisor 5.2 covers:
Hint: Click show all
4WD Loader
ADT
AG
Apollo Series
Axles
Backhoe
Boom Harvester
CF Management Solutions
Communication
Compact Excavator
Compact Loader
Crawler
Excavators
Feller Buncher
Felling Head
Forestry Swing Machine
Forwarder Wheeled
Harvester
Harvester Head
Landscape Loader
Log Loader
Logger
Mate. Hand Cut. and Shredders
Measuring System
Motor Grader
OEM Engines
OEM Winch
Other
PTO
Planetary Drive
Pump Drive
Scraper
Skid Steer
Skidder
Slasher
Software
Telematics
Tractor Loader
Tractors
Transmission
Truck
Utility Vehicles
Winch
Worksite Pro Attachment
Models on History DVDs:
Hint: Click show all
4WD Loader
Backhoe
Compact Excavator
Compact Loader
Compactor
Crawler
Excavators
Feller Buncher
Forklift
Forwarder Wheeled
Harvester
Harvester Head
Log Loader
Logger
Motor Grader
Scraper
Skidder
Tractors
Tree Harvester
Truck

Posted by: Emily white at
03:32 AM
| No Comments
| Add Comment
Post contains 543 words, total size 6 kb.
June 28, 2019
I bought my Tech 2 from obd2tool.com and it works great. Cannot really compare software with a Tech2 as that
is comparing hardware to a program. That being said, there is a
software side of things that work alongside the Tech2 which is the
TIS2000 software. Getting that working is a bit of a project in and of
itself as the software is old and seems to work best on Windows XP. The
TIS2000software is really not needed to use the Tech2 though – that is
needed if you want to update the firmware in the various modules in your
vehicle like the ECU, BCM, DDM, etc.
Simply put though. There is no other tool that can do everything on your
H2 that the Tech2 can do. It is the only tool with things that are very
specific like calibrating the rear air suspension module. Other tools
can be very powerful but that are mostly just have features that are
common to many vehicles and will not have things that are specific to
just one or two vehicles.
cannot speak for any on Aliexpress. I’ve seen both good and bad reviews on the ones from there. Also the link you gave just takes me to the Aliexpress home page. Regardless it would not matter as again, I have no way of knowing if one from some seller on there will be a good one or not.
It is also worth spending the extra to get the case which does cost a good bit more. These come with a lot of different adapters and parts and the case makes it very nice and easy to keep it all together.
This is the kit that I ordered. It also includes the Candi module which is needed for many newer model GM vehicles.
loading..
Posted by: Emily white at
11:30 AM
| No Comments
| Add Comment
Post contains 311 words, total size 2 kb.
June 20, 2019
A brand new version of John Deere Service Advisor 5.2 for AG equipment is an offline application, that use Internet Explorer browser to communicate with the user.
JOHN DEERE SERVICE ADVISOR AG 5.2 SPANISH (ESPA?OL) 02/2018 version is also available. Please indicate the preferred language in the comment field during the checkout process.
Important Notice. Installation and activation are possible only with remote assistance using Teamviewer.
Unlike the previous version (John Deere Service Advisor 4.2) to work with the application you need:
Internet Explorer 11 (The shell)
Last version of Adobe PDF reader (you will be asked to download the last version before the installation process begin)
Last version of Java runtime environment (you will be asked to download the last version before the installation process begin)
John Deere Service Advisor 5.2 System requirements:
– O.S.: Windows 7 Pro/Ultimate; Windows 8 Pro, Windows 8.1 Pro, Windows 10 Home/Pro
– CPU: Any CPU for Windows platform
– RAM: 8 GB of system memory
– Hard Drive: 150 GB of available space
JD Service Advisor v5.2 support only Genuine JD EDL V3 DLA Adapter kit (The previous version V2 USB and BT is also supported). If you’re using any other diagnostics tool we do not make any warranties
The represented version of SA 5.2 allows you:
to start the offline version with an active internet connection
The license lasts for 3 years instead of 3 months
Windows 10 is fully supported by EDL v2/v3 kit
Here is the list of the models included in Service Advisor 5.2 AG and Turf Equipment. If your model is not listed, please contact us, as some models might be missing in the product description.
TheHeavy Duty Truck Scanner John Deere Service Advisor combines several versions of the program. As well as a number of related programs and diagnostic equipment
BELLTruck
Articulated Dump
B35C
Frontier
Combines and Headers
Header Transports
HT1124
HT1128
HT1132
HT1138
HT1142
HT1224
HT1228
HT1232
HT1238
HT1242
HT1248
Platforms
620VS
622VS
625VS
630VS
SH1206
SH1208
SH1210
SH1212
SH1216
SH1306
SH1308
Wide-Row Cornhead PIN Prefix XF
CH2112
CH2208
Cotton Harvesting
Module Handler
CM1100
Cutting and Mowing
Flex-Wing Grooming Mower
Rear Discharge Rotary Mower
Rotary Cutters
Side Discharge Rotary Mower
Golf and Turf Products
Grinders
BG1000
BG1500
RG5000
RG5500
Hay and Forage
Bale Carrier
BC1104
BC1108
BC1110
Bale Mover Feeders
BU1060
Bale Spear
HS1001
HS1002
HS2001
HS2002
HS2003
HS2004
Bale Wrapper
LW1166
LW1266
Carted Wheel Rakes
WR0008
WR0010
WR0012
WR1008
WR1010
WR1012
WR1108
WR1112
WR1116
WR3008
WR3010
WR3012
WR3108
WR3110
WR3112
WR6008
WR6010
WR6012
Disc Mower Caddy
DC1000
Hay Merger
HM1109
HM1209
HM1212
Mowers
DM1130
DM1140
DM1150
DM1160
DM1270
DM5050
DM5060
DM5070
SB1106
SB1107
SB3106
SB3107
SB3108
Processor
BP1166
Pull-Type Wheel Rakes
WR1212
WR1214
WR1216
WR1218
WR1417
WR2010E
WR2012E
WR2014E
WR2110
WR2112
WR2114
WR2212
WR2214
WR2316
WR2318
WR3310
WR3312
WR3313
WR3315
WR3414
WR3416
WR3417
WR3419
WR4106
WR4109
WR4313
WR5417
Rotary Rake
RR1012E
RR2109
RR2211
RR2313
RR2324
Tedders
TD1010E
TD1123
TD1316
TD2418
TD2427
TD3418
TD3427
Hydraulic Power Pack
Hydraulic Power Pack
HP2025
HP2134
Landscaping
Aerator
CA1048
CA1060
CA1072
CA2048E
CA2060
CA2060E
CA2072
CA2072E
Arena Rake
RA1084
RA1108
RA1110
Blade
BB1048
BB1048L
BB1060
BB1065
BB1072
BB1160
BB1165
BB1172
BB1184
BB1284
BB1354
BB1360
BB1365
BB1372
BB1472
BB1484
BB2048
BB2048L
BB2060
BB2065
BB2072
BB2172
BB2184
BB2272
BB2284
BB3272
BB3284
BB3296
BB3384
BB4160
BB4166
BB4172
BB4178
BB4184
BB4196
BB4278
BB4278C
BB4284
BB4296
BB5048L
BB5060
BB5060L
BB5072
BB5084
BB5096
Blower
BL1130
BL2130
Chipper_Shredder
WC1103
WC1105
WC1205
WC1208
Land Plane
LP1048
LP1060
LP1160
LP1172
LP1184
LP1184C
LP1196
LP1196C
LP1207
LP1208
LP1210
Landscape Rake
LR1060L
LR1072
LR1172
LR1184
LR1196
LR2060L
LR2072
LR2084
LR2172
LR2184
LR2196
LR5048L
LR5060
LR5060L
LR5072
LR5084
LR5096
Post Hole Auger
PHA006
PHA009
PHA012
PHA106
PHA109
PHA112
PHA118
PHA124
Post Hole Digger
PHD100
PHD200
PHD300
PHD400
Power Rake
PR1148
PR1160
PR1172
PR1184
PR1184F
ROTARY BROOM
SW2160
SW2172
SW2184
Rear Mounted Blades
RB1060
RB1060L
RB1072
RB1084
RB1172
RB1184
RB1196
RB2060
RB2060L
RB2072
RB2084
RB2160
RB2160H
RB2172
RB2172H
RB2184
RB2184H
RB2196
RB2196H
RB2272
RB2284
RB2296
RB2307
RB2307C
RB2308
RB2308C
RB2309
RB2309C
RB2310
RB2310C
RB2408
RB2408C
RB2409
RB2409C
RB2410
RB2410C
RB5048L
RB5060
RB5060L
RB5072
RB5084
RB5096
Rotary Tiller
RT1060E
RT1070E
RT1080E
RT1140
RT1142
RT1149
RT1150
RT1157
RT1160
RT1165
RT1170
RT1173
RT1180
RT1181
RT1207
RT1208
RT1240
RT1250
RT1260
RT1265
RT1270
RT1273
RT1280
RT1280C
RT1307
RT1307R
RT1308
RT1308R
RT1310
RT1310R
RT1360
RT1370
RT1370R
RT1380
RT1380R
RT2210
RT2283
RT2293
RT2308
RT2310
RT2383
Scrapers
LL1117
LL1160
LL1172
LL1208
LL1210
LL1212
LL1227
LL1327
LL1372
LL1372C
LL1384
LL1384C
LL1396
LL1396C
LL2317
LL2327
LL4137
LL4237
LL4337
LL5237
LL5337
LL9247
LL9347
Soil Pulverizor
SP1048
SP1060
SP1272
SP1272B
SP1284
SP1284B
SP2048B
SP2060B
SP2072B
SP2272B
SP2284B
Spreader
SS1022B
SS1023B
SS1035B
SS1036B
SS1067B
SS1079P
SS1116P
SS1180P
SS1220P
SS2036B
SS2067B
SS3067B
Trencher
DT1136
seeders
TR1048
TR1060
TR1072
TR2058
Mate. Hand Cut. and Shredders
Attachment
MJ4058
MJ4084
MJ4085
MJ4090
MJ4091
QC1072
Bale Carrier
AB17K
Bale Hugger
AH11A
AH11D
AH11G
MJ4099
Bale Spear
AB11D
AB11E
AB11G
AB12A
AB12D
AB12E
AB12G
AB13D
AB13E
AB13G
AB13K
AB14A
AB14D
AB14G
AB14K
AB15A
AB15K
AB16A
AB16D
AB16G
AB18K
BF1102S
MJ4037
MJ4060A
MJ4074
MJ4081
Bucket
AD11E
AD11H
AD12D
AD12G
AT2016G
AT2016U
AY11E
AY11H
AY12D
AY12G
MJ4059A
MJ4061A
MJ4062
MJ4063A
MJ4079A
MJ4118
Free Stall Scraper
AE11E
Front Blade
AF10F
AF11D
AF11E
AF11G
AF12D
AF12G
Grapple
AT1096G
AV20D
AV20E
AV20G
AV20H
BG1096
Grinder Mixers
GX1117
Manure Fork & Grapple
AM11D
AM11E
AM11G
AM11H
MJ4076
MJ4077
Pallet Fork
AP12A
AP12D
AP12F
AP12G
AP12K
AP13D
AP13F
AP13G
AP13K
Rock Bucket
AR10D
AR10E
AR10G
AR10H
AR12A
AR12D
AR12G
Roller
CR1448
CR1448C
CR1460
CR1460C
Scrapers
LL1410
LL1410C
LL1412
LL1412C
LL1414
LL1414C
LL1416
LL1416C
Silage Defacer
AG10A
AG10D
AG10G
AG11S
AG12S
SD1096
Snow Push
AS10H
AS11E
Spreader
MS1102G
MS1105G
MS1108
MS1108G
MS1112
MS1117
MS1223
MS1227
MS1231
MS1237
MS1243
MS1256
MS1266
MS1337
MS1354
MS1368
MS1442
MS1455
MS2320
MS2326
MS2334
MS2342
Planting and Seeding
Drills
BD1307
seeders
CS1360
CS1384
FP1204
FP1204P
FP1206
FP1208
FP2204
FP2204L
FP2204P
FP2206
FP2208
Snow Products
Snowblowers Loader Mounted
SB2164
SB2176
Snowblowers Rear Mounted
SB1148
SB1154
SB1164
SB1174
SB1184
SB1194
SB1274
SB1280
SB1308
SB1308R
SB1309R
SB1388
SB1388R
SB1392
SB1392R
Sprayers
Fertilizer Spreader
FS1124
FS1128
Orchard & Vineyard Sprayers
AB1010
AB1015
AB1020
AB1110
AB1115
AB1120
AB1130
AB1210
AB1215
AB1220
AB1230
AB2020
AB2030
AB2120
AB2130
AB2220
AB2230
AB5010
AB5015
AB5020
AB5110
AB5115
AB5120
AB5210
AB5215
AB5220
AB7020
AB7030
AB7120
AB7130
CN4106
CN4108
CN4110
MB3110
MB3115
MB3120
MB3210
MB3215
MB3220
MB6010
MB6015
MB6020
MB6110
MB6115
MB6120
MB6210
MB6215
MB6220
ab5130
ab5230
Sprayer
LS1125
LS1130
LS1130BL
LS1140
Tillage
Cultivator
PC1001
Disks
DH1048
DH1066
DH1166
DH1176
DH1180
DH1276
DH1280
DH1296
DH1376
DH1380
DH1396
DH1508
DH1509
DH1510
DH1512
DH1610
DH1612
DH1613
DH1615
DH3263
DH3272
DH3280
DH3290
DH3299
DH3409
DH3409C
DH3474
DH3474C
DH3480
DH3480C
DH3490
DH3490C
DH3499
DH3499C
DH4108
DH4110
DH4112
DH4114
DH4115
DH4116
DH4117
DH4119
DH4119R
DH4121
DH4122
DH4125
DH4218
DH4221
DH4307
DH4309
DH4311
DH4315
DH4317
DH4320
DH4411
DH4413
DH4413C
DH4414
DH4414C
DH4415
DH4415C
DH4420
DH4420C
DH5108
DH5110
DH5112
DH5114
DH5116
DH5210
DH5212
DH5214
DH5216
DH5217
DH5219
DH5221
DH5221F
DH5222F
DH5224F
DH5308
DH5310
DH5312
DH5314
DH5316
DH5410
DH5410C
DH5411
DH5411C
DH5412
DH5412C
DH5413
DH5413C
DH5414
DH5414C
DH5510
DH5510C
DH5511
DH5511C
DH5513
DH5513C
DH5514
DH5514C
DH5610
DH5610C
DH5612
DH5612C
DH5613
DH5613C
DH5615
DH5615C
TM4124
TM4125
TM4130
TM5118
TM5120
TM5121
TM5124
TM5129
TM5132
Field Cultivators
PC1072
Mulch Finishers
MF1204
MF1204P
MF1206
MF1208
MF2204
MF2206
MF2208
Plows
CP1104
CP1106
PB1001
PB1002
Rippers
PM1001
PS1001
Rotary Tiller
RC1208
RC1208R
RC1210
RC1210R
RC1310
RC1310R
RC1313
RC1313R
Vertical Tillage
Disk
VT1710
VT1712
VT1713
VT1715
GreenSystem
Field and Crop Solutions
Moldboard Plows
MB3102H
mb3103H
Harvester
Row-Crop Harvesting Units
PH1101B
PH1101T
PH1102T
Harvester Head
Attachment
CK5018
CK5024
CK7024
Corn Heads
MH1006
Mate. Hand Cut. and Shredders
Attachment
BH1112G
Flail Shredders
SS1001
Front Blade
AF2196G
FB1018
FB1021
FB1024
FB1121
fb1016
Pallet Fork
AP2142G
Wagons
FT1006
FT1010
TT1005
TT1006
tt1003
Planting and Seeding
Drills
RS1220
SD1009
SD1009G
SD1011
SD1011G
SD1013
SD1013G
Planters
PP1102
VP1014
seeders
DC1102
Sprayers
Fertilizer Spreader
FS1003B
FS1005B
Mounted Sprayers
MS1004
MS1006
MS2104
MS2106
MS2108
MS2110
Trailed Sprayers
DS1120
Sugar Cane Planter
PIN Prefix 1XG
SP3030
SP3040
SP3130
SP3140
Tillage
Cultivator
RC1009
RC1011
RC1013
RC1209
RC1211
RC1213
SC1009
SC1011
SC1013
SC1209
SC1211
SC1213
Disc Ridger
DR1002
DR1004
Disk
DH6016
DH6022
Disk Plows
DP1002
DP1003
DP1004
DP3203
DP4205
DP4206
DP5203
DP5204
DP5303
DP5304
DP5403
DP5404
DP5503
DP5504
dh4105
dh4106
Disks
DH7105
DH7106
DH7205
DH7206
DH7207
DH7305
DH7406
DH7407
DH7508
Moldboard Plows
MB2002H
RP1105
Rippers
TS1001
TS1002
Rotary Tiller
RT1004
RT1005
RT1006
RT1007
RT1014
RT1015
RT1016
RT1017
RT1024
RT1025
RT1026
RT1027
RT1028
RT1204
RT1205
RT1206
RT1207
RT1214
RT1215
RT1216
RT1225
RT1226
RT1227
RT1228
RT1229
RT2225
RT2225R
RT2330
RT3016
RT3018
RT3220
RT3223
RT4019
RT5224
RT5225
RT5226
RT6220C
RT6220R
RT6323C
RT6323R
rt6220S
Row-Crop Cultivators
CR2220
CR2222
CR2231
CR2232
CR2240
CR2251
CR2260
CR2280
HITACHI
Compact Excavator
HCMABC60__0225005
Zaxis17u-5N
HCMACB60__0260005
Zaxis26u-5N
HCMADG60P00270001 – (FT4)
Zaxis35u-5N
HCMAED60L00280001 – (FT4)
Zaxis50u-5N
HCMAFC60T00285001 – (FT4)
Zaxis60USB-5N
None
EX17u
EX27u
EX35u
EX50u
Zaxis17u-2
Zaxis27u
Zaxis27u-2
Zaxis27u-3
Zaxis35u
Zaxis35u-2
Zaxis35u-3
Zaxis50u
Zaxis50u-2
Zaxis50u-3
Zaxis60USB-3
Hagie
Attachment
Attachment
Boom
CCI
DTB
HSTB
NTB
Detasseler
Detasseler
204
Sprayers
None
284
Self-Propelled Sprayers
2101
284XP
DTS 10
DTS 8
Hagie Custom
STS 10
STS 12
STS 12i
STS 14
STS 16
John Deere
4WD Loader
1YNWL53_ _ _D100008в?â€
WL53
1YNWL56_ _ _C000010в?â€
WL56
1YNWL56_ _ _D000326в?â€
WL56
AG
ISOBUS
ISOBUS Implement
None
F441R
AG and CCE
Large Square Balers
L1524
Apollo Series
None
Transaxle
Attachment
Feed Mixers
110
110A
114A
Grapple
4048
4552
None
24
26
Tool Carrier
201
23A
23B
Axles
None
AR15MTL
TM 2
1200
1400
1600
TM 3
1200
1400
TM 4
1200
1400
TM 5
1400
1500
1600
1700
Backhoe
Loader
JD300-A
JD310
JD400-A
JD410
None
50
51
9505A
9510A
9511
9605
Boom
Wheeled
CH8
Com Attachments
Corn Heads PIN prefix KM
608FC
Combines and Headers
Attachments
10
205
210
234
235
244
313
334
335
343
410
434
435
634
K
N
Auger Platforms
890
Combines
1032
105
1052
1055
106
1065
1068H
1072
1075
1085
111
1133
1144
1155
1157
1158
1165
1166
1169H
1170
1174
1175
1177
1185
1188
12A
1450
1550
200
2054
2056
2058
2064
2066
2254
2256
2258
2264
2266
2266EXTRA
25
277
30
330
3300
360
40
42
430
44
4400
4420
4425
4435
45
483
530
55
583
630
65
6600
6601
6602
6620
6622
683
730
7700
7701
7720
7721
7722
8820
925
930
932
935
940
9400
9410
945
95
950
9500
9500SH
9510
952
955
9560
9560SH
95H
96
960
9600
9610
965
965H
9660
9660CTS
9660WTS
968H
970
975
9780iCTS
985
9880STS
9880iSTS
C670
CTS
CTS II
CTS Region II
S560
T550
T560
T660
T670
W540
W550
W650
W660
Combines 072800 – XXXXXX
9780CTS
Combines 1H0 745100-764999
S550
S650
S685
S690 Hillmaster
Combines 1H0 765000 – 784999
S650
Combines 1H0 785000 – XXXXXX
S650
S660
S670
S680
S690
Combines 1H0S660 745100 -765171
S660
Combines 1H0S660 765172 в?" 784999
S660
Combines 1H0S670 745100 в?" 765252
S670
Combines 1H0S670 765253 в?" 784999
S670
Combines 1H0S680 745100 в?" 766006
S680
Combines 1H0S680 766007 в?" 784999
S680
Combines 1H0S690 745100 в?" 765249
S690
Combines 1H0S690 765250 в?" 784999
S690
Combines 1JZ 105000 – 109999
S660
S670
W540
W650
Combines 1JZ 745100-XXXXXX
S550
S660
S670
S680
S690
Combines 1YC 785000 – XXXXXX
S660
Combines 1YH 745100-764999
S550
S660
S670
S680
S690
Combines 1YH 765000 – 784999
S660
Combines 1Z0 100000 – 104999
S660
S670
S680
S685
S690
Combines 1Z0 102000 – XXXXXX
T550
T560
T660
T670
W540
W550
W650
W660
Combines 1Z0 105000 – 109999
S660
S670
S680
S685
S690
T550
T560
T660
T670
W540
W550
W650
W660
Combines 695101 – XXXXXX
9450
9550
9550SH
9650
9650CTS
Combines H0 or 1H0 XXXXXX-745099
S690
S690 Hillmaster
Combines MY12 and 13 Wide Cab PIN Prefix 1Z0
T550
T560
T660
T670
W540
W550
W650
W660
Combines MY14 PIN Prefix 1JZ
S660
S670
Combines MY14 PIN Prefix 1Z0
S660
S670
S680
S685
S690
Combines MY14 Wide Cab PIN Prefix 1Z0
T550
T560
T660
T670
W540
W550
W650
W660
Combines PIN Prefix 1CQ – Brazil
1175
9470STS
9570STS
9650STS
9670STS
9750STS
9770STS
S430
S440
S540
S550
S660
S670
S680
Combines PIN Prefix 1CQ 120100 – XXXXXX
S540
S550
S660
S670
S680
S690
Combines PIN Prefix 1CQ 90000-XXXXXX
1470
S540
S550
S660
S670
S680
S690
Combines PIN Prefix 1J0
S540
S550
S660
S670
S680
Combines PIN Prefix 1XG
W330
W440
Combines PIN Prefix 1YC 015000 – XXXXXX
C240
R230
W230
Combines PIN Prefix 1YC 020000 в?" XXXXXX
C440
Combines PIN Prefix 1YC 020000-099999
C120
Combines PIN Prefix 1YC в?" 000001 в?" 009999
1042
3316
C110
C230
L70
W210
Y215
Combines PIN Prefix 1YC в?" 010000 в?" XXXXXX
C100
C230
L60
W210
W80
Y110
Y115
Y210
Y215
Combines PIN Prefix CQ – Brazil
1175
1470
1570
1650CTS
9470STS
9570STS
9670STS
9770STS
S540
S690
Combines PIN Prefix CQ – Brazil – 047354 – 48750
1450
1450CWS
1550
1550CWS
Combines PIN Prefix CQ – Brazil – XXXXXX – 047353
1450
1450CWS
1550
1550CWS
Combines PIN Prefix CQ – Brazil – XXXXXX – 48750
1450WTS
1550WTS
Combines PIN Prefix H0 – 695101 – XXXXXX
9650STS
9750STS
Combines PIN Prefix H0 – North American
9560STS
9570STS
9660STS
9670STS
9760STS
9770STS
9860STS
9870STS
Combines PIN Prefix H0 – XXXXXX – 695100
9650STS
9750STS
Combines PIN Prefix MY – India
W70
Combines PIN Prefix N4
R40-STC
Combines PIN Prefix Z0 – European
9540
9540i
9560
9560i
9580
9580i
9640
9640i
9660
9660i
9680
Combines Pin Prefix 1JZ
W330
W540
Combines Pin Prefix 1MY
Posted by: Emily white at
09:47 AM
| No Comments
| Add Comment
Post contains 2196 words, total size 25 kb.
June 17, 2019
General Notice
The Bluetooth Diagnostic Interface has been carefully designed and tested to comply with OBDII protocols. However, some vehicle models are not in full compliance with these protocols for various reasons. In addition, the computer control systems or sensors on any given vehicle may be malfunctioning. While Autel’s testing and the experiences of the users have shown the unit to be safe and reliable, there is an inherent risk in using any product that may potentially affect the operation or drive-ability of your vehicle.
If you are concerned about the operation of your vehicle at any time while using the Bluetooth Diagnostic Interface: ? Pull off the roadway immediately or as soon as it is safe to do so. ? Disconnect the device from the OBDII port. ? Consult a licensed mechanic or automobile service center. Contact your local distributor, or visit www.auteltech.com for issues or concerns about the product. We maintain an active database of the feedback we receive, and your comments can help us continuously improve the product.
Introduction
The Bluetooth Diagnostic Interface is a multi-brand device which comes with the Autel Maxisys kit. It is designed to connect wirelessly with the MaxiSys Display Tablet, as well as standalone PCs, as a vehicle communication interface (VCI) for vehicle data transmission. Thanks to the wireless Bluetooth technology, with which you are allowed to work freely around the vehicle. This interface device can communicate with vehicles’ electronic control units (ECUs), guaranteeing performance and speed that redefine multi-brand diagnostics. The development of this interface has been focused on reducing the communication time, and ensuring the tool is practical to use.
Autel Bluetooth
The MaxiSys diagnostic platform combines the VCI device and the display tablet with technical information into a single program, ensuring quick and simple access to the vehicle to perform comprehensive diagnostics applications.
Wireless Communication
The Bluetooth Diagnostic Interface supports Bluetooth communication. It can transmit vehicle data to the MaxiSys Display Tablet without a physical connection. The working range of the transmitter through Bluetooth communication is about 755 feet (about 230 m). A signal lost due to moving out of range automatically restores itself when the display unit is brought closer to the VCI unit. For detailed information about VCI connection with the MaxiSys display tablet, please refer to the MaxiSys User Manual.
USB Connectivity
The VCI device also provides a direct connection to the MaxiSys display tablet or a PC via a USB 2.0 full-speed connection. All of the electronics are contained in the device shell, making it a compact and rugged vehicle communication tool.
Power Source
The Bluetooth Diagnostic Interface operates on 12-volt vehicle power, which it receives through the vehicle data connection port. The unit powers on whenever it is connected to an OBD II/EOBD compliant data link connector (DLC). It can also be powered through connection with a PC via the USB cable, so there’s no need to connect the device to the vehicle when performing firmware update through the PC.
Functional Description
The Bluetooth Diagnostic Interface device package, which includes the unit, user manual, and a CD with driver program and update agent, comes along with the MaxiSysTM/MaxiSys MiniTM tool kit. Please refer to the MaxiSys User Manual for additional information.
1. Vehicle Data Connector (DB15-Pin)
2. Power LED
3. Vehicle LED
4. Error LED
5. Bluetooth LED
6. USB LED
7. USB Port
Vehicle Data Connector
The vehicle connector connects the device to the vehicle’s DLC via a standard DB15 – Pin OBD II cable.
Status LEDs
There are 5 status LEDs on the front panel of the VCI device, which indicates its working status as well as the hardware conditions, and are very useful for troubleshooting the device’s communication or connection to the Vehicle, display tablet and/or the PC. See Table 1 for detailed description of the status LEDs.
Table 1 – Status LEDs on the Front Panel
USB Port
The USB port provides the easiest connection between the device and the display tablet or the PC via a USB cable, and is used to control the device from the software application running on the PC.
Technical Specifications
Capabilities
When used in conjunction with the display table or the OEM softwares from the PC, the Bluetooth Diagnostic Interface device is able to perform the following functions: ? Auto diagnostics to read and clear the error memory, to display system parameters and the status of the ECU; ? Activation, adjustments and configurations that are essential for ensuring a complete repair; ? Resetting the service lights or the airbag systems; ? Configuration of the ECUs, keys and remote controls, etc
Product Troubleshooting
This part describes problems that you may encounter while using the VCI device.
Vehicle Linking Error
A communication error occurs if the interface device fails to communicate with the vehicle’s control module when performing diagnostic procedures. You need to do the following check-ups: ? Verify that the ignition is ON. ? Check if the interface device’s OBD II connector is securely connected to the vehicle’s DLC. ? Turn the ignition off and wait for about 10 seconds. Turn the ignition back to on and continue the operation. ? Verify the control module is not defective.
PC Communication Error
Verify the interface device is powered, and the green power LED is illuminated. ? Check if there is any firewall software interfering with the connection port. ? Check if the green status light is illuminated for USB communication. If these issues have been addressed, verified, and you are still having trouble, please contact technical supports for assistance. Refer to the MaxiSys User Manual for additional information.
Driver Setup
In order for the Bluetooth Diagnostic Interface device to operate correctly with the diagnostic applications on the PC, you will need to first install the device’s driver onto the PC that controls the device. The program package requires Windows XP, Windows Vista (32 or 64 bit), or Windows 7 (32 or 64 bit).
IMPORTANT: Do not plug the interface device onto the PC until you have installed the driver program.
The following steps may vary depending on the operating system or components that are installed on your computer, but in general this is the standard installation process. 1 Insert the CD that came with the MaxiSys tool kit into the CD/DVD slot of the PC. The driver installation wizard will load momentarily. Follow the Setup Wizard instructions to complete the whole installation process.
2 Click on "Next†on the welcome page.
3 Select "Next†on the installation location and installation name. It is recommended not to change the default settings; otherwise the computer may have a hard time recognizing the driver.
4 Click on "Install†and the driver program will be installed onto your PC. NOTE: During this part of the process a MS-DOS style window will pop up and may remain on your screen for a short while, which is perfectly normal. Do not attempt to close the MS-DOS style window manually as this will prevent the device driver being installed successfully. It will close automatically when the device driver installation is complete.
5 When the driver is successfully installed, a confirm window will appear.
6 Click on "Finishâ€, and connect the interface device to the PC’s USB port.
8 Select "Install the software automatically (Recommended)â€, and click on "Nextâ€. After the progress bar finishes, click on "Finishâ€. Users have finished installing at this point and can run the software working with the interface device.
Firmware Update
Autel periodically releases updates to the device’s drivers. Updates are necessary to solve specific problems and to ensure the VCI device is working properly with the OEM software. If you are experiencing any problems during use, always make sure that you have the latest device software and drivers.
Update Online
This function allows you to update the driver software for the device through the PC. Make sure the PC is connected to the Internet before using this function.
1 Power up the interface device and connect to the PC via the USB cable.
2 Verify the Power and USB LEDs on the front panel are illuminated.
3 Click on "All Programs†from Windows Start Menu, find the "MaxiFlash
Bluetooth†entry under "Autelâ€, click on "UpGradeâ€, and wait for the
program interface to pop up.
Autel Maxisys Bluetooth
4 Select the "Update†tab and the update agent will automatically check for the available update online.
5 Press the "Next†button to install the newest firmware.
6 Press the "Cancel†button to exit.
Warranty and Service
Limited One Year Warranty
Autel warrants to its customers that this product will be free from all defects in materials and workmanship for a period of one (1) year from the date of the original purchase, subject to the following terms and conditions: 1) The sole responsibility of Autel under the Warranty is limited to either the repair or, at the option of Autel, replacement of the device at no charge with Proof of Purchase. 2) This warranty does not apply to damage due directly or indirectly, to misuse, abuse, negligence or accidents, repairs or alterations outside our Service Center or facilities, criminal activity, improper installation, normal wear and tear, or to lack of maintenance. 3) Autel shall not be liable for any incidental or consequential damages arising from the use, misuse, or mounting of the device. Some states do not allow limitations on how long an implied warranty lasts, so the above limitations may not apply to you. 4) All information in this manual is based on the latest information available at the time of publication and no warranty can be made for its accuracy or completeness. Autel reserves the right to make changes at any time without notice.
Service Information
If you have any questions, please contact your local distributor or visit our website at www.auteltech.com. If it becomes necessary to return the tool for repair, contact your local distributor for more information.
Posted by: Emily white at
01:07 AM
| No Comments
| Add Comment
Post contains 1658 words, total size 12 kb.
June 16, 2019
Renault (ESpace, Megane, Scenic, Talisman) key programming has solution now, that isobdstar dp plus + one OBD2 convertor of the packed P001 adapter. It can program keys for these Renault cars via OBD.
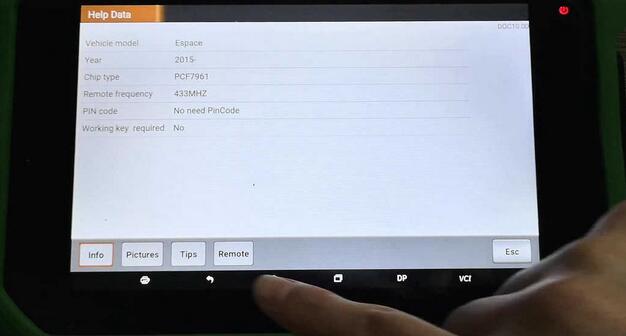
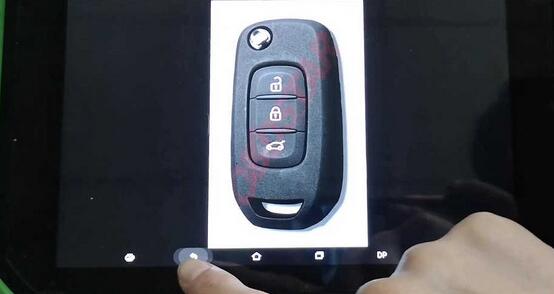
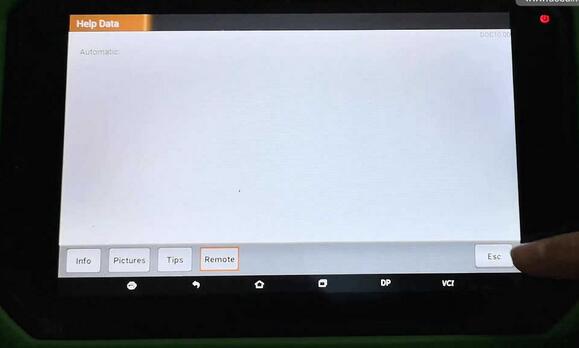
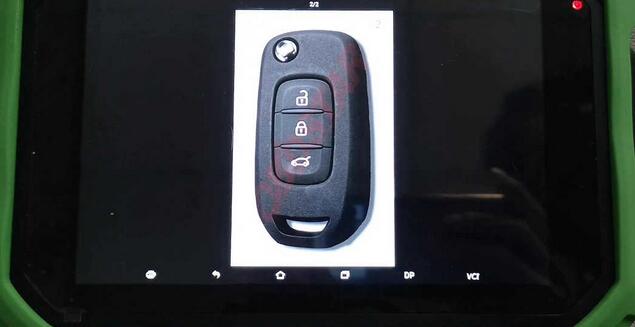
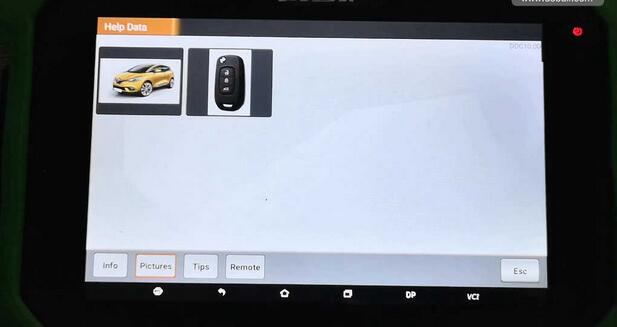
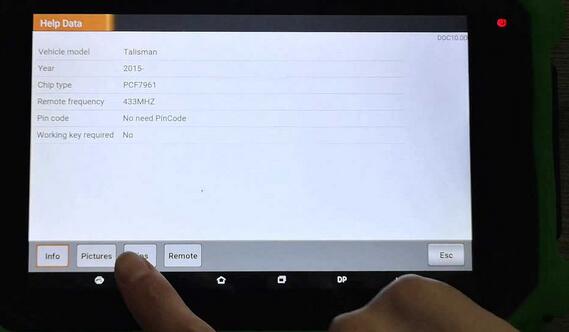
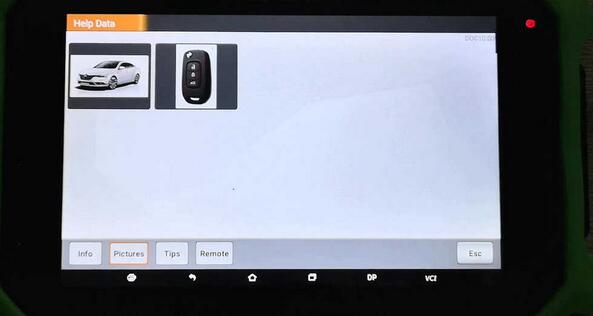
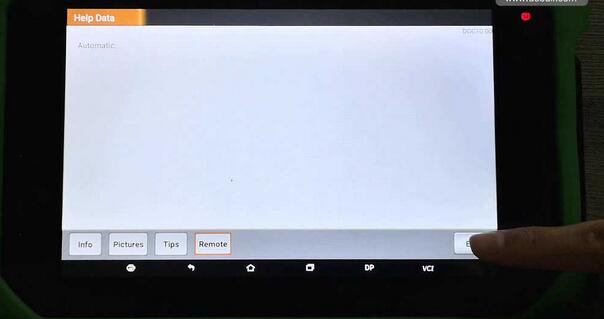
A nice feature is the DP plus system comes with key info, pictures, tips and remote etc which can help the user easily use the machine.
OBDSTAR DP plus Renault Coverage:
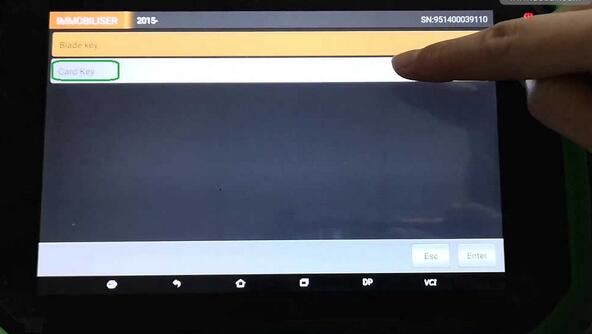
1.Renault ESpace
2015-
Blade key
Card Key
2002-2015
2 KEY
3 KEY
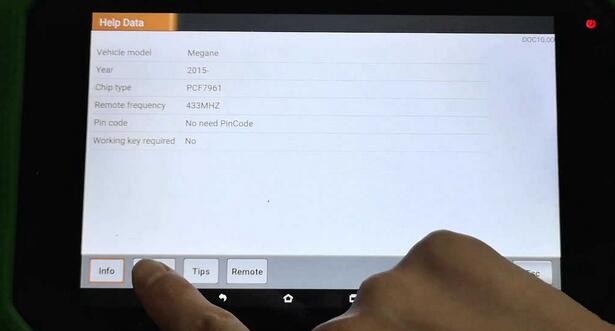
2.Renault Megane
2015-
Blade key
Card Key
2008-2015
2002-2008
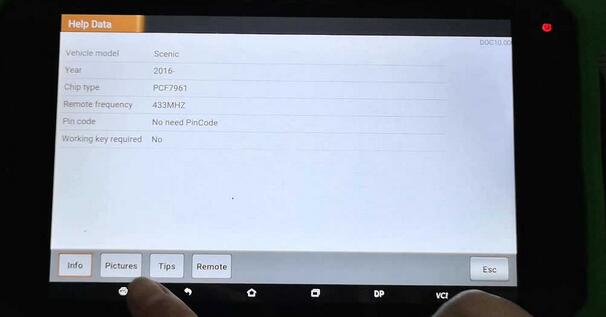
3.Renault SCENIC
2016-
Blade key
Card Key
-2016
4.Renault Talisman
2015-
Blade key
Card Key
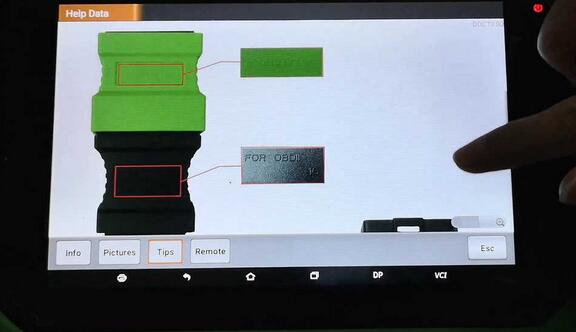
To be specific, you need:
1.One OBDSTAR X300 DP plus
2.One additional OBD2 convertor to connect P001 adapter.
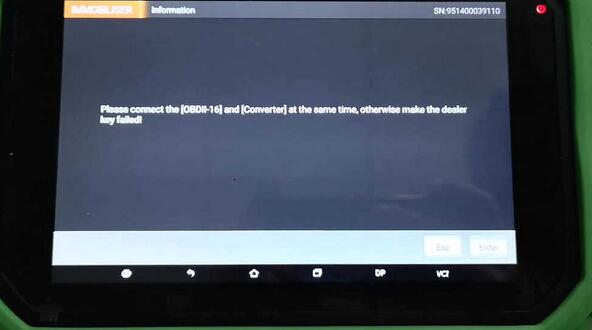
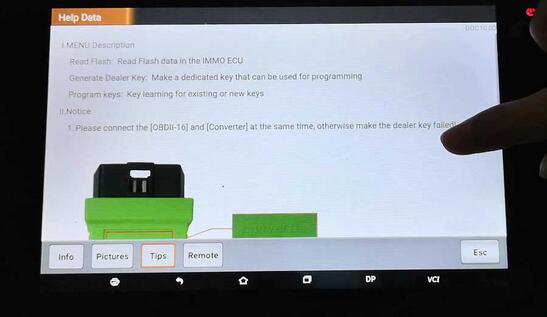
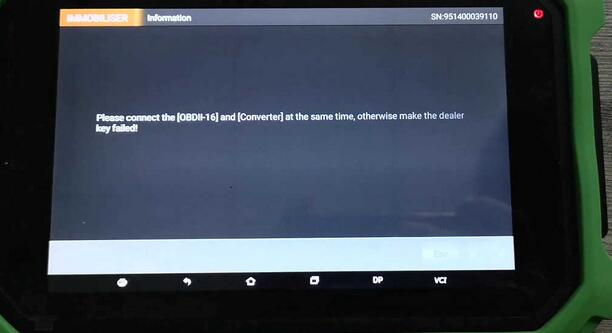
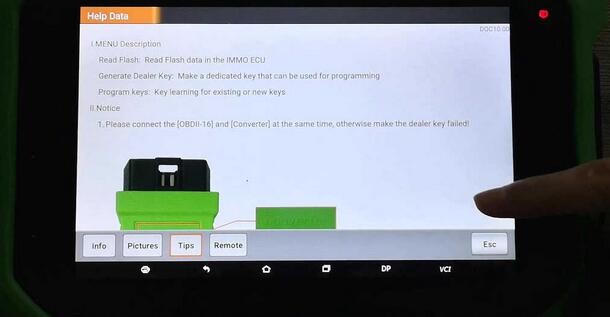
Tip: The machine will prompt "Please connect the [OBDII-16] and
[Convertor] at the same time, otherwise make the dealer key failed.â€

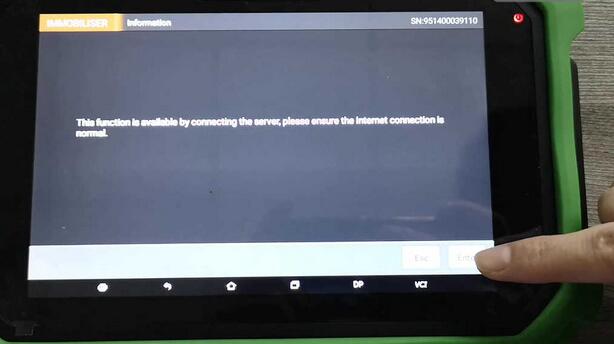
3.Network connection.
How-to’s of OBDSTAR DP PLus on Renault ESpace Megane Scenic Talisman key program:
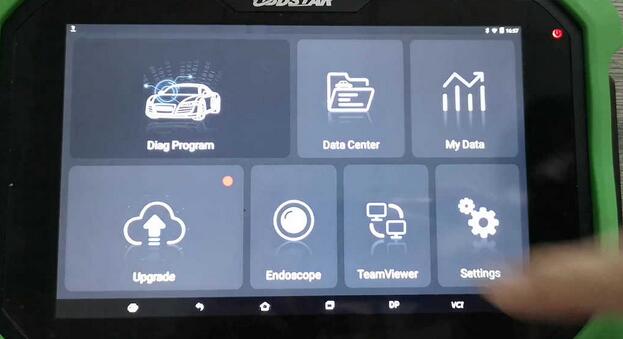
Tap "DPâ€.
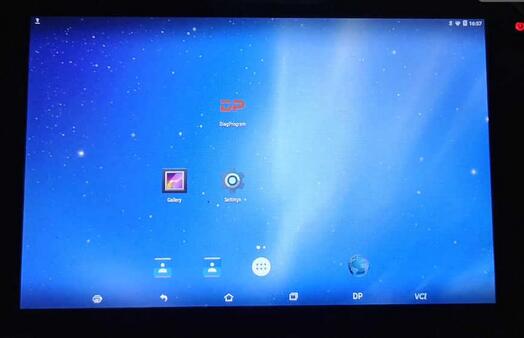
Choose "Diag Programâ€.
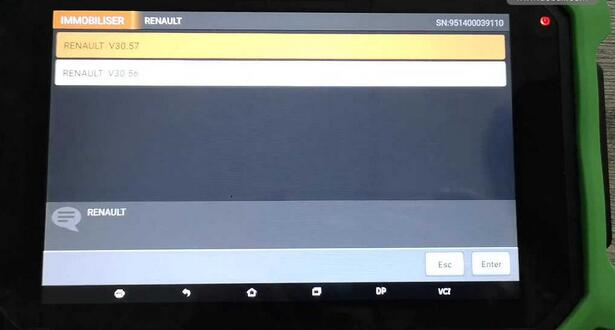
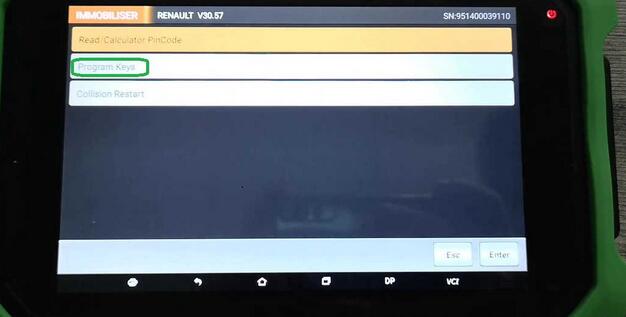
Renault V30.57
Tap "Programs keysâ€.
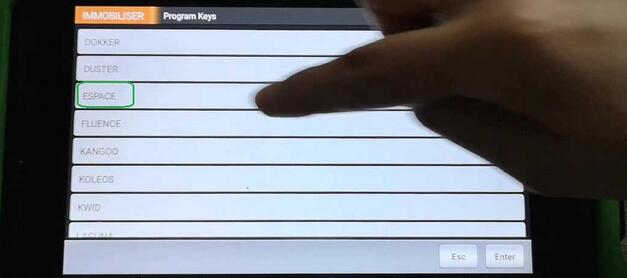
Tap "Espaceâ€.
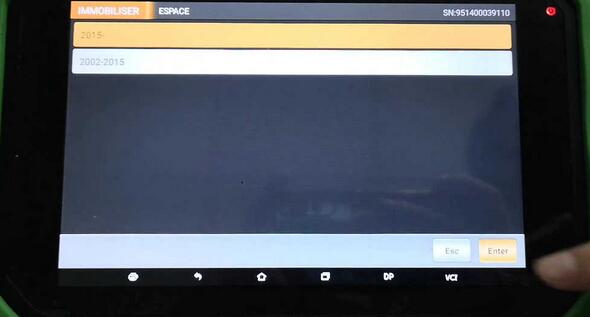
Tap "2015 -".
DP plus will prompt "Please connect the [OBDII-16] and [Convertor] at the same time, otherwise make the dealer key failed.â€
You see, obdstar DP plus allows the user to read Renault Espace 2015- info, pictures, tips and Remote.
Back to choose "Card key".
Again get message "Please connect the [OBDII-16] and [Convertor] at the same time, otherwise make the dealer key failed.â€
And then †The function is available by connecting the server, please ensure the internet connection is normal.â€
PS: For Renault Megane, Scenic, Talisman key programming, just do in the same method.
Here comes their info, pictures, tips, remote that the machine will have.
Renault Megane info, pictures, tips, remote.

Renault Scenic info, pictures, tips and remote.
Renault Talisman info, pictures, tips and remote.
Good luck.
Posted by: Emily white at
02:34 AM
| No Comments
| Add Comment
Post contains 304 words, total size 11 kb.
June 07, 2019
CGDI Prog MB is possible to program Mercedes Benz W164 2009-/W221 2009- in 2 ways: via OBD and on bench.
OBD mode takes about 2 hours.
Bench reading shorten the online calculation time to less than 4 minutes. (This requires CGDI MB AC adapter).
Here’s the how-to guide to program W221 all keys lost with MB Key Programmer CGDI MB on bench.
Step 1: Calculate Password
Open CGDI MB software
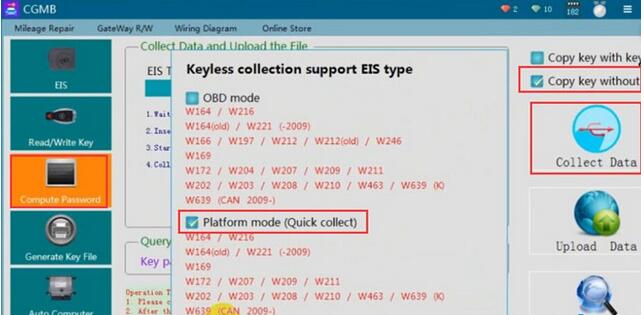
Go to Compute Password->Copy key without key->Collect data
Select collect data via Platform mode (quick collection)
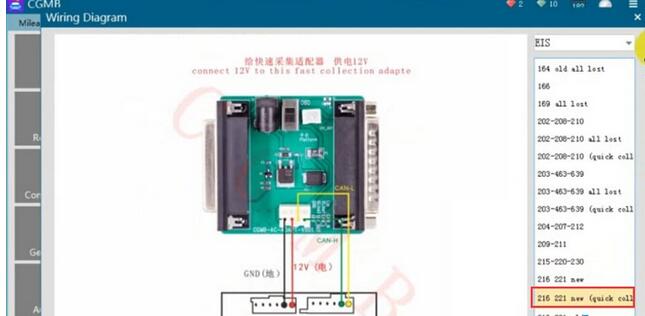
Connect the AC Adapter with cgdi follow the wiring diagram
Insert the simulation key within 1 minute, if you have inserted, pull it out and try again
Turn the quick collect adapter switch to the Platform position
Turn ignition switch to ON position
Collection is done.Very fast.
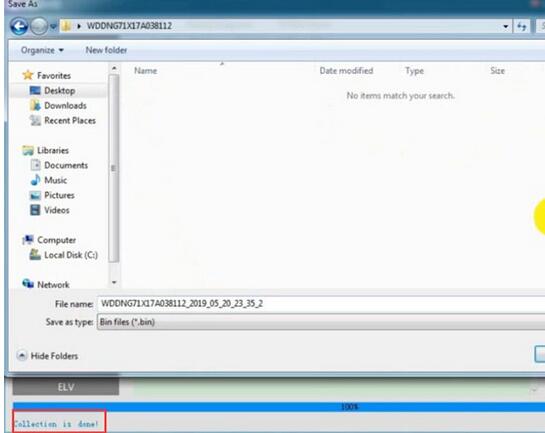
Save file.

Save the file successfully. Upload the data to calculate password.
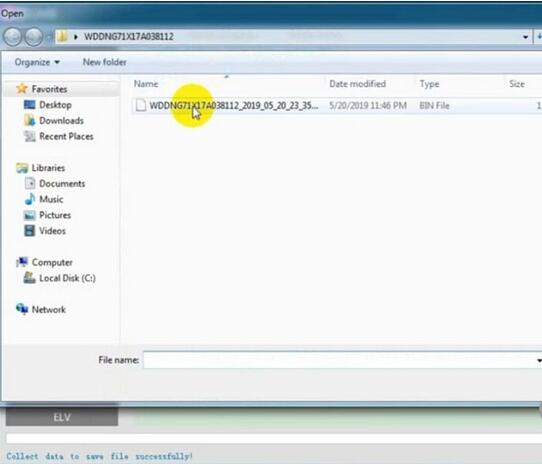
Upload data just saved
Press Query Result to calculate pass

CGDI MB calculates password success.
Copy the password
Step 2: Save new EIS data
Go to EIS->Read EIS data
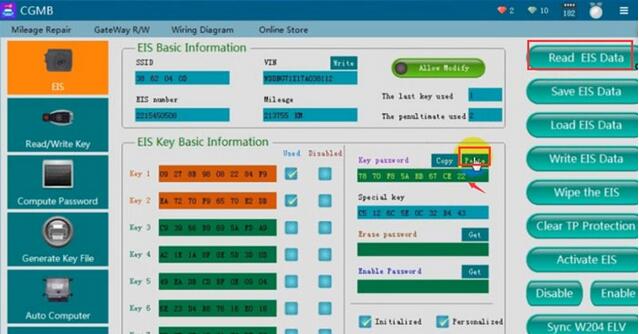
Paste the password to corresponding area
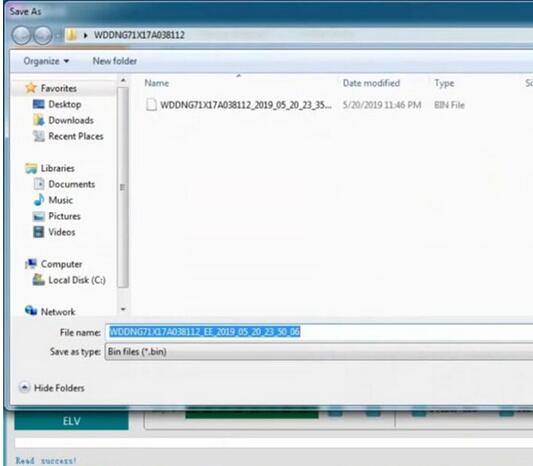
Save EIS data
Step 3: Generate Key File
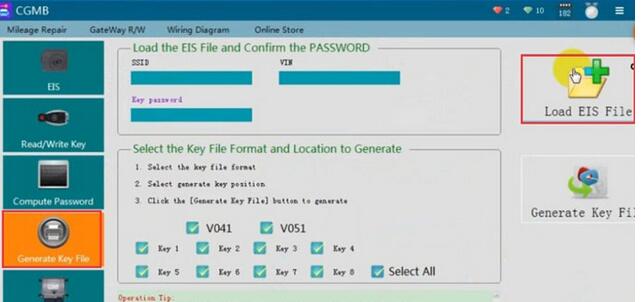
Select Generate Key File function

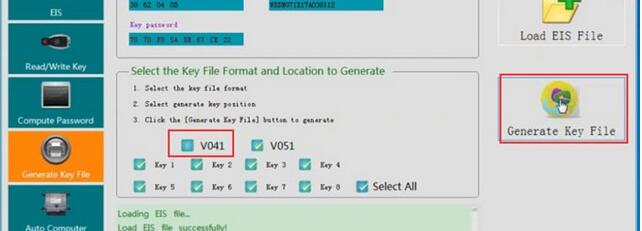
Select key file format and press Generate Key File
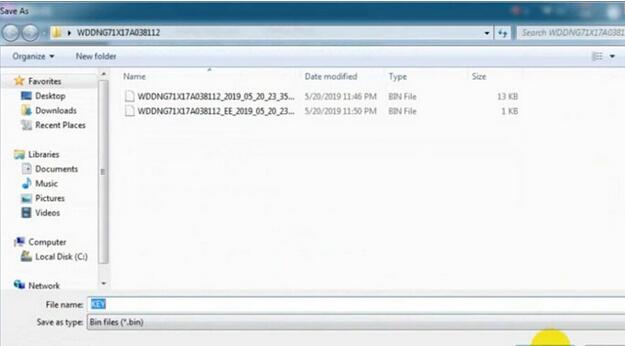
Save key file

Step 4: Write Key
Go to Read/Write Key->Read Key/Chip
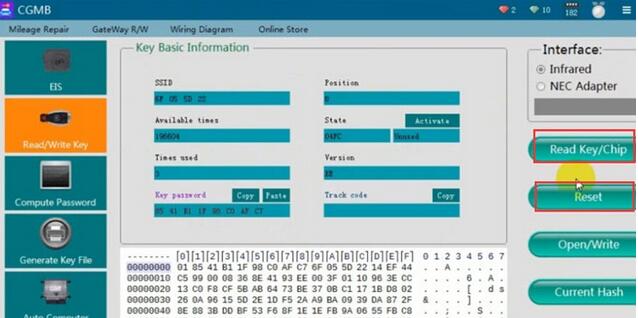
Then Reset
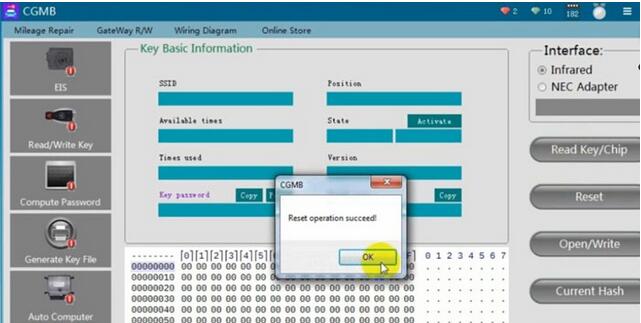
Reset operation success
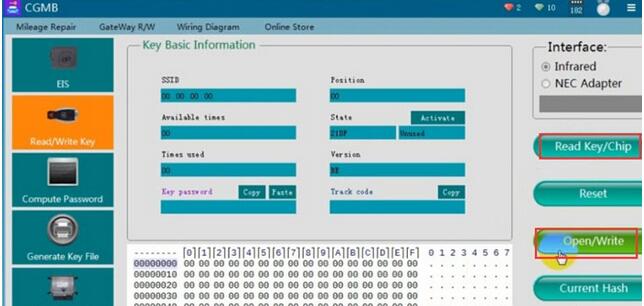
Read key again, check key information
Press Open/Write
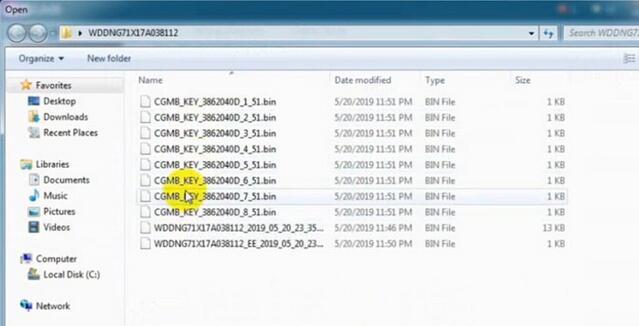
Choose a key file (common BE key choose v51 format)
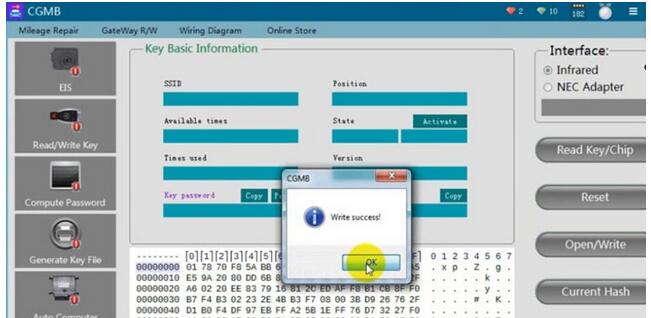
Write key success
Posted by: Emily white at
02:59 AM
| No Comments
| Add Comment
Post contains 252 words, total size 7 kb.
32 queries taking 0.0384 seconds, 168 records returned.
Powered by Minx 1.1.6c-pink.

