


February 25, 2019

Autel is the market leading provider of automotive diagnostic tools that empowers the world’s mechanics and experienced amateurs to help them achieve their professional vehicle maintenance and repair goals. And to provide users with unparalleled experience in the automotive diagnosis, we especially develop different products with riches of functions and features to meet customer needs.
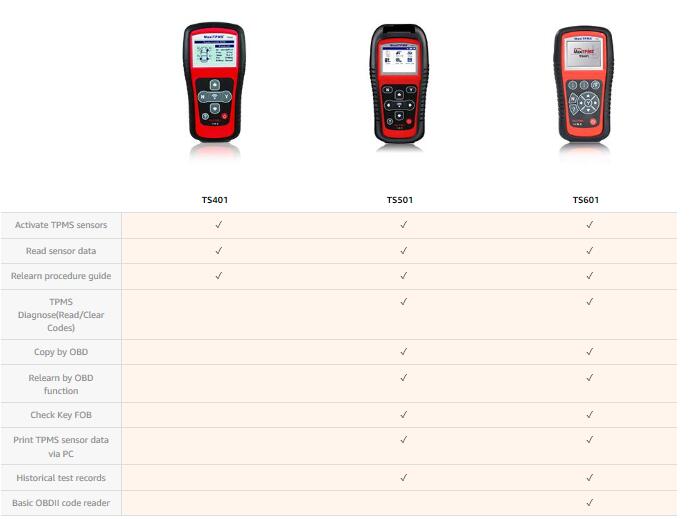
Autel TS601, a TPMS tool plus OBDII code reader, is specially designed to work on TPMS and provide users with direct access to the vehicle’s OBD system, thus allowing users to program the sensor (Autel MX-sensor), retrieve/clear TPMS DTCs, read live data and perform special functions, helping technicians to quickly find out faulty TPMS and turn off the warning light.

Professional TPMS Diagnosis and Programming
The easy-to-useAutel TPMS Tool Autel TS601 provides users with unparalleled experience of efficiency and accuracy for complete TPMS diagnosis. Instead of simply checking the sensor data, sensor ID, tire pressure/temperature, battery condition, sensor position and diagnosing the TPMS to read/write sensor ID, read/clear TPMS codes (turn off TPMS warning light), retrieve TPMS ECU information, and perform actuation test, this TPMS tool allows user programming the sensor data to MX-sensor and replacing faulty sensor that is with low battery life or is not functioning.
Fast Access to Accurate OBDII Diagnosis
Autel TS601 is the first one to integrate the TPMS tool with OBDII code reader. Except professional diagnosis to the TPMS, you can also perform the exceptional diagnosis to vehicle engine running conditions and the operating status of the exhaust after-treatment, which is called OBDII diagnosis.
With OBDII diagnostic functions, you can quickly check the vehicle self-inspection condition, accurately locate the fault that caused the Check Engine Light, and easily turn off the check engine light after the maintenance and repair.
Easy and Fast MX-Sensor Programming
The TPMS sensor programming can and will only work with the Autel
MX-sensor. There are 4 options available for you to complete MX-sensor
programming, and they each have their own advantages and
characteristics:
Auto Create – applying random ID for the tested vehicle
Manual Create – manually input the random ID or the original sensor ID
Copy by OBD – read sensor ID with Relearn function, and write it to MX-sensor
Copy by Activation – automatically write in the retrieved original
sensor data to MX-sensor in the case of original sensor is triggered
Posted by: Emily white at
01:10 AM
| No Comments
| Add Comment
Post contains 396 words, total size 4 kb.
February 16, 2019
Background information:
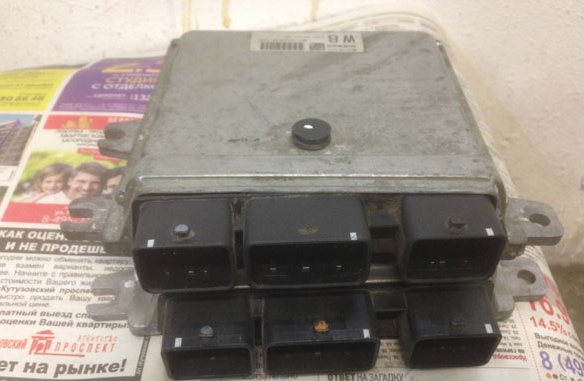
A Nissan Murano Z51 3.5L CVT 2012Y had an accident. The lower part of the connectors of the original engine control unit moved by 7-8mm inside the board, half of the pins are broken off, one heating channel of the upper lambda does not work, although the field effect transistor is jerky. Got and most lambda, but it has already changed.
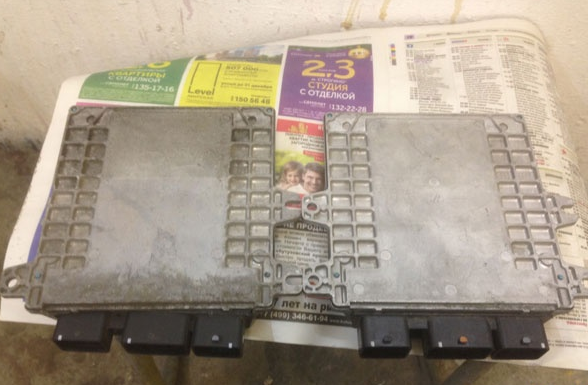
Bought a new ECM, there were no problems with snapping, software is different. The old module stands still, the new Nissan Consult III Plus lies on top:

Disclaimer: The tutorial was translated from Russian. Credit to Car-Buster. You are at your risk.
Marking the old ECM module: 23710-1AA4B
Marking the new ECM module: 23710-1TJ0A

Well visible recessed connectors:
Back of the control modules
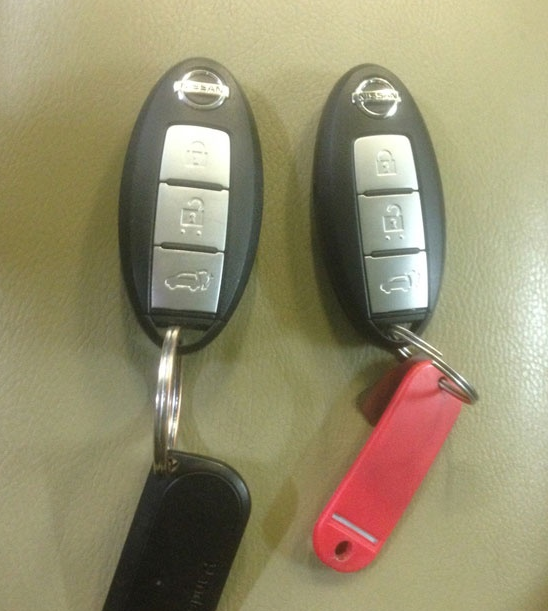
During this procedure, all previously programmed keys are erased, so it is strongly recommended to register all keys at a time:
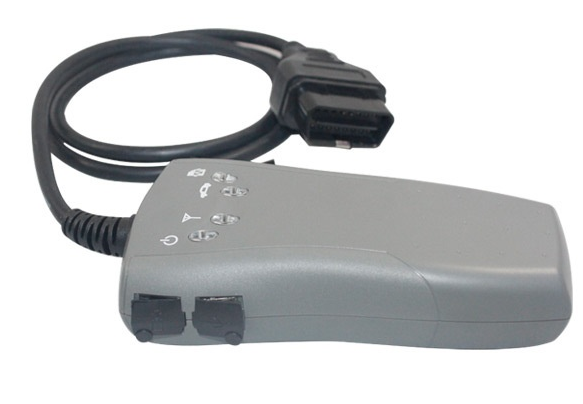
Device used: original Consult-III diagnostic without the Immo card , and with the correct software:
If you using the clones, better go for Consult III Plus, Nissan Consult 3
Plus adds ECU programming function without working with immobiliser
card since software version v65.12.
There are many step-by-step screenshots, so I’ll lay out the most basic.
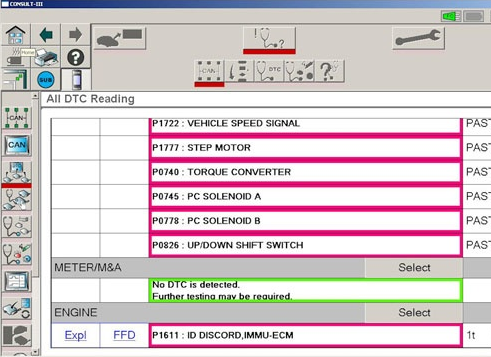
After installing a new unit, the car naturally won’t start, there will
be an active error due to mismatch of ID keys recorded in the ECM and
Immo , in short, there is no sync P1611 ID DISCORD IMMU-ECM :
Yes, the ignition turns on, the starter turns but the car no start
Let’s go.
Turn off the ignition, turn on the emergency light, connect to the car,
choose vehicle model Murano Z51 after 2010.v. and press the Select
button :

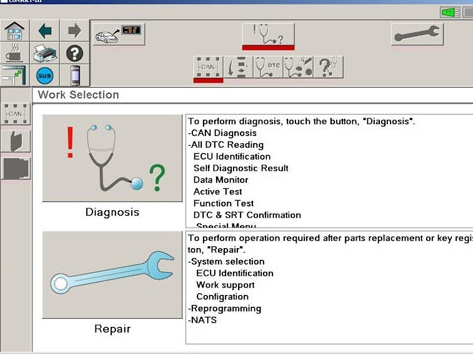
Confirm the choice with the Confirm button , but now select Repair :
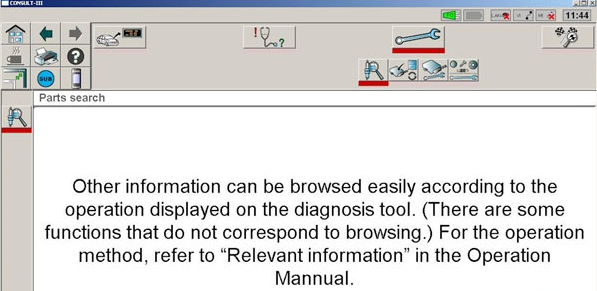
Click on the tablet (top left):
We drop down the list and select NATS :

Click Start :
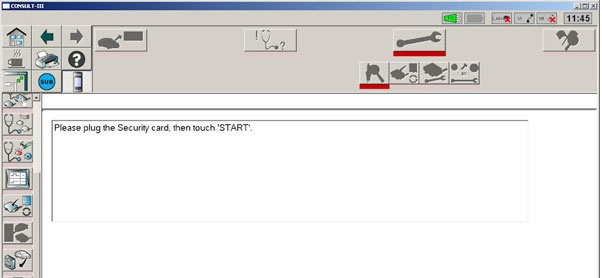
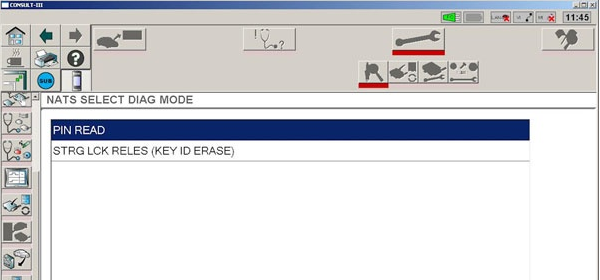
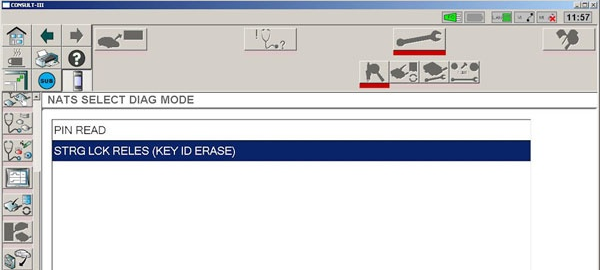
In the menu that appears, click Pin Read and Next :
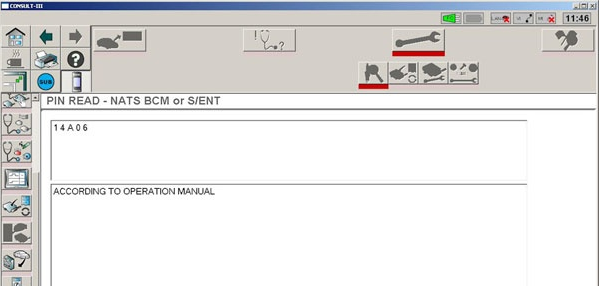
We get the PIN 14A06 , press END :
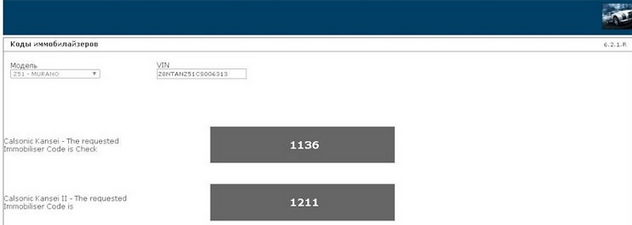
You also need the generic code Immo , in our case variant is 1211 :
After this, select STRG LCK RELES (KEY ID ERASE) , this procedure will erase the keys and pre-lock the steering column latch:
Enter the Immo code, 1211, and run the procedure:
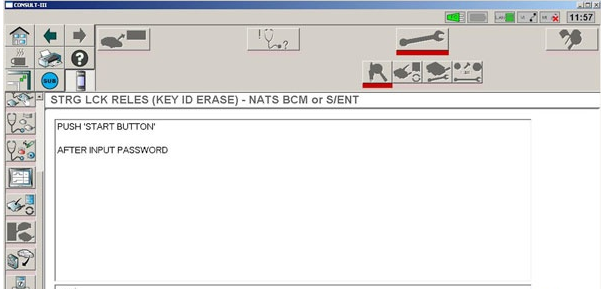
Everything is carried out with the ignition off and with the
emergency lights on. We hear how the steering column is unlocked, and
the ignition is now turned on only when something (key) is inserted into
the emergency key slot. And one more thing, the ACC mode disappears ,
this is normal, that is, immediately switch ignition OFF-ON and not like
people OFF-ACC-ON :

The next step, turn on the ignition with any key, and in the NATS menu we already choose C/U Initialization :

Enter the immo code 1211, and go to the last screen, claiming that initialization is completed:

Turn off the ignition, take out the key (it has not yet been registered,
but served only to start the procedure). Now we insert the first key
into the slot, turn on the ignition, turn off the ignition, pull out the
key, the immo indicator flashes 5 times. Repeat this procedure for keys
2-5.
In my case, only 2 keys. Turn off the ignition, check the operation of
the radio channel from each key. Works. Now remove the first key away
from the car, and leave the second inside, start the engine – with a
half kick. For the second key is similar.
As a result, there is no error in heating one of the upper lambda, and
in the current data adequate readings. Engine speeds develop adequately
without kicks. New engine control module was replaced successfully.
Posted by: Emily white at
07:06 AM
| No Comments
| Add Comment
Post contains 629 words, total size 10 kb.
February 08, 2019
This poster offers solution to MB SD Connect C4 got blue screen on Dell laptop.
Dear Mr. or Mrs,
thank you for the fast shipment. The package has arrived but when inserting the MB SD Hard drive into my Dell laptop I wasn’t able to boot.
I got a blue screen and after the restart I got a message to try a windows recovery but this didn’t work either ??
Do you have a torrent or FTP so I can download and install everything manually, or would it be possible to get a replacement hard drive?
Thank you
Solution offered by www.obd2tool.com engineer:
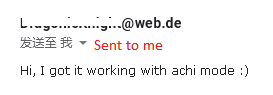
Change another computer, switch achi mode for your Dell laptop.
BTW, there is no torrent or FTP for you to download and setup manually.
Good luck!!!

Finally, mb sdconnect c4 was got working with achi mode.![]()
Posted by: Emily white at
01:50 PM
| No Comments
| Add Comment
Post contains 150 words, total size 2 kb.
February 04, 2019
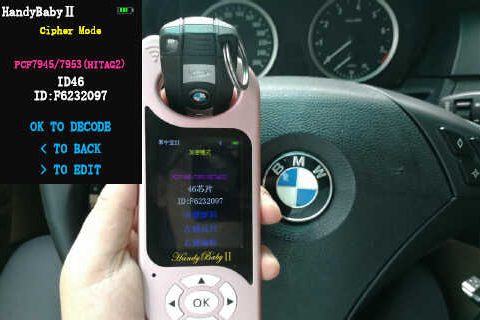
Here OBD2TOOL share the guide on how to use JMD Handy Baby II to decode and add new keys for BMW 525 ID46 Keys.
What You Need?
Handy Baby II 2 Programmer
S-JMD Red Chip or K-JMD Chip
Procedures:
Build connection between Handy Baby 2 and you mobile JMD APP

Insert the original key into the coil to read key information
Choose "Handy Baby 1â€
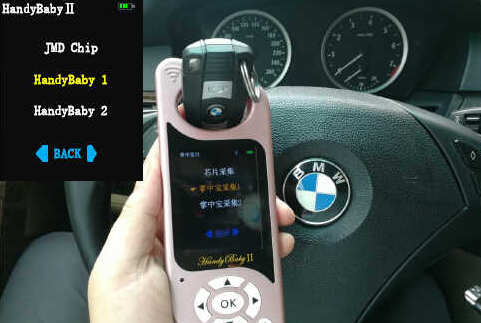
The collect antenna of the Handy Baby II is close to
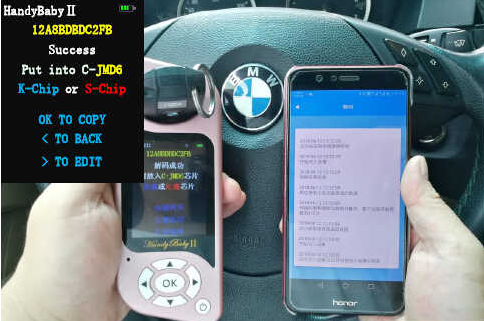
Close Handy Baby II collection antenna to BMW 525 car slot (ignition switch)
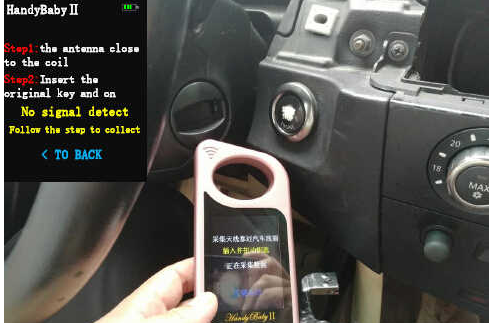
Insert the original car key into the card slot,lit up dashboard and wait connection complete.
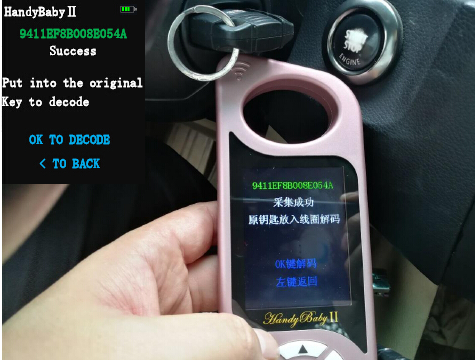
Select "On-line(APP)â€

Calculating…Don’t move the key
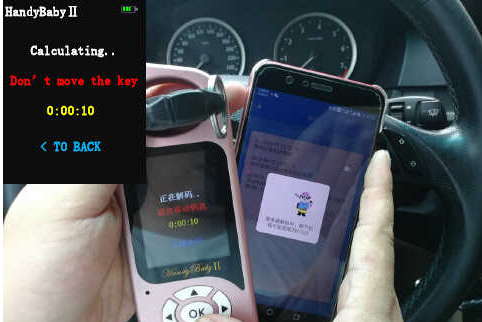
Decode successful.Used JMD S-Chip/K-Chip/ID46 to copy.
Copy successfully,and if you want to copy next key click "OK†to continue.
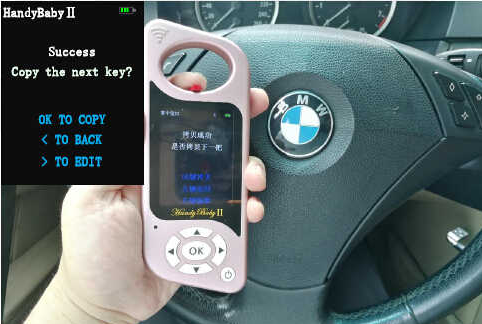
Done!
Posted by: Emily white at
09:37 AM
| No Comments
| Add Comment
Post contains 143 words, total size 4 kb.
32 queries taking 0.0918 seconds, 164 records returned.
Powered by Minx 1.1.6c-pink.

