


April 08, 2020
Car model: BMW F10 / F31 / F25
Purpose: coding the cars

BMW coding tools to have:
ESYS + ENET
ICOM Next
Target user:
Newbie
Question:
BMW shuts down the ignition after a while so how can we prevent the car to shut down the ignition if you are programming ?
@tokarszczak experience:
I always program all ecus only with ENET cable– car never died and all work always done. Even with Icom you can brick car it you don’t know what are you doing. Why you write that it will be slow? Its same channels of communication like in ICOM.
Ignition won’t turn off when programming.
I don’t know speed of this two- for me programming nbt evo with 35 minutes is fine with enet. Try to flash some difficult nbt or kombi with icom- always problem and enet helps me a lot with it. Have 2 original Icom- both faulty and repaired in BMW. There was few threads about killing a car with Icom and programming in Ista- so it is possible. Enet is not bad for work with F and G series but if you want only click start button in Ista and wait for finish- Icom is for you. With Enet you can do same job.
@Matthew53 review:
When executing TAL, esys will take care of ignition, so it won’t turn off.
ISTA will also take care of ignition. It will also write to you first what to do. For F10 that is – do no open/close driver’s door during operation.
@2013m5 review:
I owned few BMW E, F and G series. I never use ISTA-D with eNet cable to program F or G series.
Always used icom or ICOM Next for BMW to program with ISTA-D over my home network, and never have any problem.
I bought the iCom Next A 81 31 2 360 883.
Buy the iCom Next for your F series cars.
Here the steps I prepared before I connect the iCom on my F or G series.
1. Latch the driver seat belt.
2. Latch the drive door latch for coupe and sedan.
3. Turn ON ignition.
4. Connect the iCom.
5. Run ISTA-D
@Enabled review:
Enet is completely fine, even factory uses enet…..
@ snypertje review:
Programming with ista+ is easy.
@ lmao1 review:
My recommendation, don’t use ISTA+ and ENET for programming…. anyway if you want o risk it, use ESYS + ENET.
2 times I updated with ista+enet went wrong, I had luck to recover the whole car with esys + icom, good luck.
ps: about ista+ and ignition, Voltage is not checked in ISTA with ENET.
@ Matthew53 review
Most of the time, when you updating the whole car, it does do
everything and you don’t have to put your fingers in esys, but there are
also situations where ISTA fail with programming one of the modules
(sometimes more) and refuse to reprogram until you replace it. It’s
good, if it’s stuck in programming mode, but still response. Then you
need to try to reprogram with esys.
If you want to start with programming, then in my opinion, you should definitely be familiar with esys and its functionality.
@ Breach review
Just use e-Sys and ENET – that’s what I’ve always used for my F10. As long as you have power, have no retrofits/donor parts and watch out for mismatching HWEL/HWEPs it’s pretty safe and straightforward. Sometimes you may have to run ABLs from ISTA, but not for KAFAS. Anyway, there are almost no updates now for the F10 and you’re already at a pretty recent ilevel.
If you really want to use ISTA then buy an ICOM. I’m in the same situation – personal use, so can’t justify the cost.
Posted by: Emily white at
03:12 AM
| No Comments
| Add Comment
Post contains 636 words, total size 5 kb.
March 16, 2020
Confirmed! Auro IM600 or Autel MaxiIM IM608 Can clear Audi A3 error code via OBD, with one-key clear, Only takes 2 minutes
Here is the step-by-step guide of Audi A3 Car Error Code Removal with MAXIIM IM608/Auro IM600
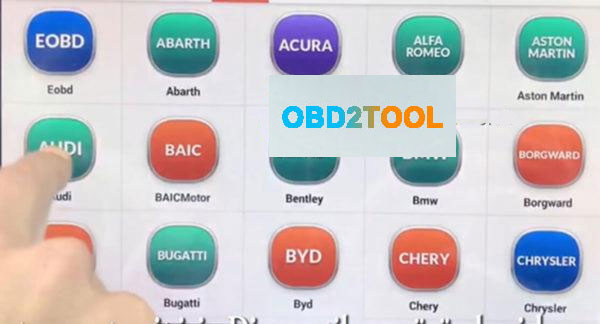
First, connect Autel IM608 to the vehicle, enter menu select Diagnostic function then select "AUDIâ€
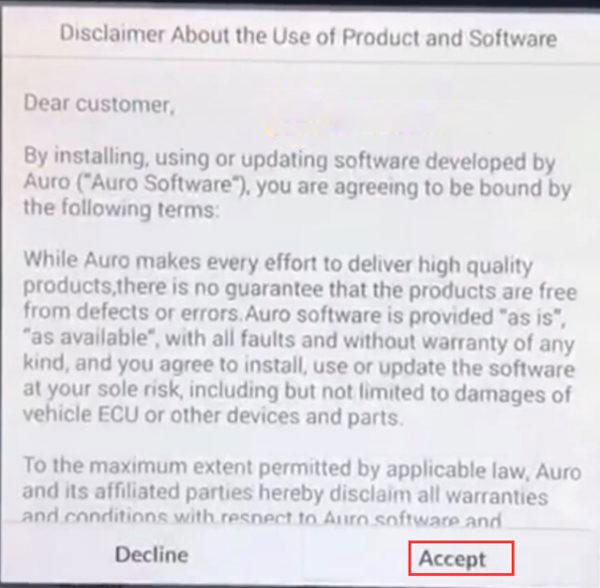
Accept their disclaimer, then diagnostic program loading, wait a moment …

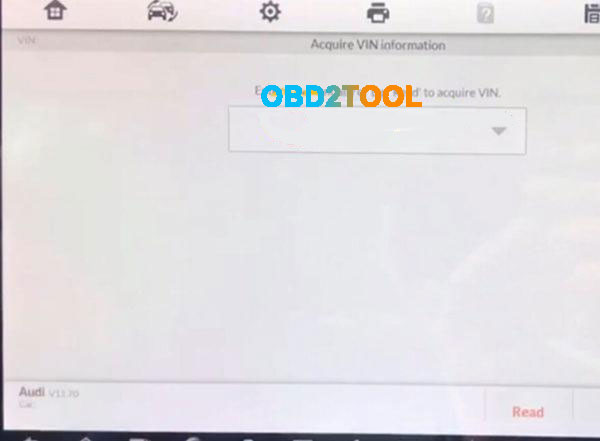
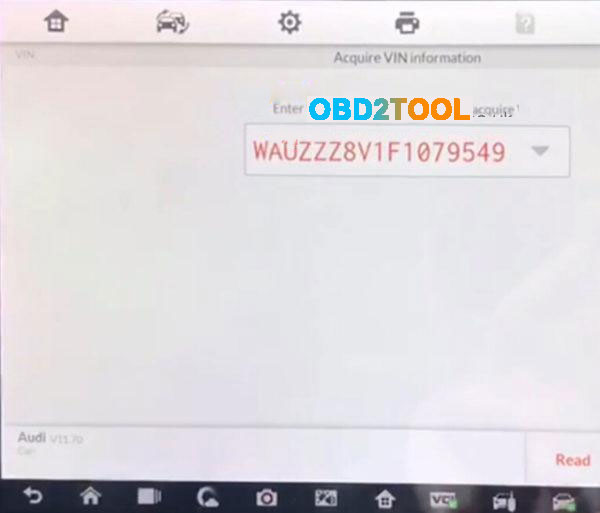
Automatic selection: Device can read automatic VIN number by
OBD after that device will select the car’s system.
Manual selection: If u know car mark, Model and years information u can use this option
System selection: If u know car system, u can select directly car system than
you can read all DTC code
Note: The first automatic selection should be preferred.
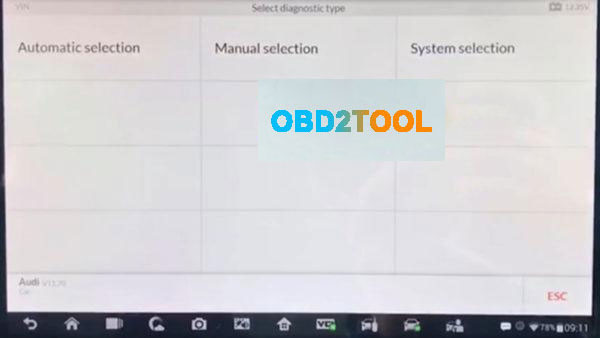
Here select "Automatic selection†to read VIN
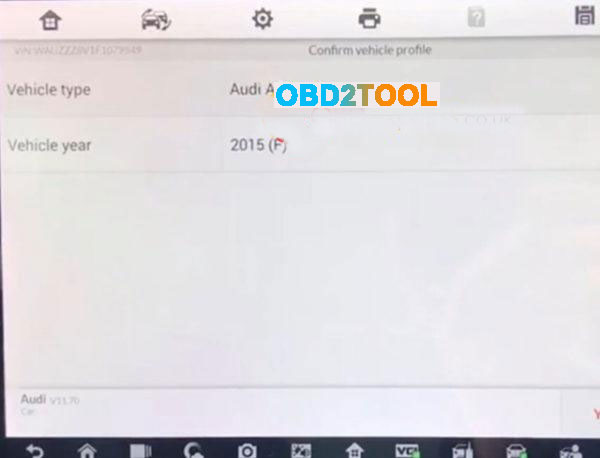
Read the vehicle info:
Vehicle type: Audi A3 2013>
Vehicle yeas:2015(F)
Then press "YES†to continue
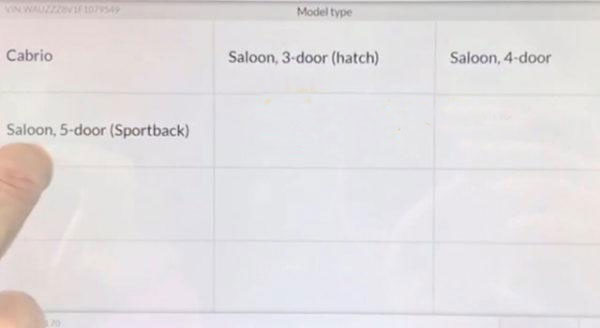
Note: Sometimes it may be necessary to choose according to the vehicle feature.
Select"Saloon, 4-doorâ€
Select"CLHA 1.61 TDI/77KWâ€
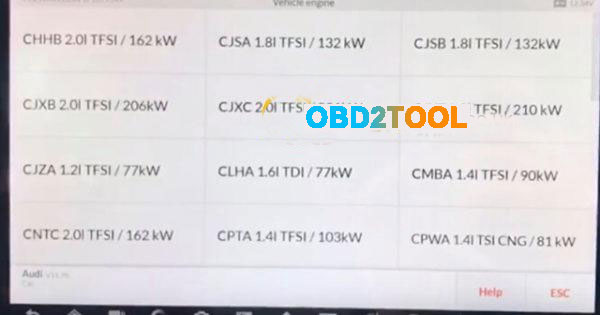
Note:The initial word of the vehicle engine number, the other parts is motor
indicates information.
Diagnosis –automatic selection by can see the all error codes with scan
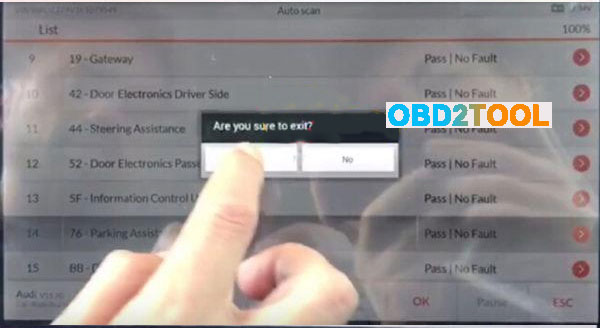
Selectâ€Diagnosisâ€
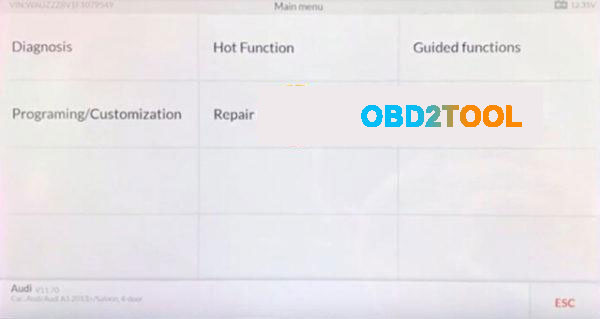
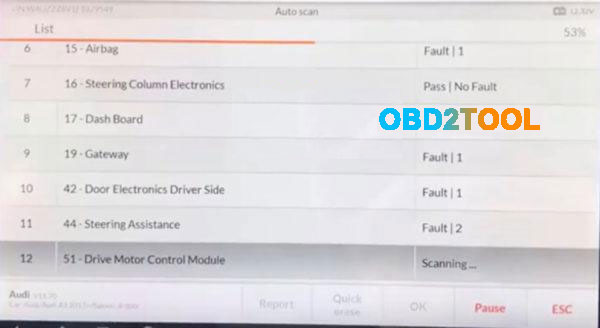
Selectâ€Auto scanâ€
then communication status..Wait a moment

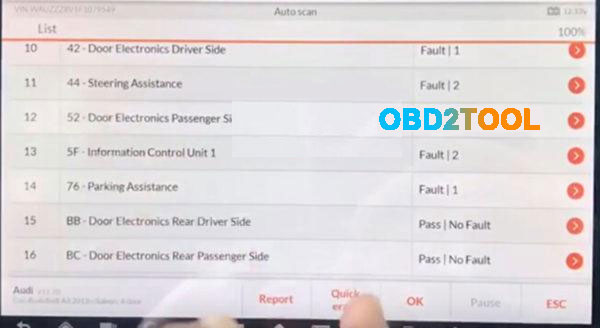
Error and Number Errors as below:
After the code is read out, press "Quick eraser†to clear,only 1 minute
after the code error clean,pressâ€ESC†to exit and back to the diagnotic menu interface
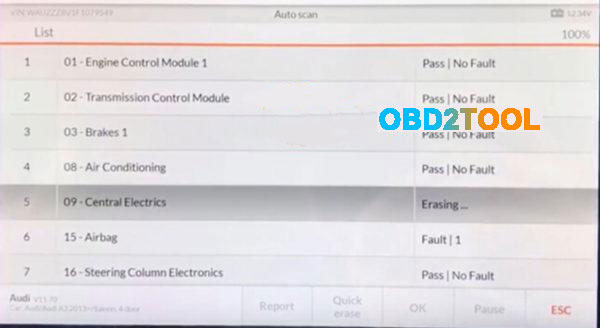
Done! Audi A3 2015(F) Error Code clear via IM608/IM600 is OK!
Posted by: Emily white at
10:18 AM
| No Comments
| Add Comment
Post contains 256 words, total size 8 kb.
Autel MaxiIM 608,A fast-access option for OBD II/EOBD vehicle diagnosis is available on the Vehicle Menu screen. This option presents a quick way to check for DTCs,isolate the cause of an illuminated malfunction indicator lamp (MIL), check monitor status prior to emissions certification testing, verify repairs, and perform a number of other services that are emissions-related. The OBD direct access option is also used for testing OBD II/EOBD compliant vehicles that are not included in the Diagnostics database.
Functions of the diagnostics toolbar buttons at the top of the screen are the same as those available for specific vehicle diagnostics.
Autel IM608 General Procedure
To access the OBD II/EOBD diagnostics functions
1. Tap the Diagnostics application button from the MaxiIM Job Menu.
The Vehicle Menu displays.
2. Tap the EOBD button. There are two options to establish communication with the vehicle.
Auto Scan – when this option is selected the diagnostic tool attempts to establish communication using each protocol in order to determine which one the vehicle is broadcasting on.Protocol – when this option is selected the screen opens a submenu of various protocols. A communication protocol is a standardized way of data communication between an ECM and a diagnostic tool. Global OBD may use several different communication protocols.
3. Select a specific protocol under the Protocol option. Wait for the OBD II Diagnostic Menu to appear.
NOTE
Tapping the button displayed beside the function name opens a bubble with additional function information.
4. Select a function option to continue.
DTC & FFD
I/M Readiness
Live Data
On-Board Monitor
Component Test
Vehicle Information
Vehicle Status
Posted by: Emily white at
09:58 AM
| No Comments
| Add Comment
Post contains 274 words, total size 2 kb.
March 04, 2020
1. What does JPRO do?
JPRO empowers diesel technicians to diagnose and repair all makes, models, and components. JPRO reduces a technician’s dependency on OEM software by offering industry-leading bi-directional controls, including DPF regens, cylinder cutouts, parameter changes, and much more. For detailed information and full coverage details, visit the JPRO Professional page.
2. What trucks will JPRO work on?
For commercial vehicles,JPRO Professional is an all makes, models, and components solution. For detailed information, check out our coverage chart.
3. If I buy JPRO, do I need anything else?
JPRO Software requires a compatible Windows based PC, Laptop or Tablet, RP1210C compliant adapter and the appropriate cable that connects the computer to the vehicle’s OBD-II, 9-Pin or 6-Pin port.
If you do not already own the items listed above we recommend purchasing JPRO as part of an adapter or diagnostic service kit.
4. Can JPRO Commercial Vehicle Diagnostics perform bi-directional vehicle tests such as Cylinder Cut Out tests?
Yes. JPRO comes loaded with industry-leading bi-directional tests for the makes and models you commonly repair. For a full list of included tests, visit our coverage chart.
5. Can JPRO Commercial Vehicle Diagnostics adjust user-configurable parameters such as road speeds or idle shutdown settings?
Yes. On certain vehicles, users can adjust max cruise speed, max road speed, idle shutdown times, and enable/disable cruise control. Visit our coverage chart to see which vehicles currently allow parameter changes.
6.our coverage chart to see which vehicles currently allow parameter changes.
Yes. On certain vehicles, users can adjust max cruise speed, max road speed, idle shutdown times, and enable/disable cruise control.
7. What OEM applications come with JPRO Commercial Vehicle Diagnostics?
Although installed OEM applications can be launched directly from JPRO, OEM applications are not included with your purchase. JPRO is intended to alleviate the need to use many different OEM applications by providing coverage for all makes, models, and components.
8. Can JPRO Commercial Vehicle Diagnostics clear fault codes?
Yes. Users have the ability to clear inactive fault codes.
9. Can JPRO Commercial Vehicle Diagnostics perform ECU programming?
No, JPRO is a standalone solution that does not require any third party applications. If needed, installed OEM applications can be launched directly from JPRO.
Due to security and safety concerns, JPRO does not allow users to reprogram ECUs.
10. Do I need OEM software in order for JPRO Commercial Vehicle Diagnostics to work?
No, JPRO is a standalone solution that does not require any third party applications. If needed, installed OEM applications can be launched directly from JPRO.
11. If I have OEM software, why do I need JPRO Commercial Vehicle Diagnostics?
Diagnosing on a component-by-component basis is time consuming in an industry where time is extremely valuable. JPRO covers all components on the vehicle to provide users with a holistic view of the vehicle to improve total vehicle health. JPRO automatically detects all components on the vehicle, down to the serial number, so you don’t even have to choose which application is needed to diagnose the vehicle you are diagnosing and repairing. If you do need additional information from your OEM applications, JPRO will launch the application and/or its associated troubleshooting manuals directly.
12. How does JPRO Commercial Vehicle Diagnostics diagnose aftertreatment issues?
On one simple screen, JPRO allows you to view the overall health of
the aftertreatment system. Users easily view information such as soot
level, DPF lamp status, and engine derate as it relates to
aftertreatment and current regen status. JPRO also provides regen zone
information and explains to users why that vehicle is in a particular
zone. From many screens outside of the aftertreatment section of JPRO,
users will be alerted if a DPF regen is needed and/or inhibited. DPF
regens can be initiated from multiple screens within JPRO.
Does JPRO Commercial Vehicle Diagnostics support OBDII?
13. Does JPRO Commercial Vehicle Diagnostics support OBDII?
Yes. View our coverage chart for additional details.
14. Can I look at the data in log files?
To protect the vehicle owner’s vehicle data, log files are stored in a format that cannot be read by a simple text editor. However, log files can be played back with JPRO’s playback function to view all vehicle data as it was during the original connection.
15. What is the default location for saved log files?
JPRO stores log files by default in the C:\JPRO Logs\ folder on your device.
Posted by: Emily white at
10:32 AM
| No Comments
| Add Comment
Post contains 734 words, total size 6 kb.
Customer Qustion:
Can you recommend something OBDSTAR tool to me? I need odometer tool for Hyundai IX35 2018 – 2019 how is the best? Thanks
Suggestion from www.obd2tool.com:
OBDSTAR X300 DP PLUS and OBDSTAR Odo Master both can do mileage change for Hyundai IX35 2018 – 2019 via OBD.
Here is how to use:
Part 1: obdstar odo master Hyundai IX35 2018 – mileage calibration via obd
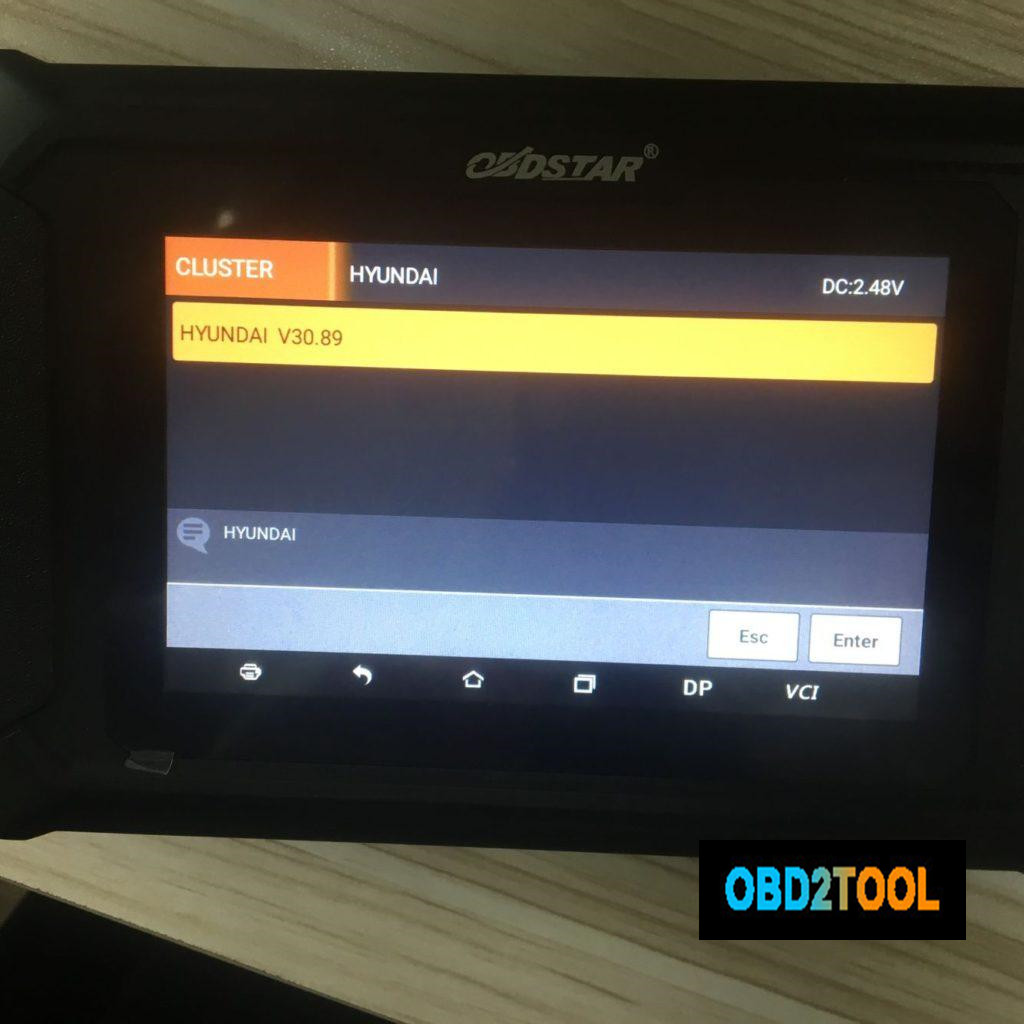
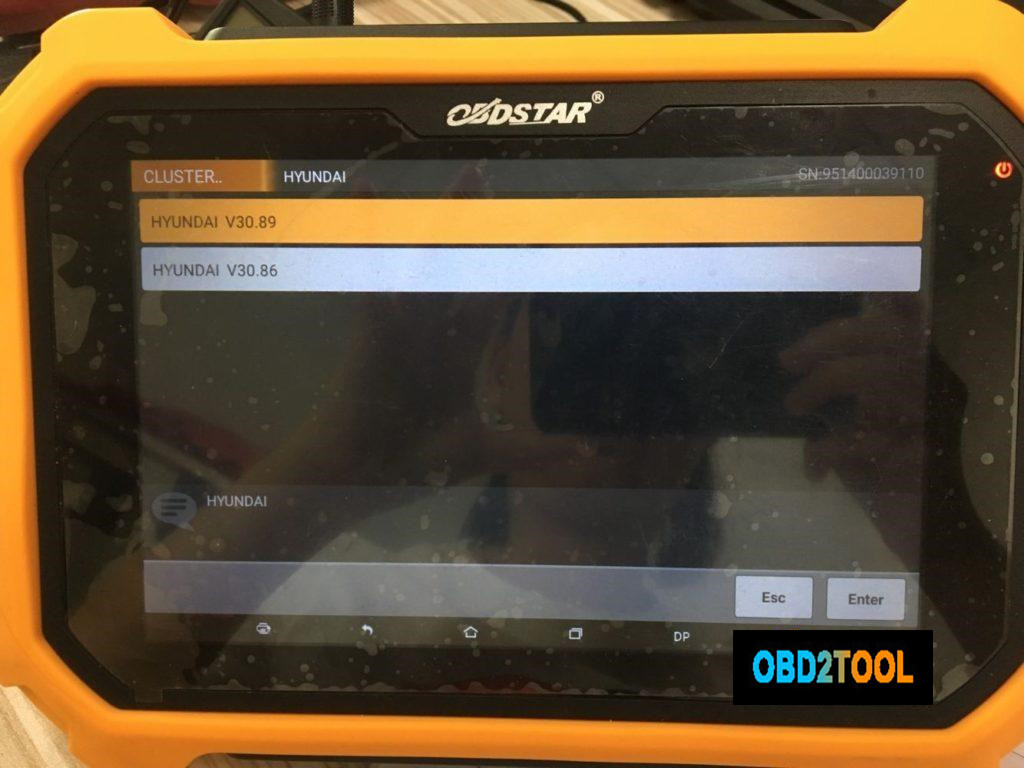
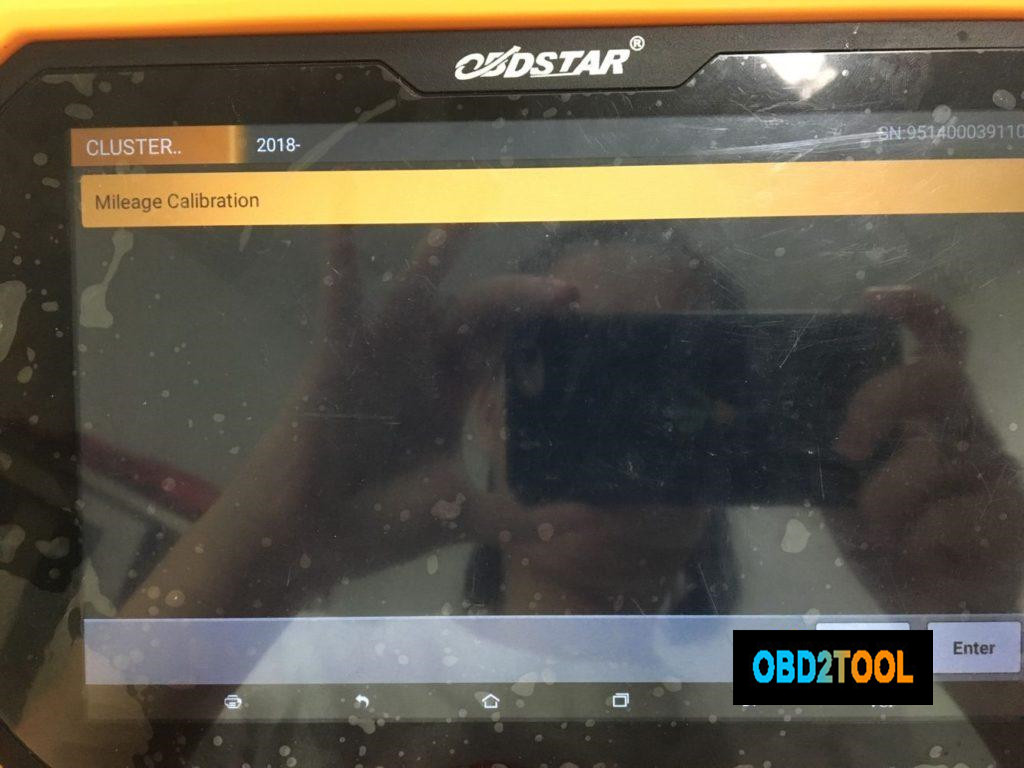
Use obd2 cable to connect obdstar odo master to the Hyundai IX35, open the machine, tap "Clusterâ€, then "Hyundaiâ€.
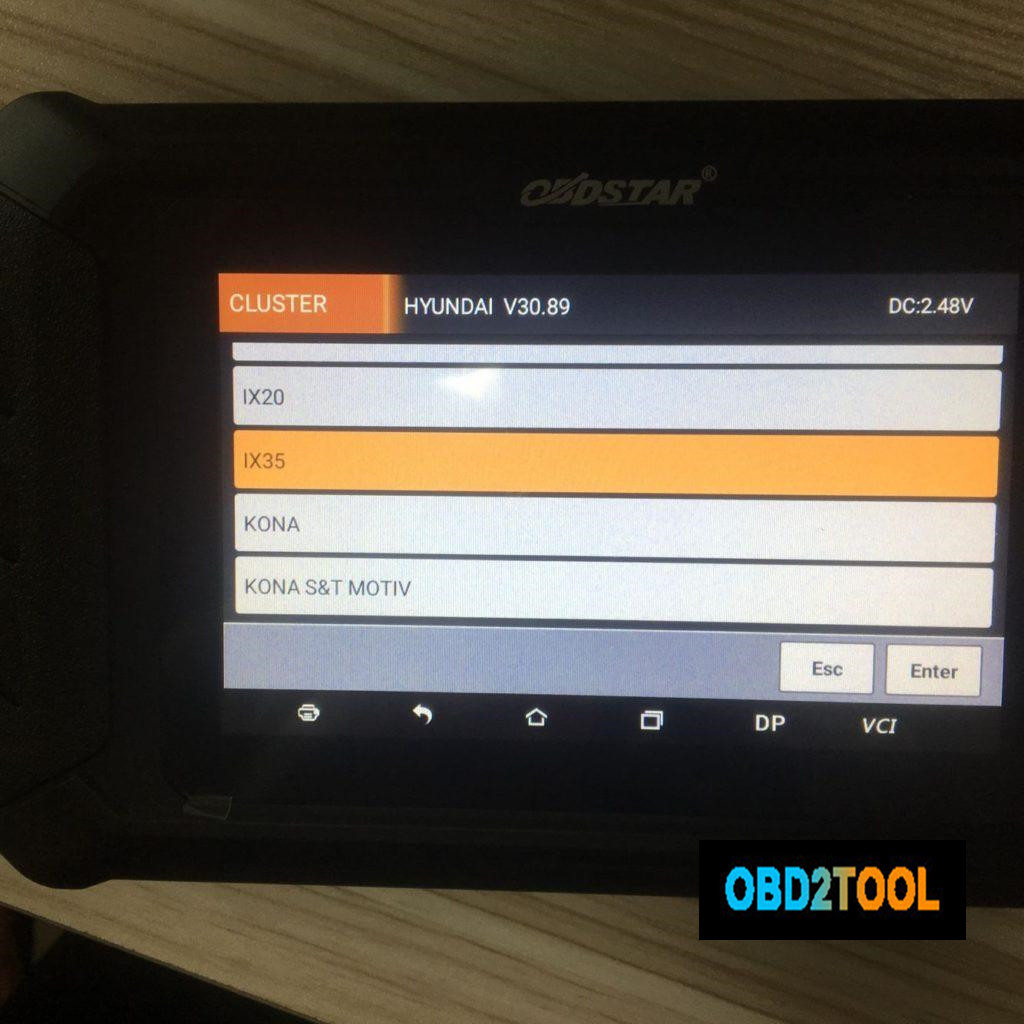
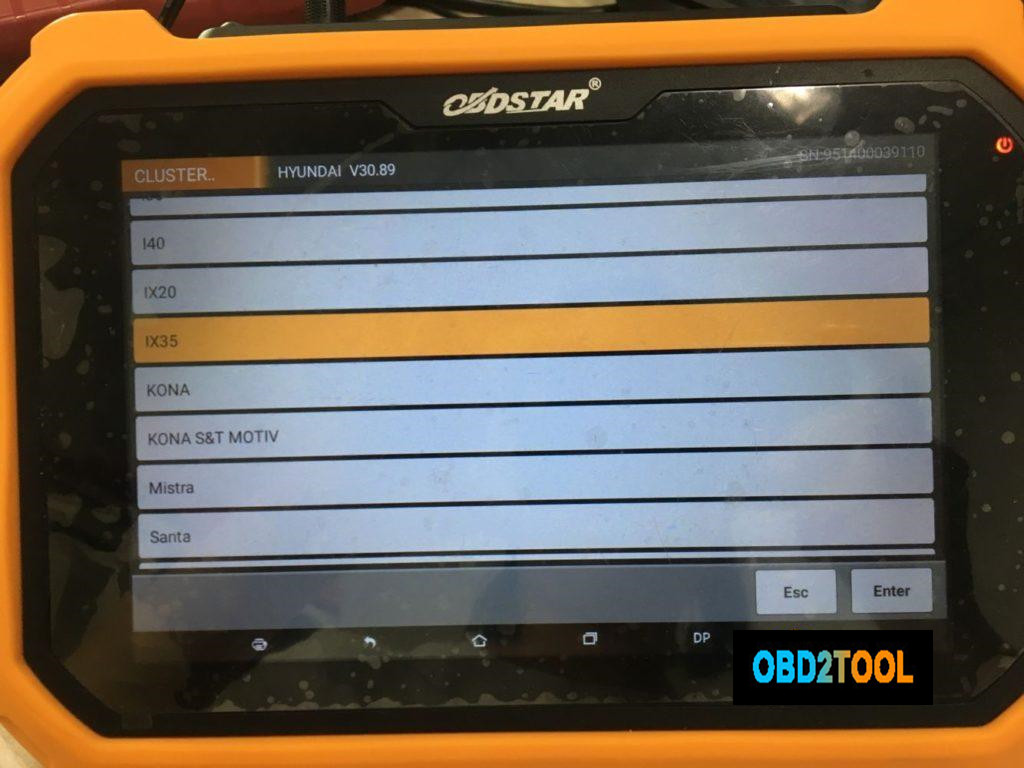
Hyundai IX35.
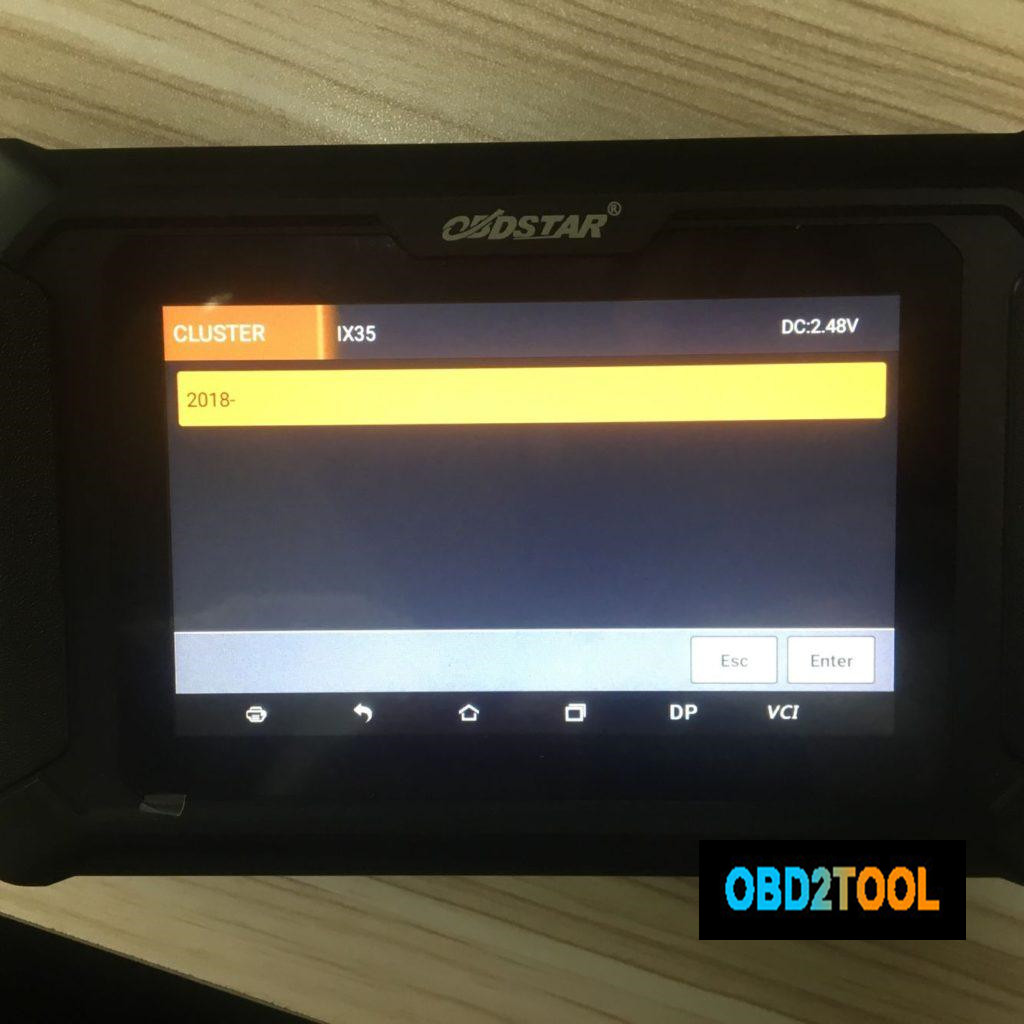
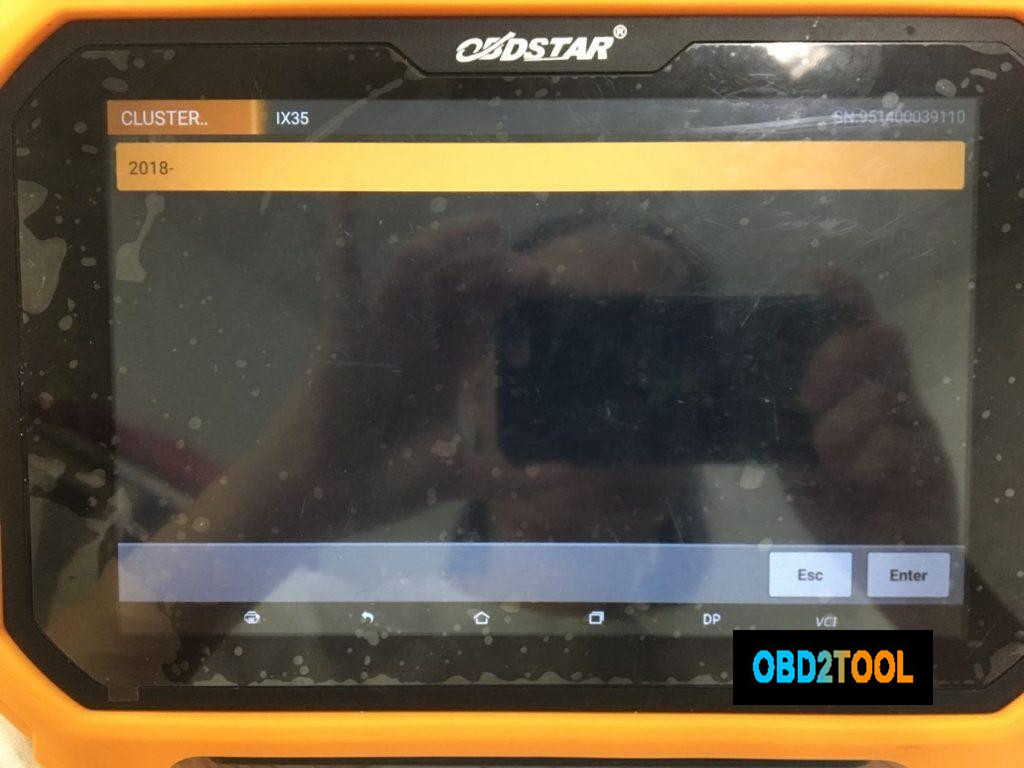
2018 – (Year)
Mileage Calibration.
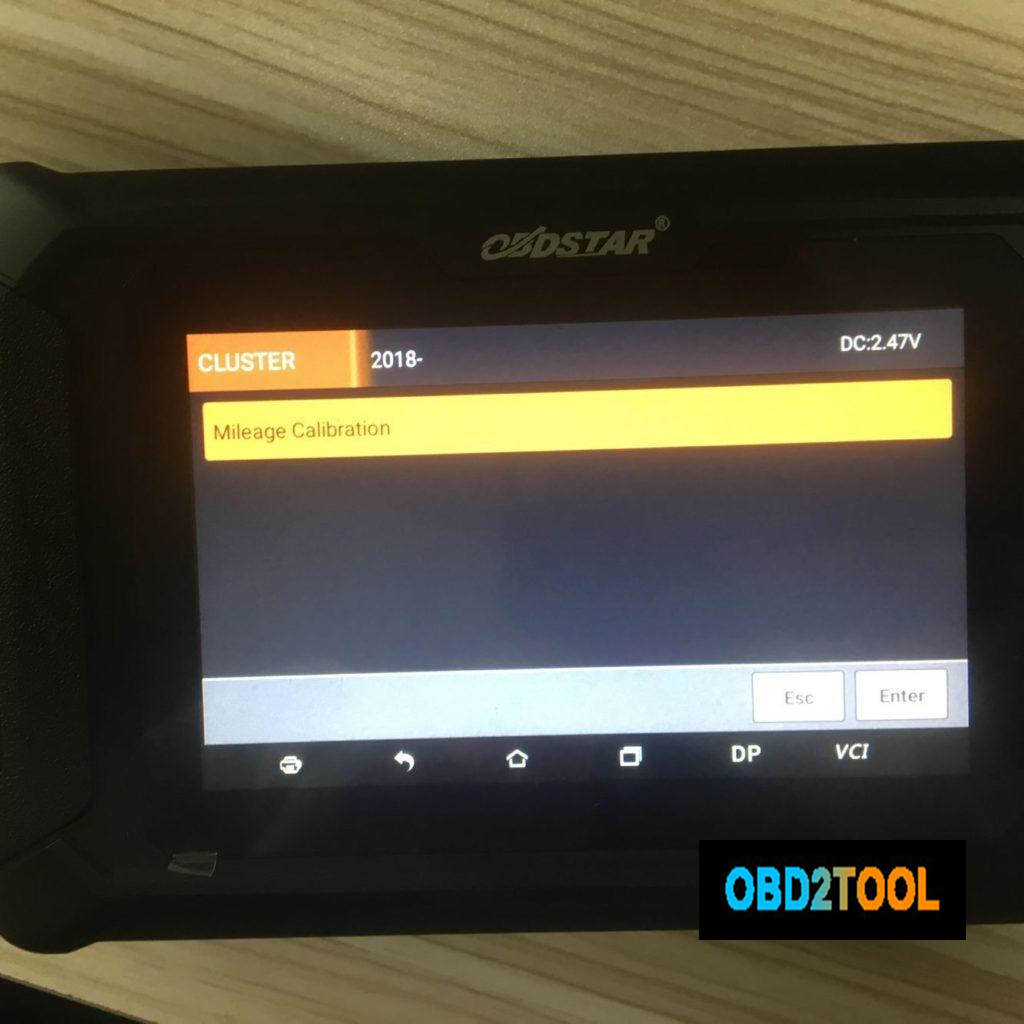
Go on to follow the on-screen instruction to finish mileage calibration, the machine comes with "Help†file that you can follow.
OBDSTAR ODO Master both can do mileage change for Hyundai i20 2014:
Part 2: obdstar X300 DP Plus Hyundai IX35 2018 – mileage calibration via obd
Use obd2 cable to connect obdstar X300 DP Plus to the Hyundai IX35, open the machine, tap "Clusterâ€, then "Hyundaiâ€.
Hyundai IX35.
2018 – (Year)
Mileage Calibration.
If you don’t have super luxury cars to program keys, you can choose obdstar odo master,
If you have super luxury cars to program keys and sometimes do some service reset, you choose obdstar x300 dp plus.
Posted by: Emily white at
10:23 AM
| No Comments
| Add Comment
Post contains 216 words, total size 3 kb.
February 21, 2020
Model:2013 Jaguar XF,VIN:SAJAA05M2DPU0****;


Function:After maintain or replace the valve (EVAP).
Operationprocedure toSelf-test withlaunch X431 Vor X431 V+ (pro3) PAD:
- .Choose Jaguar after V33.25,and ECM;

- .Choose "Special functionâ€ï¼›

- .Choose "Purge solenoid valveâ€ï¼›

- .Start engiuneï¼›

- .The temperature of engine must over 75 Celsius,then program can start;

- .Self-test runningï¼›

- .Prompt: Clearance valve evaluation value passedï¼›

- .Turn off the ignitionï¼›

- .Switch on the ignitionï¼›

- .Press "Yes†to clear all DTC;

- .Clear all the DTCï¼›

All DTC clearedï¼›

Turn off the ignitionï¼›

Initializingï¼›

Switch on the ignitionï¼›

- .Function finishedï¼›

- .Turn off the ignition ï¼›

https://www.obd2tool.com/blog/2019/12/23/how-to-self-test-on-2013-jaguar-xf-engine-purge-valve-with-launch-x431-v-x431-v-pro3-pad/
Posted by: Emily white at
08:06 AM
| No Comments
| Add Comment
Post contains 108 words, total size 6 kb.
SVCI 2020 Feather:
Version: 2020
Sever: No Need Connect to Server!
Activation: No Need Online Activation!
Time for use:No Time Limitation!
Free download SVCI 2020 (FVDI) abrites commander software:
https://mega.nz/#!ff4hTKhY!RppGNKf9mugkzarQdbIIHLNzboeY32Ka5gtaPjQe2Wo
Easy to install:
There is only one executable file on the CD-ROM.
Double-click "AbritesCommanderSetup.exe†to start the installation. ]
Do not plug the USB into the computer during the installation.
After the installation is complete, connect the USB to the computer.
How to use SVCI 2020 Quick Start Software?
1.VCI 2020 Quick Launch Software has 42 shortcut icons. Left-click the icon to launch the corresponding software.
2.Compared to the quick launch of SVCI 2018, the activation dialog is not displayed after clicking the icon.
3.The last icon is the firmware upgrade program. Click it to start the firmware upgrade program.
4.You must be online to download the latest firmware program. After downloading, click Update to update the firmware program.
5.After clicking the icon, the dongle program icon will appear in the tray at the bottom right corner of the computer.
6.The dongle program cannot be exited while the software is running.
SVDI 2020 connection:

Software display:

2020 SVCI softwarelist andvehicle coverage:
| Car Make | Software Version | Car Year |
| Jaguar / Land Rover | V2.6 | up to 2016 |
| Suzuki | V1.2 | up to 2019 |
| Daihatsu | V1.4 | up to 2019 |
| VVDI | V1.2.2 | up to 2015 |
| VW/Audi/Skoda/Seat | V18.0V24.0V37.0 (new) | up to 2019 |
| BMW / MINI | V10.4V10.5(new) | up to 2019 |
| Mercedes Benz / Smart/Maybach | V5.11V7.0V10.8 | up to 2019 |
| Renault / Dacia | V5.3V6.3
V7.4(new) |
up to 2019 |
| Peugeot / Citroen | V5.10V6.7V8.0(new) | up to 2019 |
| Fiat / Lancia / Alfa / FCA | V5.1V5.7V7.6 | up to 2019 |
| Opel / Vaushall | V5.8V6.6V7.5(new) | up to 2019 |
| Ford / Mazda | V4.9V7.7(new) | up to 2019 |
| Chrysler / Doge / Jeep | V3.3V3.4 | up to 2019 |
| Toyota / Lexus/ Scion | V9.0V11.7(new) | up to 2019 |
| Nissan / Infiniti | V4.3V5.7 | up to 2019 |
| Hyundai / KIA | V2.1V4.4(new) | up to 2019 |
| Volvo | V4.3V6.2(new) | up to 2019 |
| Mitsubishi Motors | V2.1V3.7(new) | up to 2019 |
| Porsche | V4.1V7.1(new) | up to 2019 |
| DAF | V1.0 | up to 2019 |
| Bikes / Snowmonilrd/ Water Scooters | V1.2V2.0(new) | up to 2019 |
| Tag Key Tool | V6.2 | up to 2015 |
Note: Special functions only works for Jaguar Land Rover/ SUZUKI /DAF
The difference between SVCI 2020 and SVCI 2018
SVCI FVDI V2020 Hardware Difference:
1.SVCI 2020 has fewer button batteries than SVCI 2018.
2.SVCI 2020 does not need to be activated, it will not lock the machine, and the serial number will not be lost.
SVCI FVDI V2020 Software Difference:
SVCI 2020 has 19 more software than SVCI 2018:
1.ABRITES Commander for VAG V37.0,
2.ABRITES Commander for BMW V10.5,
3.ABRITES Commander for Mercedes V10.4
4.ABRITES Commander for Bikes V2.0
5.ABRITES Commander for Chrysler V3.4
6.ABRITES Commander for Daihatsu V1.4
7.ABRITES Commander for FIAT V7.6
8.ABRITES Commander for Ford V7.7
9.ABRITES Commander for Hyundai V4.4
10.ABRITES Commander for JLR V2.6
11.ABRITES Commander for Mitsubishi V3.7
12.ABRITES Commander for Nissan V5.7
13.ABRITES Commander for OPEL V7.5
14.ABRITES Commander for Porsche V7.1
15.ABRITES Commander for PSA V6.3
16.ABRITES Commander for Renault V7.4
17.ABRITES Commander for Suzuki V1.2
18.ABRITES Commander for Toyota V11.4
19.ABRITES Commander for Volvo V6.2
Posted by: Emily white at
07:22 AM
| No Comments
| Add Comment
Post contains 522 words, total size 9 kb.
February 08, 2020
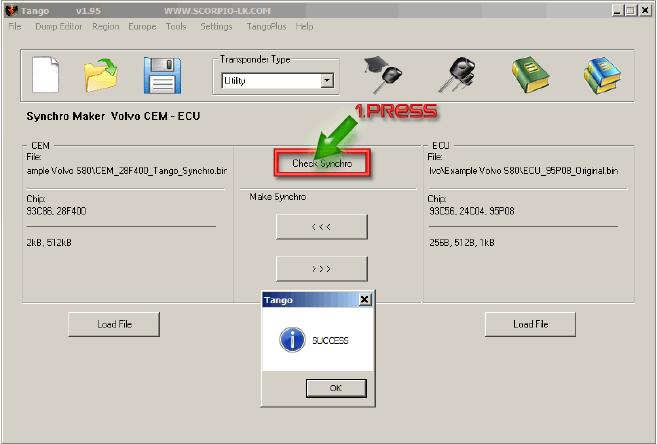
Synchro maker Volvo was introduced in Tango software update 1.95. The main function of this maker is to allow, the users of Tango programmer that purchased it,to synchronize ECU and CEM modules found in Volvo vehicles.
In order to use the software you will need to load a dump file from both ECU and CEM modules in Tango software. In case that one of the modules is broken or the chip contents are replaced a file from a replacement (donor) module can be used.
Currently supported types of ECU and CEM contain the following chips:
CEM: 93C86, 28F400
ECU: 93C56,24C04, 95P08
Any combination of the above mentioned can be synchronized.
The main purpose of this document is to show and explain how to properly use this software.
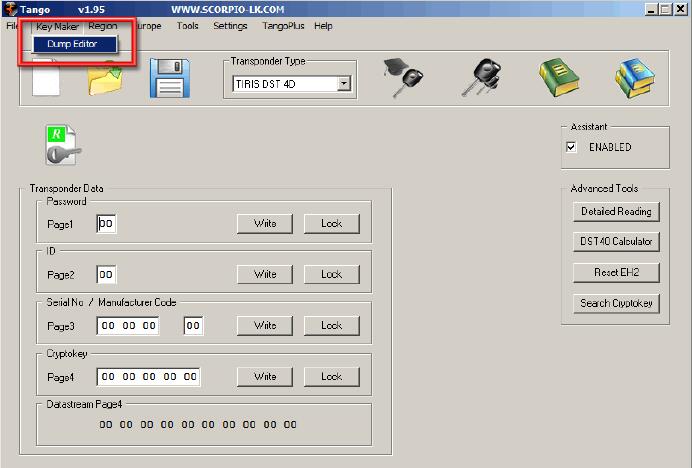
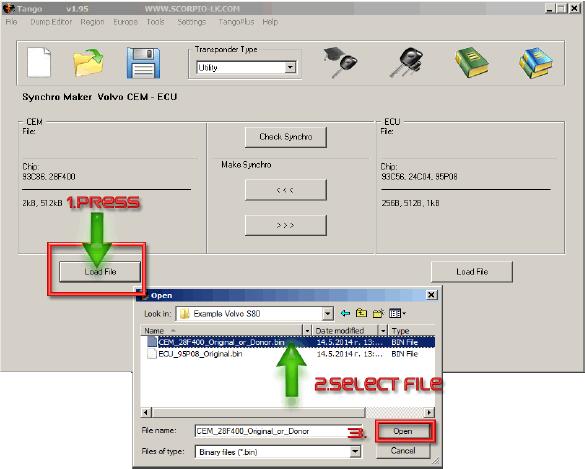
First Start Tango software and select Dump Editor mode:
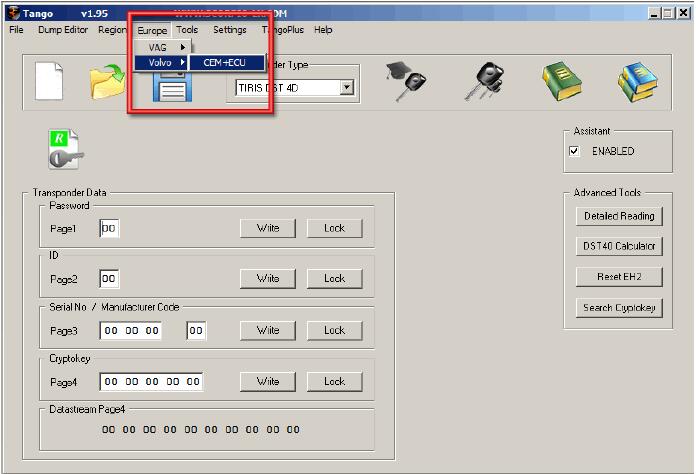
After that select Europe -> Volvo- > CEM+ECU
When loaded the software window looks like this:
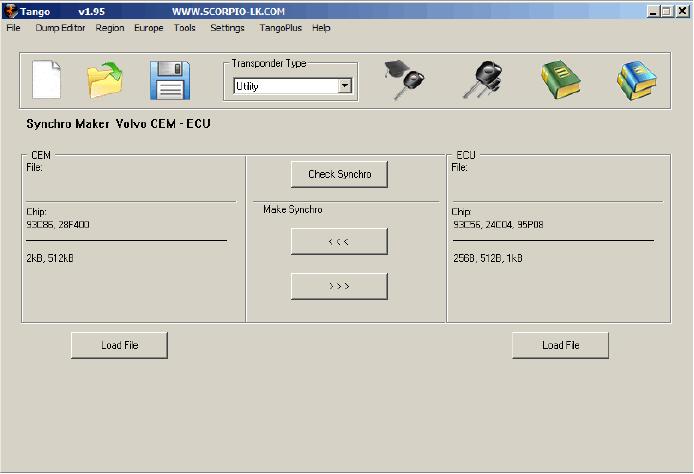
The Synchronization of the modules begins with loading their dump files in Tango software, in the example used in this document the sync between CEM with 28F400 and ECU with 95P08 will be displayed. It doesn’t matter which file is loaded first
In this guide it will be demonstrated how synchronize the CEM module with the ECU.As a result of the whole procedure a new file for the CEM module will be generated byTango Key Programmer and this file is synchronized and compatible with the originally loaded ECU file. The reverse operation – creating a new ECU file compatible with the original CEM file can be used instead, the procedure is basically the same.
Synchronization is started with loading the dump file from the CEM module:
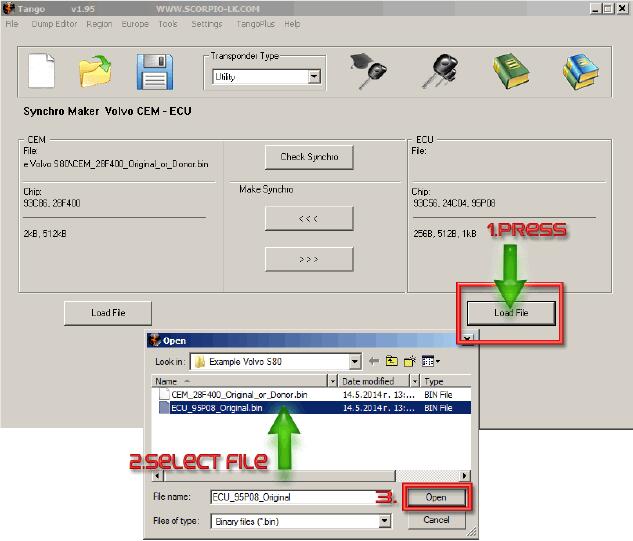
Using similar procedure load next the ECU file:
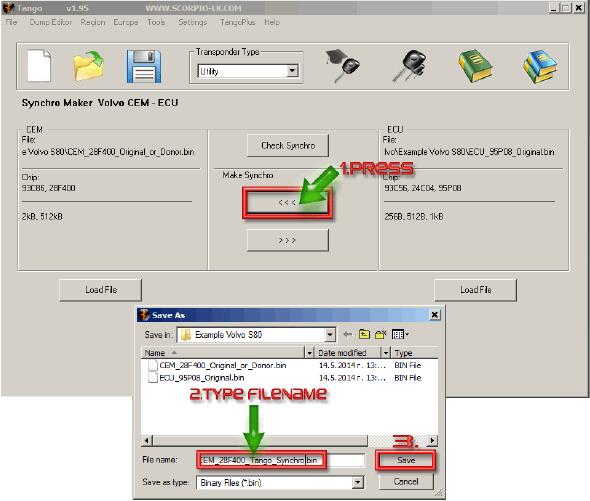
If you press the Check Synchro button now, it will display the following error, because at this point the files of the ECU and CEM are not synchronized. NB: If the files are taken from a working car the error will not appear and will write "SUCCESS†instead.

To actually synchronize the files press the arrows beneath "Make Synchroâ€. The upper arrow that points left will prompt saving a new CEM dump file that is synchronized with the ECU. The second button which points right may be used to create a new ECU dump file instead. Choosing which function to use (create new CEM file or create new ECU file) is up to users’ personal preferences and basically there is no difference. It may be a good idea to base your decision, which module to synchronize, on the unit where it is easier for you to reprogram. As to our example, rewriting FLASH 28F400 is more difficult than 95P08. Therefore it may be a good choice to generate file for the ECU module and write it back. Click the bottom button "Make Synchro†and save the new ECU file. In any case the newly generated file has to be written back in its corresponding module, which will allow both modules to work together once again.
After the new file is generated it is advised to check the synchronization before applying it to the module. Following the example, Press "Load File†under CEM section within the software and select the newly generated by Tango file, which was created in the step above:
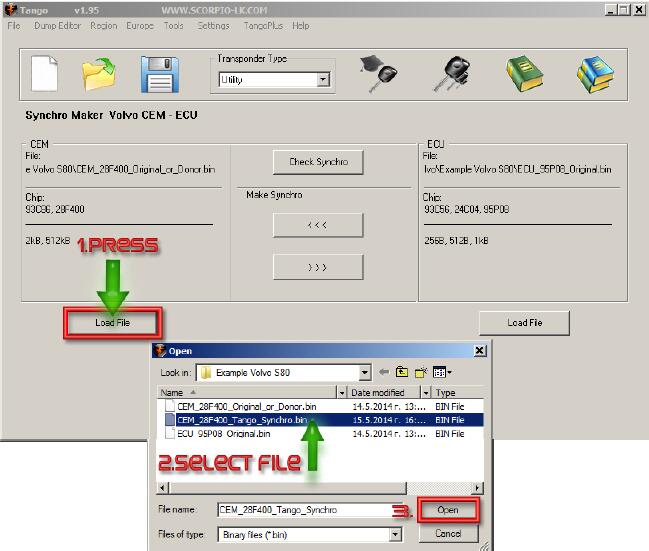
After that press Check Synchro:
After this step just write back the new file in the corresponding module.
Posted by: Emily white at
09:15 AM
| No Comments
| Add Comment
Post contains 576 words, total size 7 kb.

2. Choose "Read security codeâ€

3. Switch ignition off and click "OK†to continue.

4. Follow the tips, click "OK†and switch ignition on immediately.

5. After several times turn ignition off and on, XTOOL X-100 PAD Tabletkey programmer successfully read out the pin code for Citroen Berlingo!

Posted by: Emily white at
09:05 AM
| No Comments
| Add Comment
Post contains 104 words, total size 2 kb.
January 31, 2020
Odo Master is a new Android based 5†tablet, specialized for cluster calibration and oil service reset. The device inherits the latest technology from OBDSTAR with various advantages of easy-to-use, wide model coverage, fast operation and durable features which can meet the actual needs of different users such as automobile repair plants and fast repair shops.
Obdstar OdoMaster , the latest universal odometer correction tool, is good for Chrysler to correct odometer. It has a wide vehicle coverage of Chrysler, from 1998 to 2019.
Obdstar Odo Master Chrysler Car List
| Car Make | Model | Year | Dashboard /BSI |
| Chrysler | 1500 | 2002-2005 | |
| Chrysler | 1500 | 2000-2001 | |
| Chrysler | 200 | 2015 | |
| Chrysler | 200 | 2010- | |
| Chrysler | 2500 | 2003-2005 | |
| Chrysler | 300 | 2015- | |
| Chrysler | 300C | 2018- | |
| Chrysler | 300C | 2015 | D70F3525 |
| Chrysler | 300C | 2011- | |
| Chrysler | 300C | -2010 | |
| Chrysler | 300M | 2001-2004 | |
| Chrysler | 300M | 1998-2000 | |
| Chrysler | 3500 | 2003-2005 | |
| Chrysler | Aspen | 2006- | |
| Chrysler | Avenger | 2010- | |
| Chrysler | Avenger | 2007-2009 | |
| Chrysler | Caliber | 2009- | |
| Chrysler | Caliber | 2006-2008 | |
| Chrysler | Caravan | 2012- | |
| Chrysler | Caravan | 2011 | |
| Chrysler | Caravan | 2008-2010 | |
| Chrysler | Caravan | 2001-2007 | |
| Chrysler | Charger | 2018- | |
| Chrysler | Charger | 2016- | |
| Chrysler | Charger | 2015 | D70F3525 |
| Chrysler | Charger | 2011- | |
| Chrysler | Charger | 2004- | |
| Chrysler | Cherokee | 2018- | |
| Chrysler | Cherokee | 2015 | |
| Chrysler | Commander | 2018 | |
| Chrysler | Commander | 2017 | |
| Chrysler | Commander | 2005- | |
| Chrysler | Compass | 2018- | |
| Chrysler | Compass | 2018 | |
| Chrysler | Compass | 2008- | |
| Chrysler | Compass | 2005-2007 | |
| Chrysler | Concord | 2001-2004 | |
| Chrysler | Concord | 1998-2000 | |
| Chrysler | Dakota | 2004- | |
| Chrysler | Dakota | 2001-2003 | |
| Chrysler | Dart | 2012- | |
| Chrysler | Durango | 2018- | |
| Chrysler | Durango | 2014- | |
| Chrysler | Durango | 2011- | |
| Chrysler | Durango | 2007-2010 | |
| Chrysler | Durango | 2004-2006 | |
| Chrysler | Durango | 2001-2003 | |
| Chrysler | Grand Cherokee | 2018- | |
| Chrysler | Grand Cherokee | 2014- | |
| Chrysler | Grand Cherokee | 2011- | |
| Chrysler | Grand Cherokee | 2005-2010 | |
| Chrysler | Grand Cherokee | 2002-2004 | |
| Chrysler | Challenger | 2018- | |
| Chrysler | Challenger | 2015 | D70F3525 |
| Chrysler | Intrepid | 2001-2004 | |
| Chrysler | Intrepid | 1998-2000 | |
| Chrysler | Journey | 2011-2012 | |
| Chrysler | Journey | 2008- | |
| Chrysler | LHS | 2001-2004 | |
| Chrysler | LHS | 1998-2000 | |
| Chrysler | Liberty | 2008- | |
| Chrysler | Liberty | 2002-2007 | |
| Chrysler | Magnum | 2004- | |
| Chrysler | Neon | 2001- | |
| Chrysler | Neon | 1999-2001 | |
| Chrysler | New Sebring | 2007- | |
| Chrysler | New Sebring | 2001-2006 | |
| Chrysler | Nitro | 2006- | |
| Chrysler | Pacifica | 2018- | |
| Chrysler | Pacifica | 2017- | |
| Chrysler | Pacifica | 2007- | |
| Chrysler | Pacifica | 2003-2006 | |
| Chrysler | Patriot | 2014- | |
| Chrysler | Patriot | 2006- | |
| Chrysler | PT Cruiser | 2006- | |
| Chrysler | PT Cruiser | 2002-2005 | |
| Chrysler | PT Cruiser | 999-2001 | |
| Chrysler | Ram | 2018- | |
| Chrysler | Ram | 2013- | |
| Chrysler | Ram | 2011- | |
| Chrysler | Ram | 2009- | |
| Chrysler | Ram | 2006-2008 | |
| Chrysler | Ram-700 | 2015 | |
| Chrysler | Renegade | 2018- | |
| Chrysler | Sebring | 2010- | |
| Chrysler | Sebring | 2007-2009 | |
| Chrysler | Sebring | 2001-2006 | |
| Chrysler | SRI | SRI-6 2010- | |
| Chrysler | SRI | SRI-5 2005- | |
| Chrysler | SRI | SRI-4 2005- | |
| Chrysler | SRI | SRI-3 2005- | |
| Chrysler | SX | SX-2.0 2001- | |
| Chrysler | TJ/JY/CJ | 2007 | |
| Chrysler | TJ/JY/CJ | 2003-2005 | |
| Chrysler | Voyager | 2015- | |
| Chrysler | Voyager | 2008 | |
| Chrysler | Voyager | 2001-2007 | |
| Chrysler | Wrangler | 2007- | |
| Chrysler | Wrangler | 2003-2005 |
Posted by: Emily white at
08:14 AM
| No Comments
| Add Comment
Post contains 420 words, total size 18 kb.
Q: I want to change mileage on my 2015 PRIUS car, which device is best to use? Where to buy?
A: If you just correct odometer, recommend you to use OriginalYanhua DigiMaster 3 with unlimited Tokens.
Digimaster III Feather :
1)Best mileage correction tool in the world, covers more than 1000 models(1998-2016) in European, American, Japanese and Korea
2)Digimaster III can adjust mileage via OBD2 or Dashboard
3) D3 supports audio decoding, airbag resetting, engine ECU resetting, IMMO, programming key for Benz &BMW etc
4)Newest Version: V1.8.1902.26
5)New version, new package, 6.5KG,save more ship cost
6)No need activate, install well before ship
7)100% original and One-click Online free Update. No tokens limited
Digimaster III Odometer correction vehicle coverage:
Include cars from European, American, Japanese and Korea. Detail list as follows:
Alfa/ Cadillac/ Daihatsu/Aston/ Martin/ Chrysler/ Honda/ Audi/ Ford/ Hyundai/ Bentley/ GM/ ISUZU/ BMW/ Lincoln/ KIA/ Benz/ Lexus/ Citroen/ Mazda/ FIAT/ Mitsubishi/ Ferrari/ Nissan/ Jaguar/ Proton/ Lamborghini/ SSangYong/ Lancia/ Subaru/ Lotus/ SUZUKI/ Man/ Toyota/ Opel/ Peugeot/ Porsche/ Renault/ Rover/ Saab/ Skoda/ Volvo/ Volkswagen/ Wiesmann/ Truck/ Forkman/ Maserati
Other vehicle: Motorcycle
Digimaster 3 Newest Update Version : V1.8.1902.26 (2019-02-27)
Add car model for airbag resetting
SUZUKI 38910-59J71-000
MG_ROVER 10003952-01
Infiniti 988201WW2A
Digimaster 3 mileage programmer newly added airbag resetting and immo function cars.
Posted by: Emily white at
08:04 AM
| No Comments
| Add Comment
Post contains 220 words, total size 2 kb.
January 23, 2020
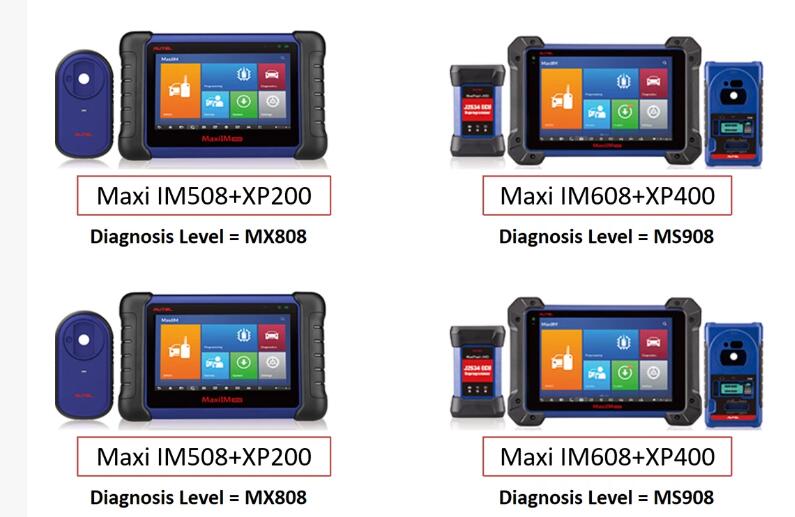
Differences Between Autel MaxiIM IM608 & MaxiIM IM508, Which Key Programmer is Your Better Choice?
Autel MaxiIM IM508 & Autel IM608 is the best professional car key programming tools in the market (or in all of Autel products) for technicians and professional mechanics.
In this review, I will provide you with the complete comparison chart of Autel IM508 IM608 and most detailed bout this Autel key programming tools.
Next, you will read
Autel MaxiIM Key Programming Tools Overview
1.1Autel IM508
1.2Autel IM608
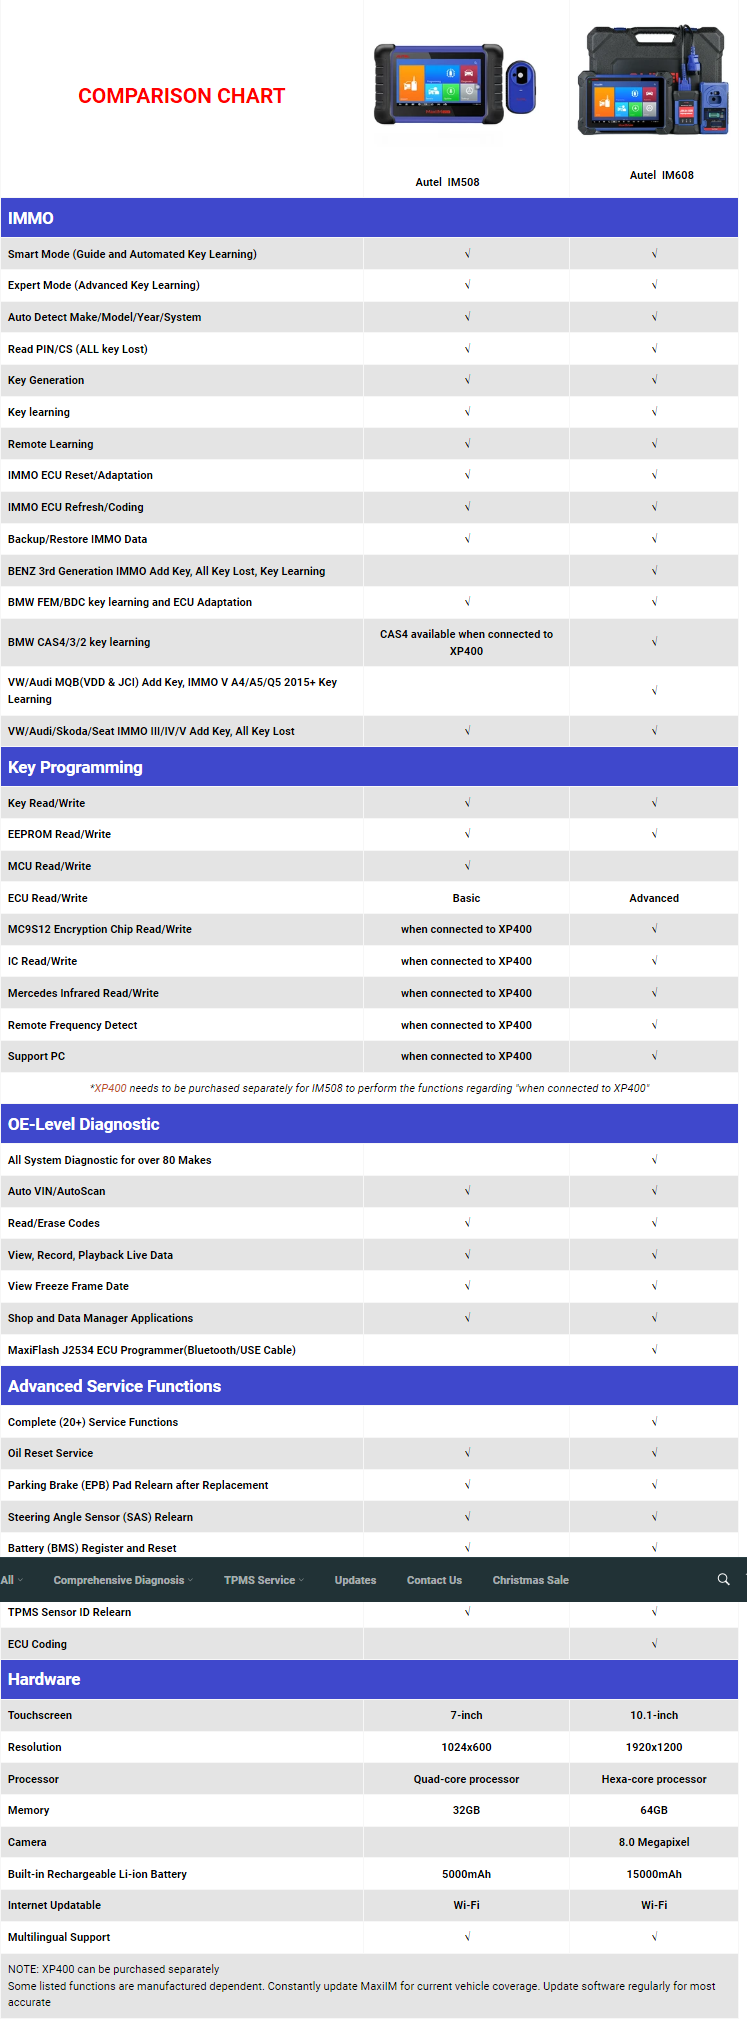
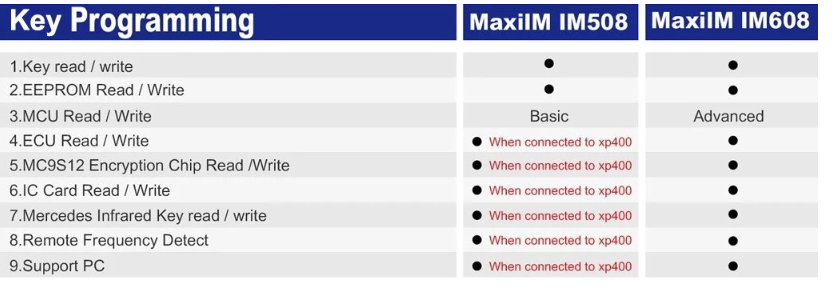
Autel IM608 vs MaxiIM IM608 Comparison Chart
2.1 IMMO Functions
2.2 Key Programming
2.3 OE-Level Diagnostic
2.4 Advanced Service
2.5 Hardware Spec
Autel MaxiIM Reviews
3.1 Autel IM508 Review
3.2 Autel IM608 Review
Autel MaxiIM Key Programming Tools Overview
Autel MaxiIM Series Key Programming & ECU Coding Scanners include IM600, IM100, IM508 and IM608, and new arrivals XP400, APB112
Autel IM508
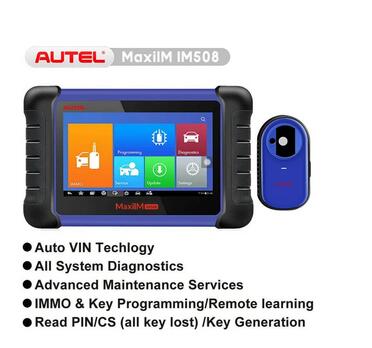
* MaxiIM IM508 is a fast, easy-to-use, and ultraportable immobilizer and key programming device.
* Equipped with the XP200 key programmer, IM508 is capable of providing
extraordinary service functions for the immobilizer system.
* Together with the ability to quickly diagnose all modules of the
majority of the makes and models on the market, IM508 provides you with
superior special functions.
* IM508 is the perfect solution for shops and technicians who demand affordable and powerful IMMO and diagnostic services.
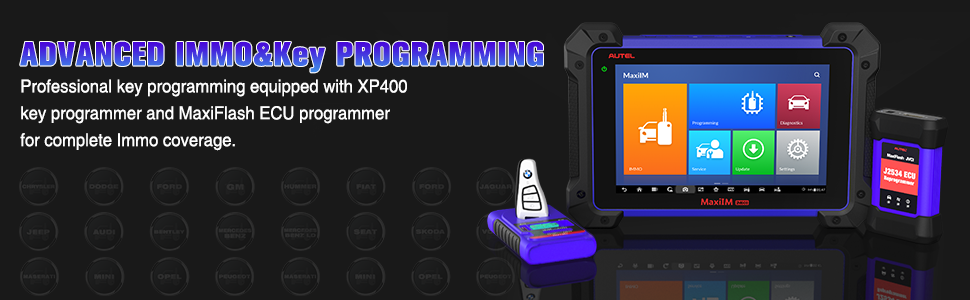
Autel IM608
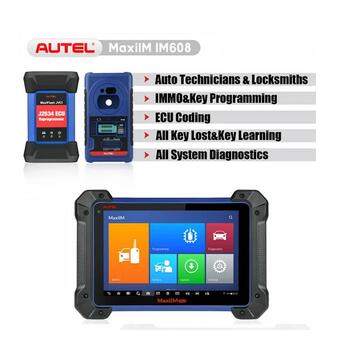
* MaxiIM IM608 is the most advanced and the unique all in one key
programming and diagnostic tool that combines advanced key programming,
all systems diagnostics, and advanced services in one Android-based
10.1-inch touchscreen tablet.
* Equipped with XP400 key programmer and MaxiFlash ECU programmer to
provide complete coverage of IMMO and programming functions.
* Together with the ability to quickly diagnose all modules of the
majority of the makes and models on the market, IM608 provides you with
all special functions.
* It is the unprecedented key programming and diagnostic tool that you ever wanted.
Autel IM608 vs MaxiIM IM608 Comparison Chart
Autel MaxiIM Reviews
Autel has lots of great tools and their scanner is well known for its quality. Fairly speaking, The Autel IM508 and IM608 professional key programmer is another excellent tool! But for better to choose a most suit key programmer. For able to choose the most suite key programmer when shops and technicians to purchase. There two reviews for reference.
Autel IM508 Review
Autel MaxiIM IM508 is built with Android 4.4.4 and Cortex-A9 processor. 7-inch LCD capacitive touchscreen with 1024×600 resolution, really like a tablet. If you know how to use a smartphone or tablet you can easily find your way around the IM508.
In diagnostic section: Similar to MK808BT/MX808 the Autel MaxiIM IM508
delivers OE-level diagnosis that includes basic, advanced and
professional functions. This mid-range device resembles a tablet, which
makes it rather easy and fun to operate.
In key programming section: IM508 is one of the best professional car key programming tools in all of Autel MaxiIM products though lower key programming than IM608. When you equipped Autel IM508 with XP400, then there no difference between Autel IM608 and IM508 in key programming section.
Autel IM608 Review
Built with Samsung Exynos hex-core Processor, the Autel MaxiIM IM608 runs on the Android operating system (OS), which is the perfect scanner for busy and professional mechanics as well as technicians. Let the price not deter you from acquiring this fast, efficient, and comprehensive diagnostic scan tool.
In diagnostic section: Autel MaxiIM IM608 diagnosis level is equal to MS908 / MK908. MaxiIM IM608 is the most advanced diagnostic tool that combines advanced key programming, all systems diagnostics, and advanced services in one Android-based 10.1-inch touchscreen tablet. Only A few professional scanners can be compared to the Autel MaxiIM IM608 when it comes to performance and ease of use.
In key programming section: IM608 is the best professional car key programming tools in all of Autel MaxiIM products.
Posted by: Emily white at
08:32 PM
| No Comments
| Add Comment
Post contains 655 words, total size 7 kb.
January 05, 2020
Big news!!! FVDI SVCI 2019 and FVDI SVCI 2020 new arrived! Here is the latest comparison chart for each FVDI version.
| SVCI (FVDI) Hardware Comparison | |||||
| Version | FVDI 2014 | FVDI 2015 | SVCI 2018 | SVCI 2019 | SVCI 2020 |
| Support software | AVDI 18 software | AVDI 18 software | AVDI 18 software+ VVDI2 software | AVDI 18 software+ VVDI2 software | AVDI 21 software+ VVDI2 software |
| Software version | One version | two version | two version | three version | three version |
| Support the years of
Vehicle manufacture |
before 2014MY | before 2015MY | before 2015MY | before 2019MY for VW/Mercedes/BWM | before 2019MY |
| connection network | NO | YES | YES | NO | NO |
| Online activate | NO | YES | YES | NO | NO |
| useful life | forever | 5 years | 5 years | forever | forever |
| stability | Strong | general | general | Strong | Strong |
| needs repaired | No | may be | may be | No | No |
| SVCI (FVDI) Software Comparison | |||||
| Version | FVDI 2014 | FVDI 2015 | FVDI 2018 | SVCI 2019 | SVCI 2020 |
| Jaguar/Land Rover | x | x | 0 | 0 | v2.6 |
| Suzuki | x | x | x | x | v1.2 |
| Daihatsu | x | x | x | x | v1.4 |
| VVDI | x | x | v1.2.2 | v1.2.2
v4.2.1 |
v1.2.2 |
| VW/Audi/Skoda/Seat | v18.0 | v18.0
v24.0 |
v18.0
v24.0 |
v18.0
v24.0 v37.0 |
v18.0
v24.0 v37.0 |
| BMW/Mini | v10.4 | v10.4 | v10.4 | v10.4
v10.5 |
v10.4
v10.5 |
| Mercedes_Benz/Smart/
MAYBACH |
v5.11 | v5.11
v7.0 |
v5.11
v7.0 |
v5.11
v7.0 v10.8 |
v5.11
v7.0 v10.8 |
| Renault/Dacia | v5.2 | v5.2
v6.3 |
v5.2
v6.3 |
v5.2
v6.3 |
v5.2
v6.3 v7.4 |
| Peugeot/Citroen | v5.10 | v5.10
v6.7 |
v5.10
v6.7 |
v5.10
v6.7 |
v5.10
v6.7 v8.0 |
| Fiat/Lancia/Alfa/FCA | v5.1 | v5.1
v5.7 |
v5.1
v5.7 |
v5.1
v5.7 |
v5.1
v5.7 v7.6 |
| Opel/Vauxhall | v5.8 | v5.8
v6.6 |
v5.8
v6.6 |
v5.8
v6.6 |
v5.8
v6.6 v7.5 |
| Ford/Mazda | v4.9 | v4.9 | v4.9 | v4.9 | v4.9
v7.7 |
| Chrysler/Doge/Jeep | v3.3 | v3.3 | v3.3 | v3.3 | v3.3
v3.4 |
| Toyota/Lexus/Scion | v9.0 | v9.0 | v9.0 | v9.0 | v9.0
v11.7 |
| Nissan/Infiniti | v4.3 | v4.3 | v4.3 | v4.3 | v4.3
v5.7 |
| Hyundai/KIA | v2.1 | v2.1 | v2.1 | v2.1 | v2.1
v4.4 |
| Volvo | v4.3 | v4.3 | v4.3 | v4.3 | v4.3
v6.2 |
| Mitsubishi Motors | v2.1 | v2.1 | v2.1 | v2.1 | v2.1
v3.7 |
| Porsche | v4.1 | v4.1 | v4.1 | v4.1 | v4.1
v7.1 |
| DAF | v1.0 | v1.0 | v1.0 | v1.0 | v1.0 |
| Bikes/Snowmobiles/
Water scooters |
v1.2 | v1.2 | v1.2 | v1.2 | v1.2
v2.0 |
| TagKeyTool | v6.2 | v6.2 | v6.2 | v6.2 | v6.2 |
| SVCI (FVDI) Supports the Years of Vehicle Models | |||||
| Version | FVDI 2014 | FVDI 2015 | SVCI 2018 | SVCI 2019 | SVCI 2020 |
| Jaguar/Land Rover | x | x | x | x | before 2016MY |
| Suzuki | x | x | x | x | before 2019MY |
| Daihatsu | x | x | x | x | before 2019MY |
| VW/Audi/Skoda/Seat | before 2014MY | before 2015MY | before 2015MY | before 2015MY | before 2019MY |
| BMW/Mini | before 2014MY | before 2015MY | before 2015MY | before 2019MY | before 2019MY |
| Mercedes_Benz/Smart/
MAYBACH |
before 2014MY | before 2015MY | before 2015MY | before 2019MY | before 2019MY |
| Renault/Dacia | before 2014MY | before 2015MY | before 2015MY | before 2019MY | before 2019MY |
| Peugeot/Citroen | before 2014MY | before 2015MY | before 2015MY | before 2015MY | before 2019MY |
| Fiat/Lancia/Alfa/FCA | before 2014MY | before 2015MY | before 2015MY | before 2015MY | before 2019MY |
| Opel/Vauxhall | before 2014MY | before 2015MY | before 2015MY | before 2015MY | before 2019MY |
| Ford/Mazda | before 2014MY | before 2015MY | before 2015MY | before 2015MY | before 2019MY |
| Chrysler/Doge/Jeep | before 2014MY | before 2015MY | before 2015MY | before 2015MY | before 2019MY |
| Toyota/Lexus/Scion | before 2014MY | before 2015MY | before 2015MY | before 2015MY | before 2019MY |
| Nissan/Infiniti | before 2014MY | before 2015MY | before 2015MY | before 2015MY | before 2019MY |
| Hyundai/KIA | before 2014MY | before 2015MY | before 2015MY | before 2015MY | before 2019MY |
| Volvo | before 2014MY | before 2015MY | before 2015MY | before 2015MY | before 2019MY |
| Mitsubishi Motors | before 2014MY | before 2015MY | before 2015MY | before 2015MY | before 2019MY |
| Porsche | before 2012MY | before 2012MY | before 2012MY | before 2015MY | before 2019MY |
| DAF | before 2012MY | before 2012MY | before 2012MY | before 2012MY | before 2019MY |
| Bikes/Snowmobiles/
Water scooters |
before 2012MY | before 2012MY | before 2012MY | before 2015MY | before 2019MY |
| TagKeyTool | before 2015MY | before 2015MY | before 2015MY | before 2015MY | before 2015MY |
| VVDI | before 2015MY | before 2015MY | before 2015MY | before 2015MY | before 2015MY |
In conclusion:
Compared with all the FVDI version, FVDI 2020 is the winner. It has the advantages below.
Hardware:
1.Support AVDI 21 software+ VVDI2 software
2.Support the years of Vehicle manufacture before 2019MY
3.It’s same as FVDI 2019 and FVDI 2014, all have strong stability and can be used forever no need network, online activation and repairing.
Software:
1.Can support Jaguar/Land Rover, Suzuki, Daihatsu version while other FVDI cannot
2.Support more software version for Renault/Dacia, Peugeot/Citroen, Fiat/Lancia/Alfa/FCA, Opel/Vauxhall, Ford/Mazda, Chrysler/Doge/Jeep, Toyota/Lexus/Scion, Nissan/Infiniti, Hyundai/KIA, Volvo, Mitsubishi Motors, Porsche and Bikes/Snowmobiles/Water scooters
Supports the years of vehicle models:
1.FVDI 2020 can support Jaguar/Land Rover before 2016MY, Suzuki and Daihatsu before 2019MY, but other FVDI cannot
2.Except BMW/Mini, Mercedes_Benz/Smart/MAYBACH, TagKeyTool and VVDI, SVCI 2020 can support other vehicles in the comparison chart before 2019MY
New arrived Overlook:
2020 SVCI FVDI:
2019 SVCI FVDI
Posted by: Emily white at
10:39 AM
| No Comments
| Add Comment
Post contains 731 words, total size 19 kb.
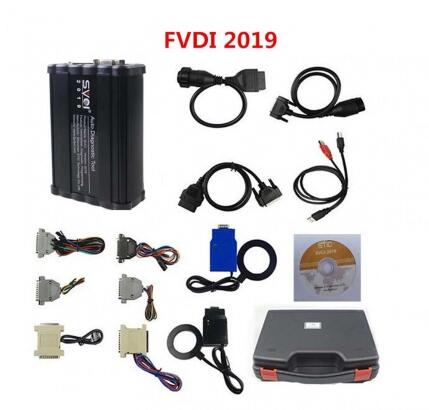
January 03, 2020
Ford IDS Release Level IDS-115. Support online programming function
also included calibration file, online programming needs online account.
Also included incode calculator for old model key programming or module installation new series need a dealer account.
Ford IDS V115 Feature:
1. Latest version: V115
2. Multi-Language: English, French, Spanish, Italian, Polish, Portuguese etc..
3. OS: Support Windows 7 32 64 bits(recommend 64bit).
4. Compatible with all Ford VCM 2 or VXDIAG NANO Ford IDS sale in the market.
5. Support Online programming, but youself must have online account, we do not provide this account.
6. No need shipping, after you pay, contact us for remote help to install and activate it.
Native Windows 7 32 64 bits installation (not vmware or other virtual software)
Installation and activation via teamviewer only without shipping the CD.
Yesterday, one user obtained remote support, here attach two images:
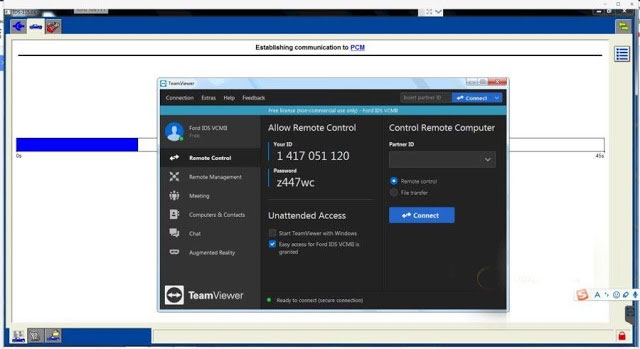

all vcm1-vcm2- original or clone works
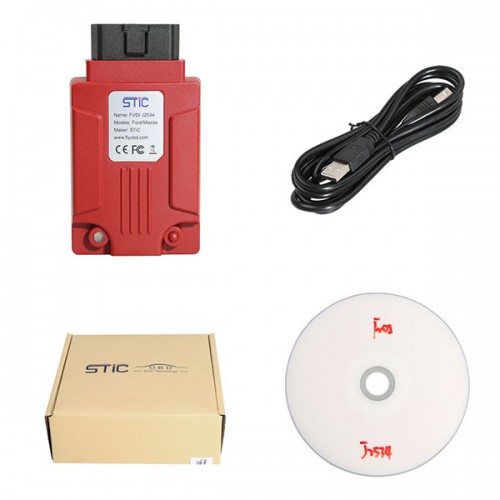
FLY SVDI Ford IDS V115 works
VXDIAG NANO Ford IDS: is testing
Image 1: best vcm2 clone.

Image 2: FLY SVDI Ford IDS
Functions:
* Automatic vehicle recognition
* Read & Clear Diagnostic Trouble Codes (DTCs)
* Live Data-stream with Recording & Playback Functions for Main ECUs
* Guided Fault Finding
* New Software Re-flash for Existing ECUs
* Programming & Installation of new ECUs (PCM, ABS, Instrument Cluster, Air Bag, Fuel Pumps, etc.)
* Program New Keys (for additional fee)
* Injector Coding
* Set, Adjust or Remove Speed Governors
* DPF Regeneration
* Brake Bleeding
* Steering Angle Resets
* All Other Offline and online Dealer Functions
Posted by: Emily white at
08:20 AM
| No Comments
| Add Comment
Post contains 267 words, total size 3 kb.
December 20, 2019
| Buick Excelle | |||
| Workhorse 6 – W22 Series | 4WAL4 Sensor/ABS | 4WAL – not implemented | |
| Medium Duty Truck Chevrolet, GMC C – WT5500 | EBCM | Kw309 – not implemented | |
|
2005 |
Chevrolet Optra | PSCM | Kw94 – not implemented |
| Workhorse4 – P42 Series, 5 – P32 Series, 6 – W22 Series, 7 – W52 Series | 4WAL3 Sensor or 4 Sensor/ABS | 4WAL – not implemented | |
| Medium Duty Truck Chevrolet, GMC C – WT5500 | EBCM | Kw309 – not implemented | |
|
2004 |
Chevrolet Optra | SSS | Kw94 – not implemented |
| Workhorse4 – P42 Series, 5 – P32 Series, 6 – W22 Series, 7 – W52 Series | 4WAL3 Sensor or 4 Sensor/ABS | 4WAL – not implemented | |
| Medium Duty Truck Chevrolet, GMC C – WT5500 | EBCM | Kw309 – not implemented | |
| Medium Duty Truck Chevrolet, GMC C – WT5500, Isuzu (3) 7.8L L6 LG4 | ECM | J1708 – not implemented | |
|
1996-2003 |
Chevrolet CAVALIER, ALIBU, IMPALA, MONTE CARLO, CORVETTE |
All Systems Under ENC (if ENC is installed) |
ENC – not implemented |
| LD Trucks, Blazer, Jimmy, Suburban, Tahoe, Yukon, Bravada | |||
| Chevrolet and GMC Van | |||
| Saturn Level1-Level3, L200 and L300 | |||
| Cadillac CTS, STS, SLS, XLR, DEVILLE | |||
| Buick ALERO, PARK AVENUE, LE SABRE, REGAL, CENTURY | |||
| Oldsmobile AURORA | |||
| Pontiac BONEVILLE, SUNFIRE, GRAND AM, VIBE, GRAND PRIX | |||
|
2003 |
Chevrolet Optra | SSS | Kw94 – not implemented |
| Workhorse p, 6 – W22 Series, 7 – W52 Series | 4WAL3 Sensor or 4 Sensor/ABS | 4WAL – not implemented | |
| Medium Duty Truck Chevrolet, C – WT5500, Isuzu FFR | EBCM | Kw309 – not implemented | |
| Medium Duty TruckIsuzu (3) 7.8L L6 LG4, C – WT5500 | ECM | J1708 – not implemented | |
| 2002 | LD Trk, MPV, Incomplete C (Equal to or Over 15000 GVW), G, P | 4WAL3 Sensor or 4 Sensor/ABS | 4WAL – not implemented |
| Medium Duty Truck 6 – W22 Series, 7 – W52 Series, T – B7 Chassis, D – C Series, C – T Series | |||
| Medium Duty Truck A – W5 Series, Isuzu FFR | EBCM | Kw309 – not implemented | |
| Medium Duty TruckIsuzu (3) 7.8L L6 LG4, C – WT5500 | ECM | J1708 – not implemented | |
|
2000-2001 |
GEO METROEngine Type (2) 1.3L L4 LY8 |
ECM, TCM | ISOSDL – not implemented |
| LD Trk, MPV, Incomplete C (Equal to or Over 15000 GVW), G, P | 4WAL3 Sensor or 4 Sensor/ABS | 4WAL – not implemented | |
| Medium Duty Truck 6 – W22 Series, 7 – W52 Series, T – B7 Chassis, D – C Series, C – T Series | |||
| Medium Duty Truck A – W5 Series, Isuzu FFR | EBCM | Kw309 – not implemented | |
| Medium Duty TruckIsuzu (3) 7.8L L6 LG4, C – WT5500 | ECM | J1708 – not implemented | |
|
1999 |
GEO METROEngine Type (2) 1.3L L4 LY8 |
ECM, TCM | ISOSDL – not implemented |
| LD Trk, MPV, Incomplete C (Equal to or Over 15000 GVW), G, P | 4WAL3 Sensor or 4 Sensor/ABS | 4WAL – not implemented | |
| Medium Duty TruckT – B7 Chassis, D – C Series, C – T Series | |||
| Medium Duty Truck A – W5 Series, Isuzu FFR | EBCM | Kw309 – not implemented | |
| Medium Duty TruckIsuzu (3) 7.8L L6 LG4, C – WT5500 | ECM | J1708 – not implemented | |
| LD Trk, MPV, Incomplete (K) 5.7L V8 L05 Manual | ECM | 160Baud/Uart – not implemented | |
|
1998 |
GEO METROEngine Type (2) 1.3L L4 LY8 |
ECM, TCM |
ISOSDL – not implemented |
| GEO TRACKER (6) 1.6L L4 L01 | |||
| LD Trk, MPV, Incomplete C (Equal to or Over 15000 GVW), G, P | 4WAL3 Sensor or 4 Sensor/ABS | 4WAL – not implemented | |
| Medium Duty Truck Engine TypeT – B7 Chassis, D – C Series, C – T Series | |||
| LD Trk, MPV, Incomplete Engine Type | ECM | 160Baud/Uart – not implemented |
| (7) 4.1L L6 LH9(K) 5.7L V8 L05 Manual | |||
| Medium Duty Truck Engine Type |
|||
|
1997 |
GEO METROEngine Type (2) 1.3L L4 LY8 |
ECM, TCM |
ISOSDL – not implemented |
| GEO TRACKER (6) 1.6L L4 L01 | |||
| LD Trk, MPV, Incomplete C, E, G, K, L, M, P, S, T | 4WAL3 Sensor or 4 Sensor/ABS | 4WAL – not implemented | |
| Medium Duty Truck Engine Type T – B7 Chassis, D – C Series, C – T Series | |||
| Medium Duty TruckEngine Type – (P) 6.0L V8 LS0; (M) 7.0L V8 LR0 | ECM | 160Baud/Uart – not implemented | |
|
1996 |
GEO METROEngine Type: (6) 1.0L L3 LP2; (2) 1.3L L4 LY8 | ECM, TCM | ISOSDL – not implemented |
| GEO TRACKER (6) 1.6L L4 L01 | |||
| LD Trk, MPV, Incomplete C, G, K, L, M, S | 4WAL3 Sensor or 4 Sensor/ABS | 4WAL – not implemented | |
| Medium Duty Truck Engine Type |
ECM | 160Baud/Uart – not implemented |
Note:
| 4WAL 3 Sensor | 4 Wheel 3 sensor Antilock Sensor |
| 4WAL 4 Sensor | 4 Wheel 4 sensor Antilock Sensor |
| CCSM | Climate Control Seat Module |
| EBCM | Electronic Brake Control Module |
| ECM | Engine Control Module |
| ENC | Entertainment And Comfort |
| LD | Light Duty |
| MD | Medium Duty |
| PSCM | Power Steering Control Module |
| SSS | Speed Sensitive Steering |
| TCM | Transmission Control Module |
| a | PSCM | Kw94 – not implemented | |
| Workhorse 6 – W22 Series | EBCM | 4WAL – not implemented | |
|
2010 |
Buick Lucerne | CCSM | SDL – not implemented |
| Cadillac DTS | |||
| Cadillac Incomplete Hearse, Limousine | |||
| Chevrolet Optra | PSCM | Kw94 – not implemented | |
| Holden Viva | |||
| Workhorse 6 – W22 Series | EBCM | 4WAL – not implemented | |
|
2008-2009 |
Buick Lucerne | CCSM | SDL – not implemented |
| Cadillac DTS | |||
| Cadillac Incomplete Hearse, Limousine | |||
| Chevrolet Optra | PSCM | Kw94 – not implemented | |
| Buick Excelle | |||
| Holden Viva | |||
| Workhorse 6 – W22 Series | EBCM | 4WAL – not implemented | |
| Medium Duty Truck Chevrolet, GMC C – WT5500 | EBCM | Kw309 – not implemented | |
|
2007 |
Buick Lucerne | CCSM | SDL – not implemented |
| Cadillac DTS | |||
| Chevrolet Optra | PSCM | Kw94 – not implemented | |
| Workhorse 6 – W22 Series | EBCM | 4WAL – not implemented | |
| Medium Duty Truck Chevrolet, GMC C – WT5500 | EBCM | Kw309 – not implemented | |
| 2006 | Buick Lucerne | CCSM | SDL – not implemented |
| Cadillac DTS | |||
| Chevrolet Optra | PSCM | Kw94 – not implemented |
Posted by: Emily white at
03:20 AM
| No Comments
| Add Comment
Post contains 964 words, total size 21 kb.
December 04, 2019
MB SD Connect Compact 5 is the newest car and truck diagnostic tool for benz. it is newest than mb star c4 in the market.
mb star c5 also support WIFI connect. multi-language :English, Bulgarian, Danish, Greek, Spanish, French, Italian, Korean, Polish, Romanian, Serbo-Croatian, Turkish, Czech, German, Finnish, Hungaria, Japanese, Dutch, Portuguese, Russian, Swedish, Chinese
New MB SD Connect Compact 5 Star Diagnosis not only support K line diagnose and CAN BUS,but also UDS diagnose protocol. Because old MB STAR C4 main board do not have UDS chip, so old MB STAR C4 can not support it;
mb star c5 support vehicles list as following:
MB SD C5 Support Mercedes Benz Cars After Year 2000
Passenger Car Support List:
A(176), A(169), A(16![]() , B(246), B(245), CLC(117), C(204) C(203),
C(202), 190(201), E(212), E(211), E(210), 124(124), S(222),
S(221), S(220), S(140), S(126), E(207), CLK(209), CLK(20
, B(246), B(245), CLC(117), C(204) C(203),
C(202), 190(201), E(212), E(211), E(210), 124(124), S(222),
S(221), S(220), S(140), S(126), E(207), CLK(209), CLK(20![]() ,
CLS(21
,
CLS(21![]() , CLS(219), CL(216), CL(215), CL(140) SLK(172), SLK(171),
SLK(170), SL(231), SL(230), SL(129), SL(107), SLS(197), M(166),
M(164), M(163), G(463), G(461), E(212), E(211), E(210),
124(124), S(222), S(221),S(220), S(140), CLK(209), CLK(20
, CLS(219), CL(216), CL(215), CL(140) SLK(172), SLK(171),
SLK(170), SL(231), SL(230), SL(129), SL(107), SLS(197), M(166),
M(164), M(163), G(463), G(461), E(212), E(211), E(210),
124(124), S(222), S(221),S(220), S(140), CLK(209), CLK(20![]() ,
CLS(21
,
CLS(21![]() , CLS(219), CL(216), CL(215), CL(140), SLK(172), SL(231),
SL(230), SL(129), SL(107),SLS(197), M(166), M(164), M(163),
G(460), GL(164), GLK(204), R(251)
, CLS(219), CL(216), CL(215), CL(140), SLK(172), SL(231),
SL(230), SL(129), SL(107),SLS(197), M(166), M(164), M(163),
G(460), GL(164), GLK(204), R(251)
Van Support List:
MB 100(631), T1, SprinterIII, SprinterII, SprinterI, Sprinter900,
Citan, Vito(639), Vito(63![]() , V(63
, V(63![]() , Viano(639), T2, Vario,
Vaneo(414)
, Viano(639), T2, Vario,
Vaneo(414)
Truck Support List:
Actros963/4, Actros2,3, AtegoIII, AtegoII, AxorII, Eonic, Zetros,
Actros, Atego Light, Atego Heavey, HPN M96, Atron, HPN M2000,
SKL, FSK, Further model series
Unimog Support List:
U20, UGN, UHN
Bus Support List:
TRAVEGO, INTOURO, INTEGRO, CITARO, CAPACITY, CITO, TOURISMO, O350/O403, CONECTO, O404, O405-O408,
Minibus, OC500, TOURO, TOURINO, MBC, MULITEGO, O500, O500/OH, OH, OH368, OF, OF384, LO, O400,
FURTHER MODEL SERIES
Super Sports Car Support List:
SLR(199)
https://www.obd2tool.com/blog/2015/11/27/newest-for-benz-diagnostic-tool-mb-star-c5/
Posted by: Emily white at
08:28 AM
| No Comments
| Add Comment
Post contains 280 words, total size 3 kb.
November 19, 2019
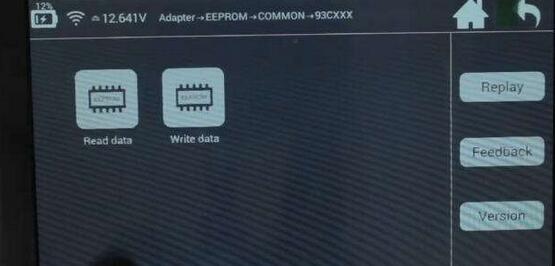
Lonsdor K518ISE or K518S key programmer connecting the Kprog2 to be able to flash an eprom soic chip AT93C56.
Steps:
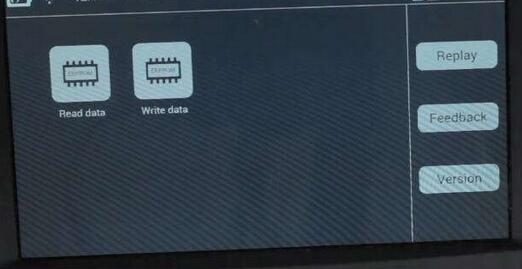
step 1: read eeprom data
step 2: edit data in hex editor
step 3: write data
step 4: read data again
step 5: check data in hex editor
in detail…
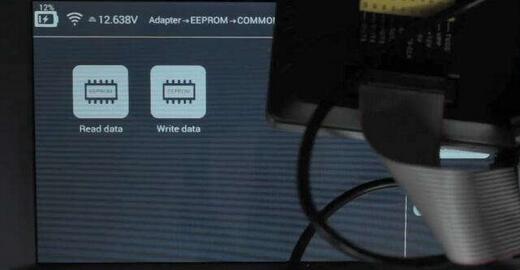
step 1: read eeprom data
eeprom connection to Kprog is done and ready for reading data using Lonsor k518ise
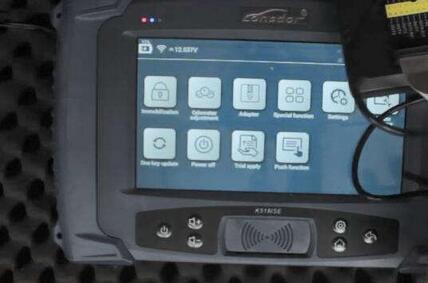

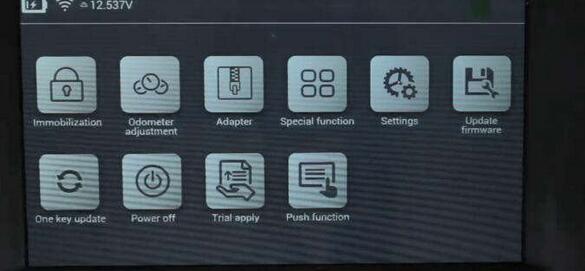
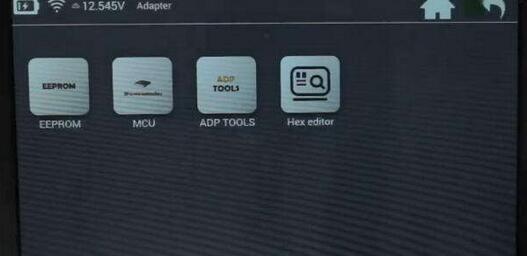
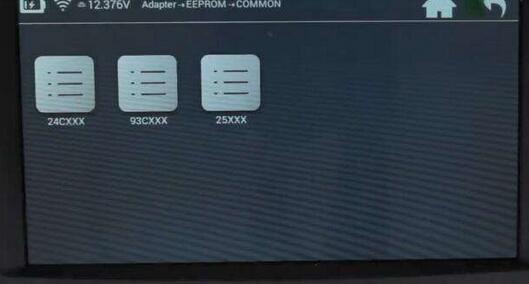
settings – adpater – eeprom – common – 93CXXX – read data

 -
-
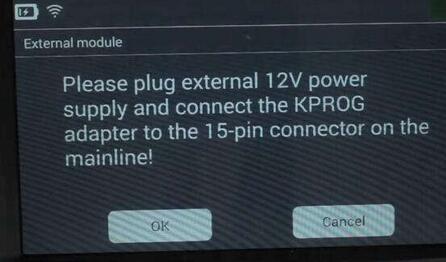
plug external 12v power supply and connect KPROG adapter to the 15-pin adapter on themainline
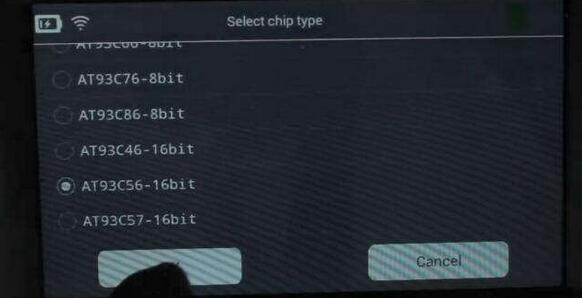
select chip type:

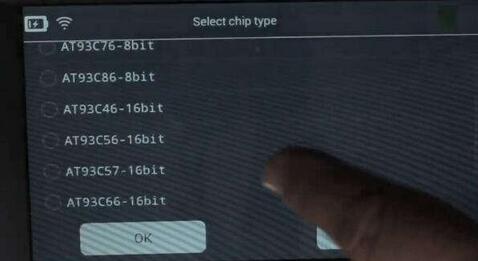
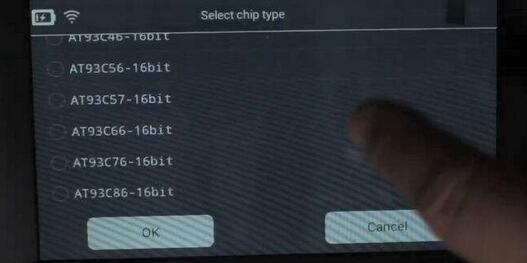
here, select AT93C56-16bit
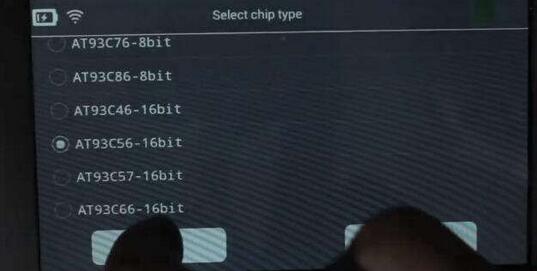

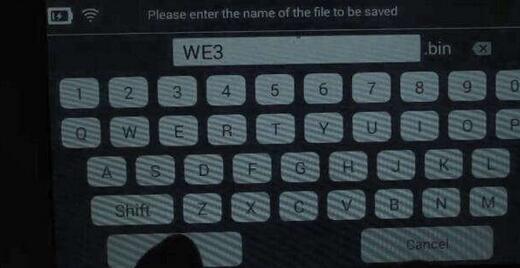
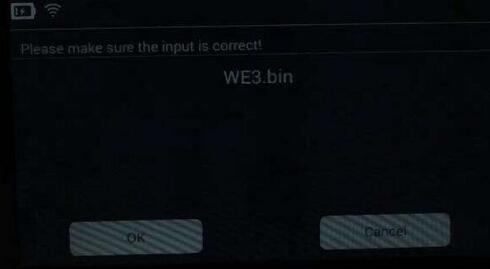
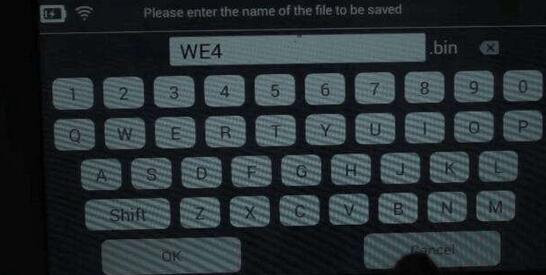
then save the bin file, name it as WE3.bin
finished reading eeprom

step 2: edit data in hex editor
back to the hex editor under adapter
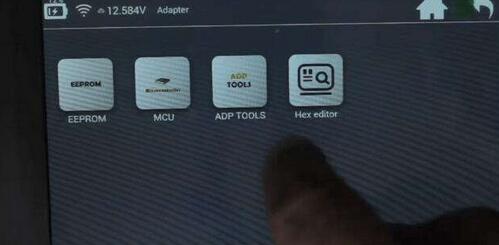
then hex editor, hex editor

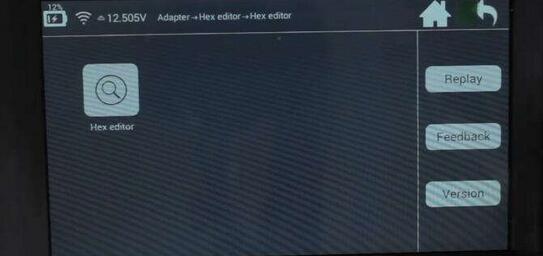
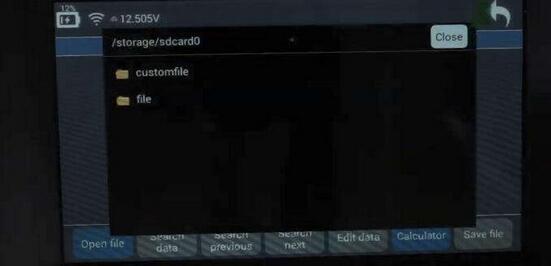
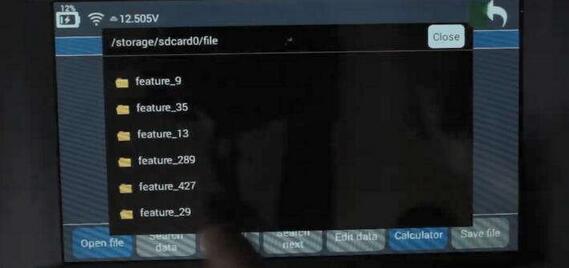
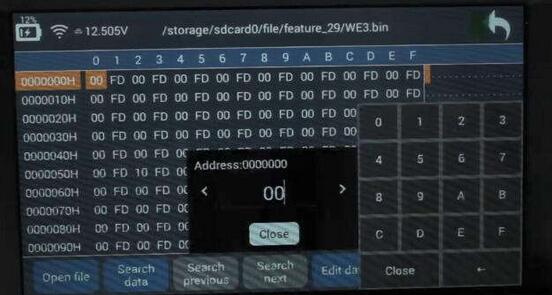
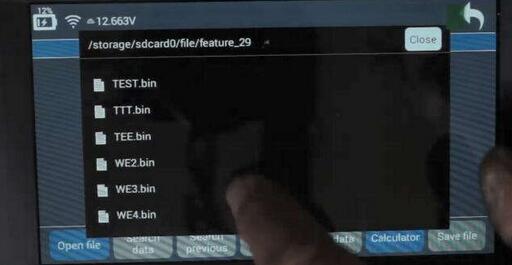
open file – folder: file – folder: feature_29 – WE3.bin
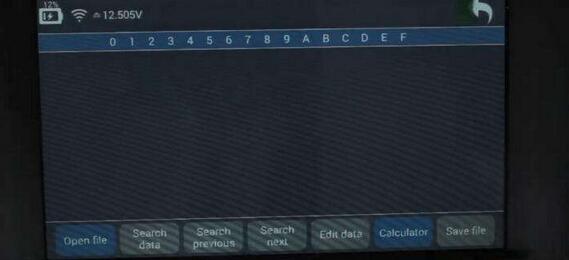
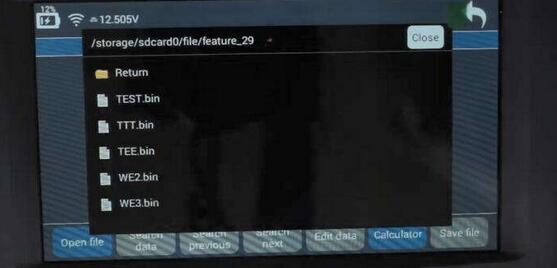
edit data
change 00 into 88

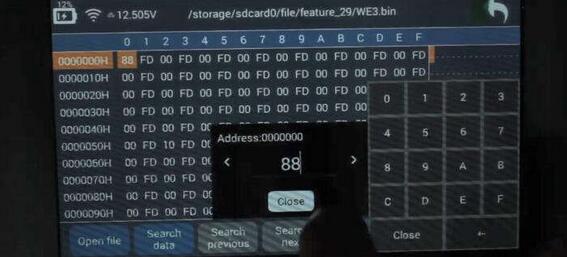
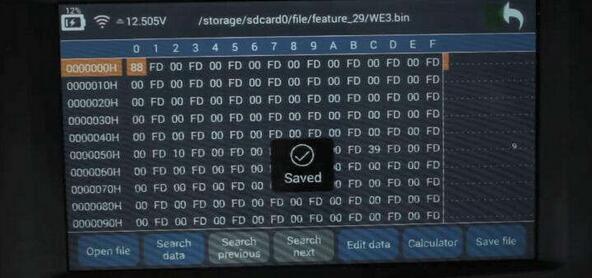
save data
step 3: write data
back to eeprom – common – 39cxxx – write data

pls plug external 12v power supply and connect the kprog adapter to the 15-pin connector on the mainline
select chip type: at93c56-16bit
Lonsdor k518ise managed to write eeprom!
step 4: read data again
back to read data under 93cxxx
pls plug external 12v power supply and connect the kprog adapter to the 15-pin connector on the mainline
select chip type: at93c56-16bit
save data. file name: WE4.bin
lonsdor read eeprom successfully!

step 5: check data in hex editor
back to hex editor – hex editor – hex editor
open file: folder "file†– folder "feature_29†– WE4.bin
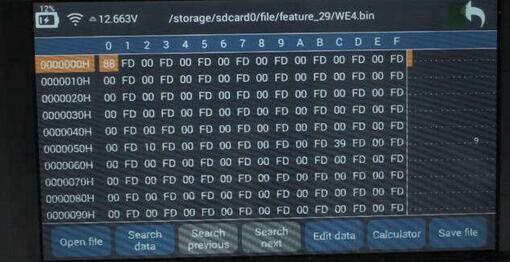
job’s done!
Posted by: Emily white at
10:52 AM
| No Comments
| Add Comment
Post contains 273 words, total size 18 kb.
November 04, 2019
Question:
I have a MAN TGA 2005 year with FFR. I need to write a new transponder to start the truck but i can’t find the eeprom on the FFR and does not have proper tool to do it.
Any help?

Answer:
Here’s demo guide on MAN truck key programming including eeprom location and tools suggestion.
Model: MAN truck 2005year
Device required:
Orange5 to read dump
Tango key programmer or TMPro2 to write key (TMpro2 require software license)
Transponder key compatible with TGA truck

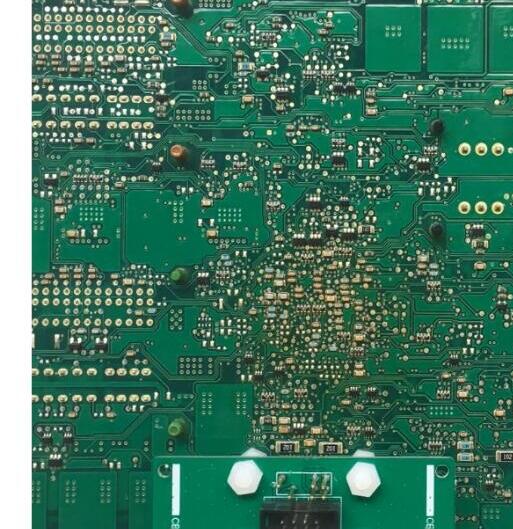
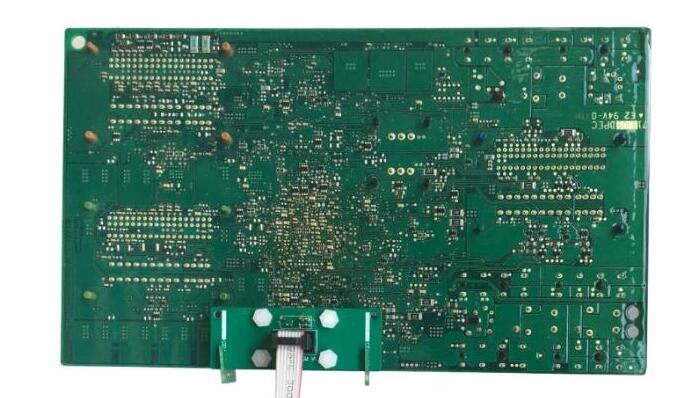
Remove ECU

Front side of ECU

Back side of ECU
Find eeprom IC 95256 and clean IC carefully


Remove IC at your own risk.

Solder IC chip to Orange5 adapter

and connect adapter with Orange 5
Open Orange5 software, select M95256-V

Read IC95256 32Kx8 and save with any name


In Tango software, select Car Model->MAN->TGA (25128, 25256, MEG13)

Upload dump


Select any position for add key

Insert key into Tango key programmer

Write key success
No need to write new file
Solder IC back to ECU
Test the new key.
Done.
Posted by: Emily white at
08:24 AM
| No Comments
| Add Comment
Post contains 184 words, total size 5 kb.
October 24, 2019
To Program Volvo 5-button and 6-button smart key with Yanhua Mini ACDP, you have to read data from CEM and KVM module first. Then write key by uploading password data.
Volvo license is required.
ACDP Mini supports following Volvo key programming models:
Supports 5-button remote key add key and all keys lost
Supports 6-button smart key add key and all keys lost
Volvo S60 (2010-201![]()
Volvo S80 (2009-2016)
Volvo XC60 (2009-201![]()
Volvo V60 (2011-2017)
Volvo V70 (2009-2016)
Volvo XC70 (2010-2016)
Read Volvo KVM Data withKey Programmer ACDP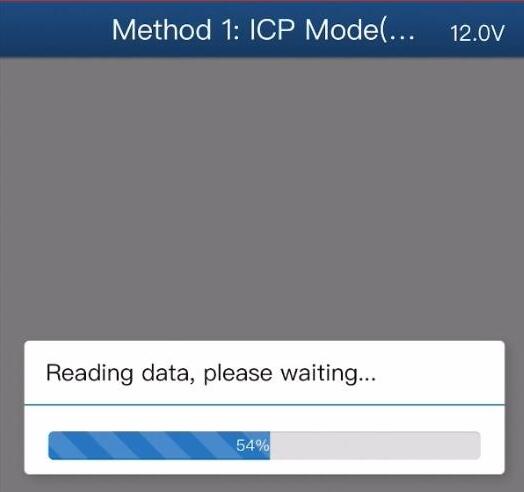
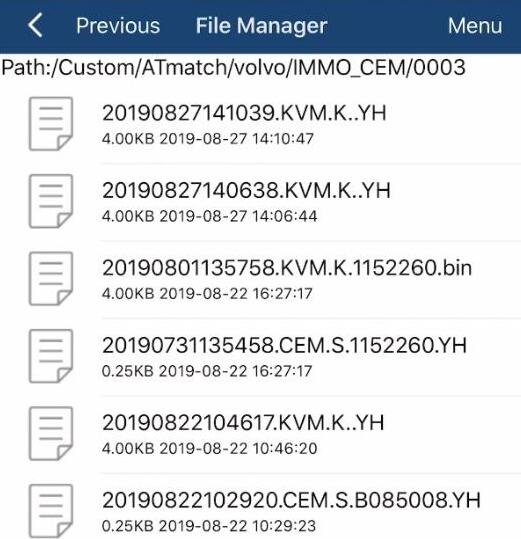

Without Soldering
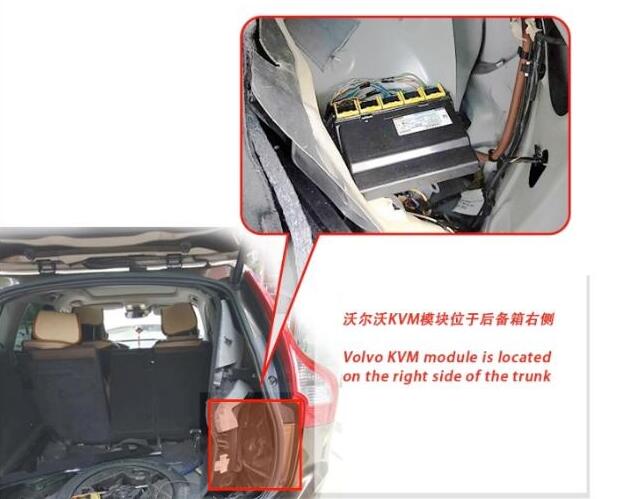
Remove the Volvo KVM module located on the tight side of the trunk
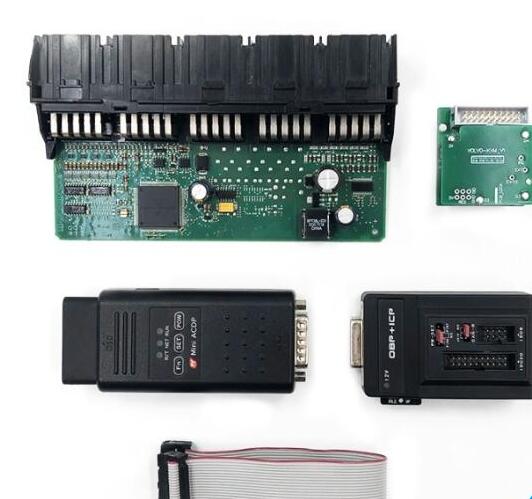
Disassemble the KVM module
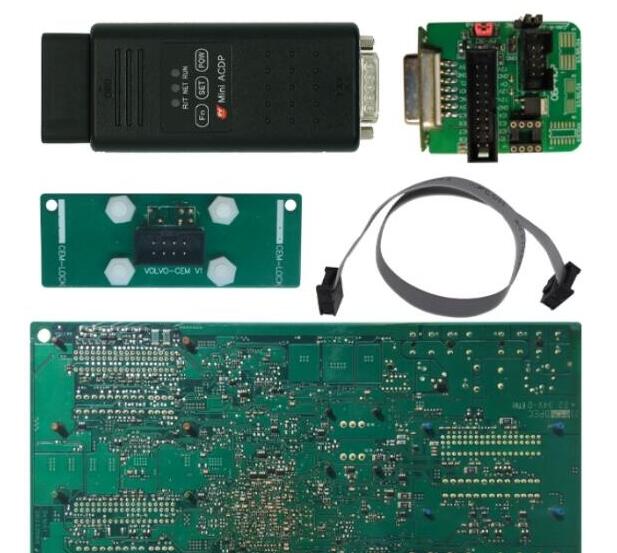
Prepare ACDP host, OBP+ ICP adapter, KVM interface board and 20 pin cable

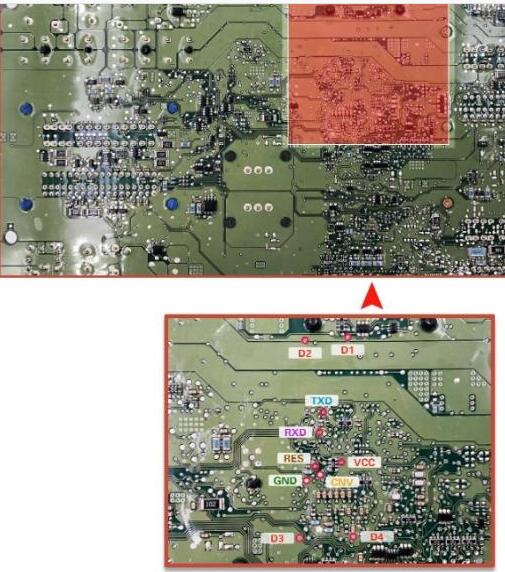
D1-D4 regional figual and picture of each test point location
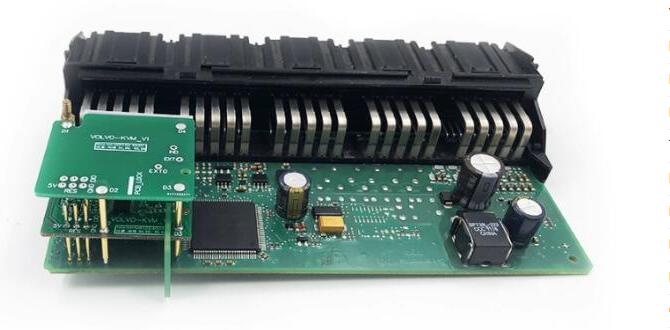
Install KVM interface board according to the registration point D1-D4
Connect the KVM module and ACDP programmer
Open Mini ACDP app
Select Volvo module
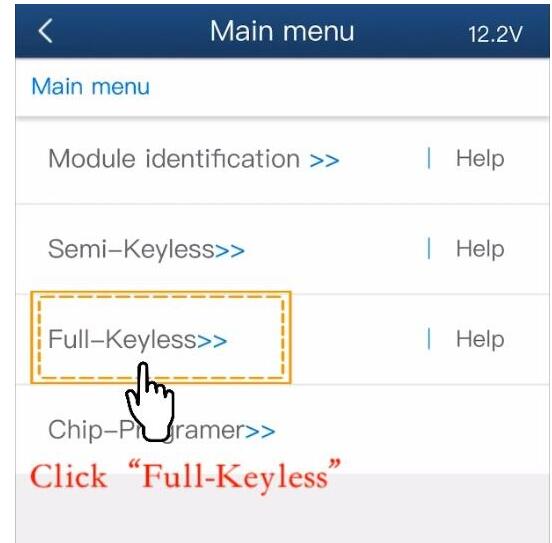
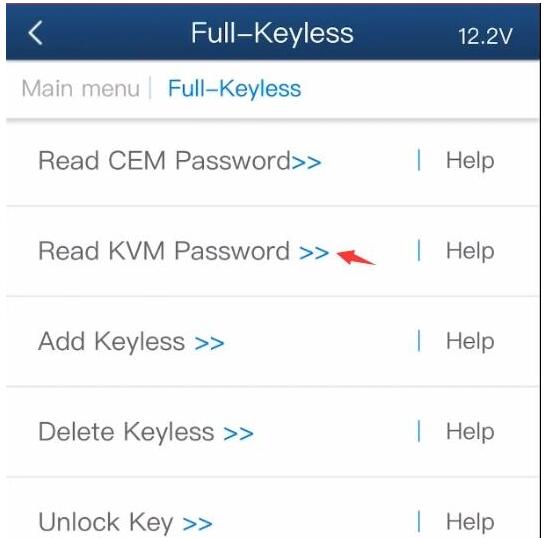
select model, i.e XC60 (2009-201![]() ->Full Keyless->Read KVM password
->Full Keyless->Read KVM password

Check well connection is built
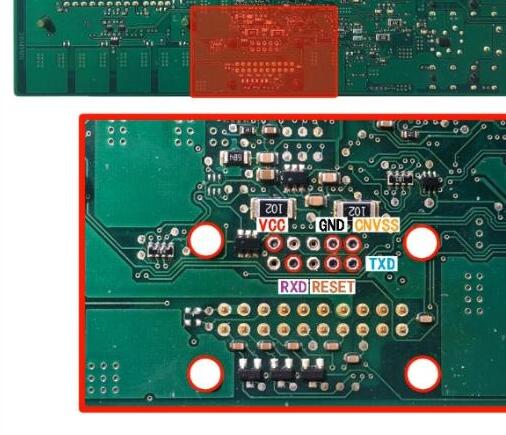
Detect PIN

Passed Pin detection. If not, clean the corresponding test point

Decrypting the chip
Confirm VIN information
Press OK to save KVM data
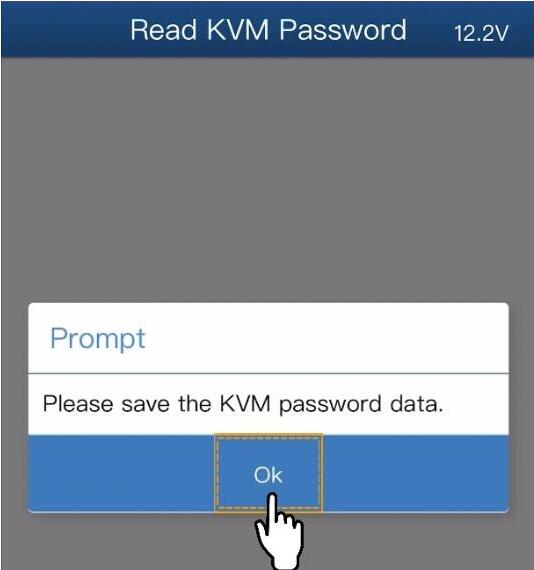
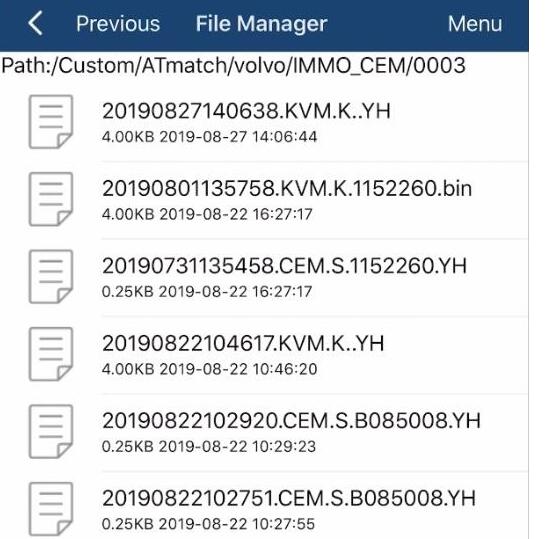
KVM data is backed up to default folder

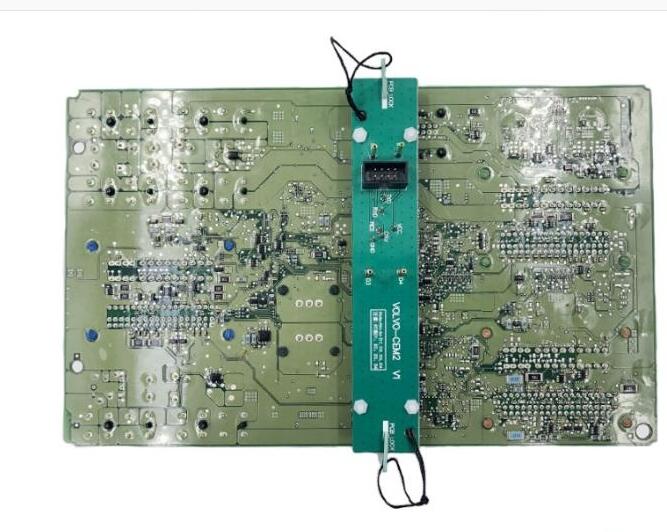
Read Volvo CEM Data with Yanhua ACDP Without Soldering
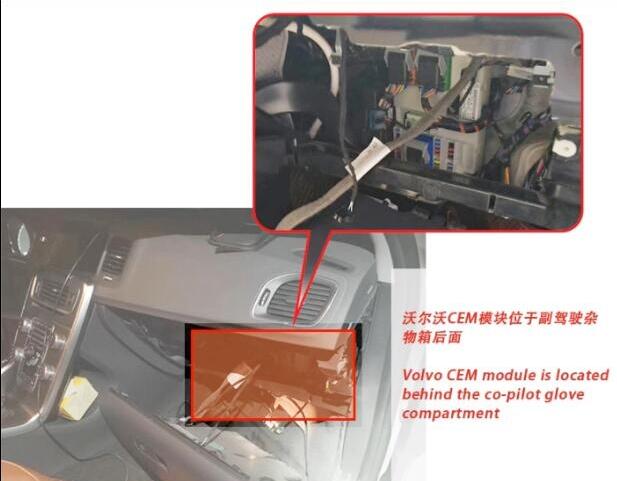
Remove Volvo CEM module behind the co-pilot glove compartment
There are 2 types of CEM module
Volvo CEM Type 1:
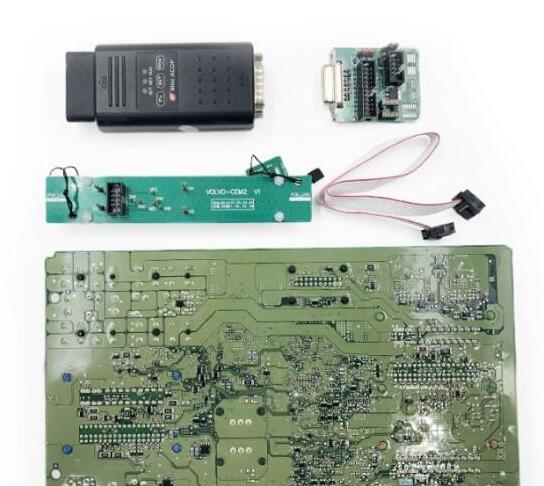
Disassemble the CEM module and prepare the ACDP, OBP+ICP adapter, CEM interface board and 8-PIN cable
D1- D4 and each test point
Install the CEM interface board according to the location point D1-D4
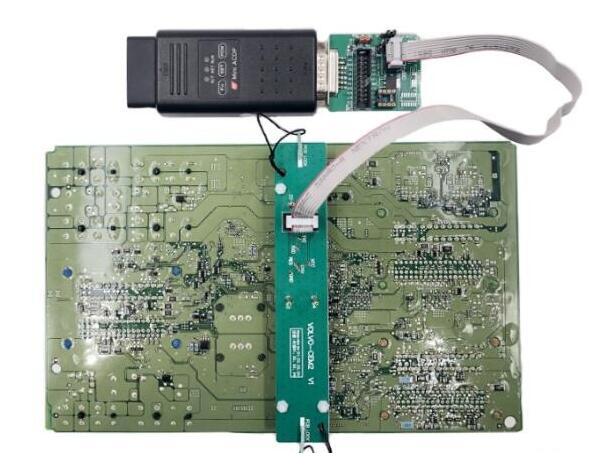
Connect ACDP host and CEM interface board as picture above
Volvo CEM Type 2:
Disassemble the CEM module and prepare the ACDP, OBP+ICP adapter, CEM interface board and 8-PIN cable
D1-D4 and each test point
Install the CEM interface board according to the location point D1-D4
Connect ACDP device and CEM interface board
Open ACDP Mini App
Select Volvo module
select model, i.e XC60 (2009-201![]() ->Full Keyless->Read CEM password->Method 1: ICP Mode
->Full Keyless->Read CEM password->Method 1: ICP Mode


Check connection

Detect PIN
Reading data
Check the VIN
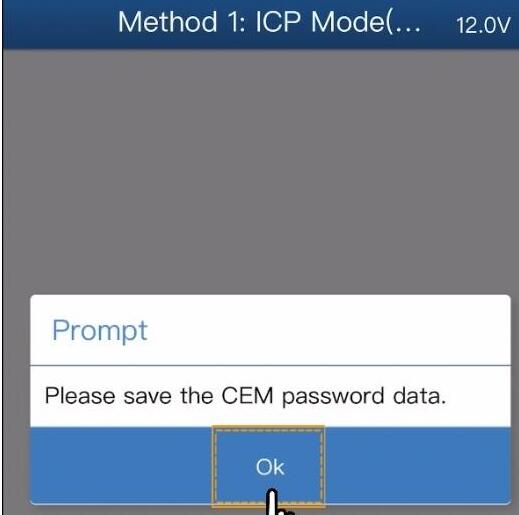
Press OK to save CEM password data
CEM data was saved to default folder.
Then you can add keyless smart key by upload password data.
Done.
Posted by: Emily white at
10:57 AM
| No Comments
| Add Comment
Post contains 380 words, total size 15 kb.
October 18, 2019
Here is a guide on programming a new Dodge key with SKP-900 Key Programmer made by Obd2tool.com technicians.
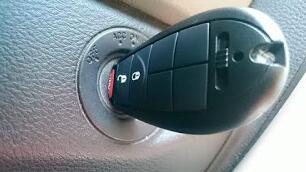
Connect the SKP-900 carOBD2 key programmer to the car and insert the blank key.
Select the immobilizer type.
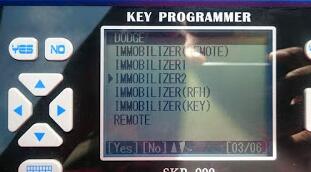
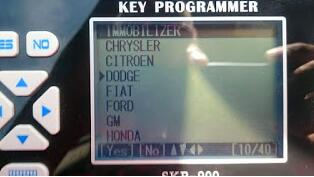
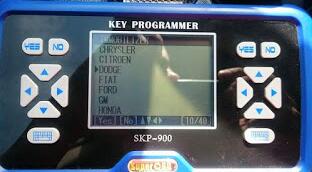
Select car model.
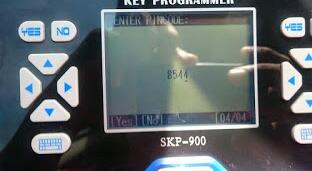
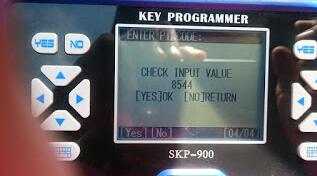

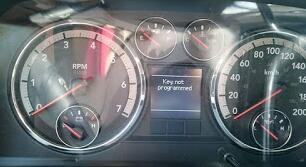
New key programmer, now we will test it if it can start the car.
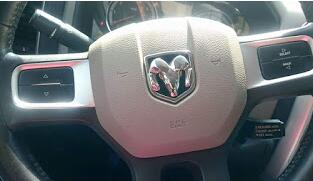

The key works perfect.
Posted by: Emily white at
09:42 AM
| No Comments
| Add Comment
Post contains 66 words, total size 3 kb.
32 queries taking 0.0777 seconds, 196 records returned.
Powered by Minx 1.1.6c-pink.

