


May 26, 2021
I’ve been struggling with this for months now and I came across a post of the Cadillac forum where someone mentioned using the GM Tech2 handheld scanner and running the "Evap service bay†test. First you will need the VCX Nano from obd2tool, it comes with the software for Tech2 andGDS2 emulators and install it on a laptop. The Evap test should be done from a cold start so have everything ready. The reason I failed the Tech2 EVAP test first time was you must keep RPM between 1800-2200 for 8 minutes it was impossible to do that with foot so it failed and i had to wait overnight for a cold start. What i did to fix was I found a piece of wood and placed it between the seat and gas pedal and move the electric seat until RPM is 2000. This worked perfectly I used this when doing brake light testing for inspection as well.
* Have everything set up, I opened hood so it wouldn’t get too hot,
connect the VCX Nano to the OBD2 port and your laptop and go to the F2:
Special Functions->F4: Service Bay Tests->EVAP System Bay Test
* Have your piece of wood ready so you can hold the RPM constant.
After the Tech 2 has read the info it needs and validates you can
proceed with the test, it will guide you step by step
* First, you’ll be told to leave the ignition key off for 10 seconds
* After that, you’ll turn on the key (but don’t start the car). Once
the Tech 2 has read the Data port, it will prompt you the EVAP test can
start (or NOT)
* start the car, idle between 1800-2200 rpm (steady!) this is where
you need the wood and move seat against it to push pedal down and hold
at 2000 RPM. This is very critical and if it cannot be held between 1800
and 2000 you will need to stop test and wait overnight for it to cool
off so you can do a cold start. Then press [Enter] to begin.
* Once you press [Enter], you need to maintain 1800-2200 RPM for about
6-8 minutes (it has a counter) and it will perform a series of EVAP
tests (11 data points are watched). You’ll hear the Solenoid working and
seeing the ‘%’
* After about 8 minutes @ 2000 RPM, you’ll be told to take it for a
drive. Disconnect the laptop power source, then press [Enter] to start
the drive test.
* The Tech 2 shows 15 KM and 600 seconds to do the drive — don’t worry about the seconds, the KMs are what’s important.
* After you’ve reached ‘0’s, you’ll be told to return to the ‘Service Bay’ for engine off EVAP Test
* Here you plug in the external power source for the laptop ‘BEFORE’
you turn off the car. Once that is done, turn off the car and press
[Enter] to start the engine off test. This test will take about 5 to 10
minutes (and yes, you’re in the car and waiting d). You see the Fuel
Tank voltage change and here the solenoid working.
* Once you’ve waited, theTech 2 will show you your status whether it passed or failed
Overall it takes about an 45-60 min to do the Engine On, Drive, and Engine off EVAP Service Bay Test. I wish I knew about this iI spent dozens of hours researching and trying to drive the 17 step EVAP drive cycle many times requiring the overnight for cold start.
Checked the Ready Monitors with my regular scanner and Im ready for inspection!
The drive cycle takes FOREVER to get done, but this one is ready in about an hour and this does work! Well worth the $90 from Amazon and now I also have great Tech2 scanner and GDS emulator. Also with the GDS it appears it uses a cloud based database and looks like there is every manufacturer supported you would just need the license to turn it on. Very happy with the way this turned out and if anyone is stuck with trying to set EVAP this is the way to go!
Posted by: Emily white at
08:41 AM
| Comments (1)
| Add Comment
Post contains 712 words, total size 5 kb.
May 13, 2021
Does your Autel subscription expire soon? Has it already expired and you don’t have a backup? Do you have the funds set aside to buy a subscription renewal today?
If your subscription has already expired you are playing with fire. The only way to recover the software without a backup is the price of an update, or a Autel Scan Tool. With <$10 it is an easy recovery via backup.
To create a backup, simply insert the Micro SD card into your tool and open the base screen (not the diagnostic application). Then open ES File Explorer. There you will find two instances of SD Cards. Open the internal drive, usually label "SD_CARD†or similar. Hold your finger on "SCAN†to bring up lower menu. Select copy. Now open the external SD card, label "EXT_SD†or similar.
Paste the copy of "SCAN†here. Depending on model of scan tool this can take up to 3 hrs. Once this is done, remove the SD card and store it somewhere safe where it will not be damaged. It is very small so store it somewhere you’re not going to forget it.
Now take the second 32 GB card, insert it into your Autel/Auro tool and repeat the above process. Leave this one in your tool after backup. Update this once a month until your subscription expires, swap with the other backup, repeat.
Now you don’t have to stress it when something crashes.
The Autel line of tools will only recognize up to 32 GB Micro SD Cards. I highly recommend buying this pair of 2x 32 GB Micro SD cards to create redundant backups in case of file corruption.
Posted by: Emily white at
03:16 AM
| No Comments
| Add Comment
Post contains 284 words, total size 2 kb.
April 08, 2021
Purpose
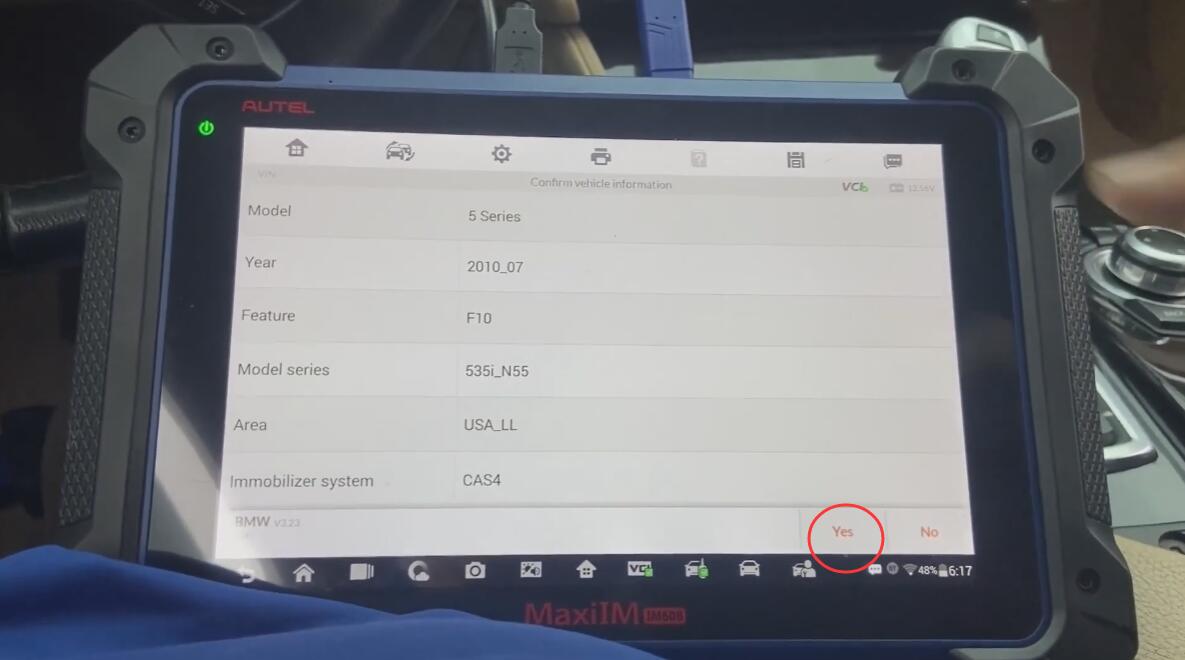
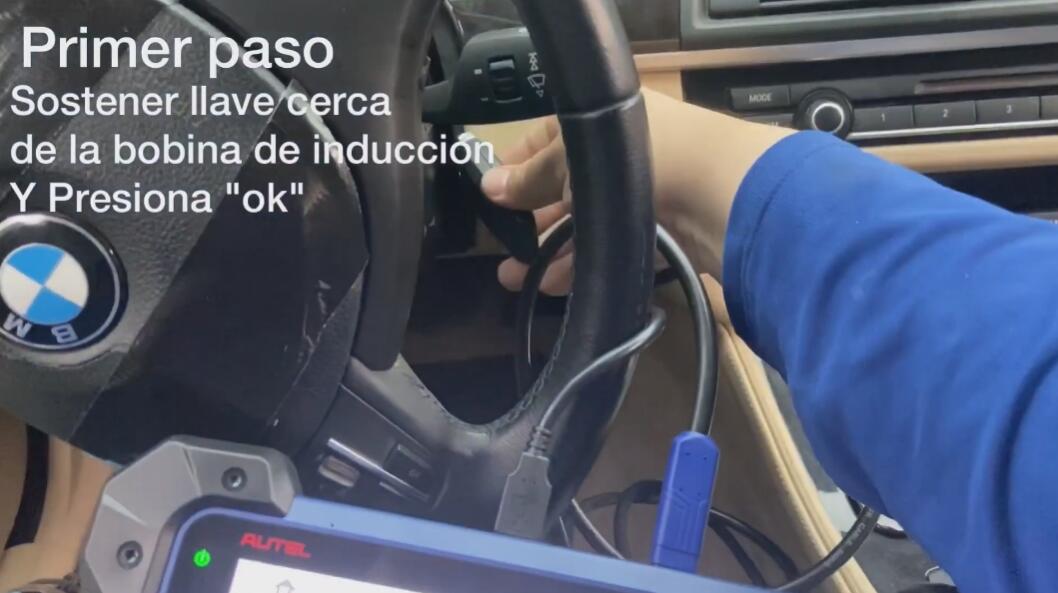
Using Autel MaxiIM IM608 Pro Programmer to add a new key for 2009-2016 BMW 5 series CAS4 by OBD.
Preparation
A BMW smart key with frequency 315 Mhz
Autel MaxiIM IM608 Pro
Connect Autel IM608 Pro with OBD via APC101 cable
Important: voltage must be at 13V
Turn ignition ON but do not start the engine.
Procedure
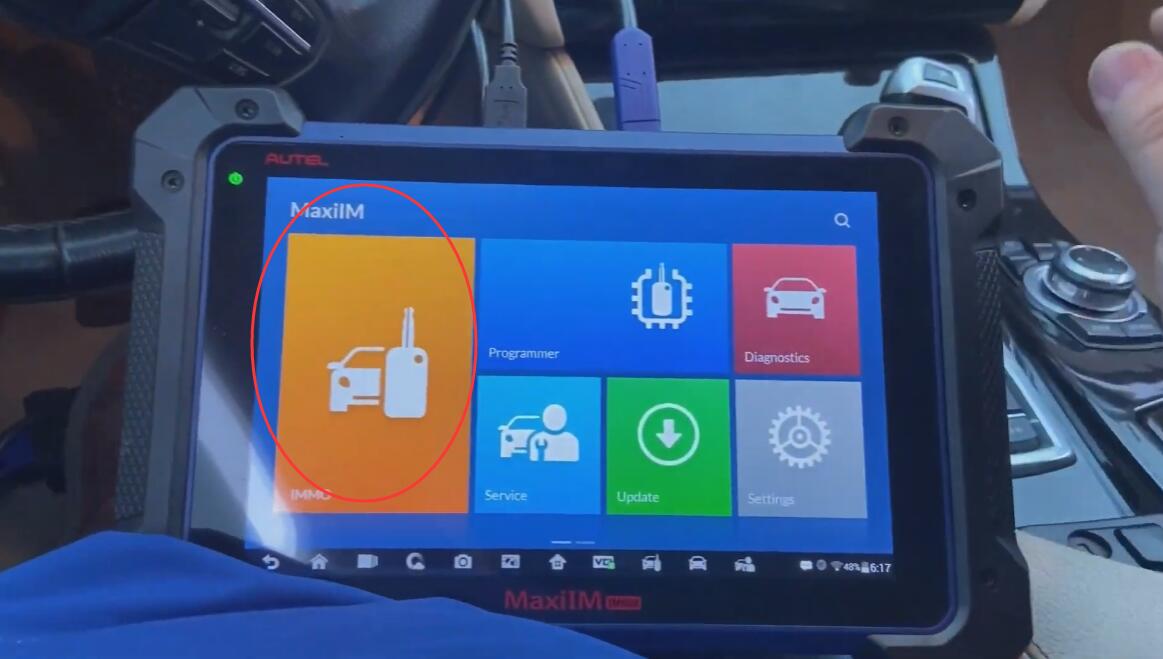
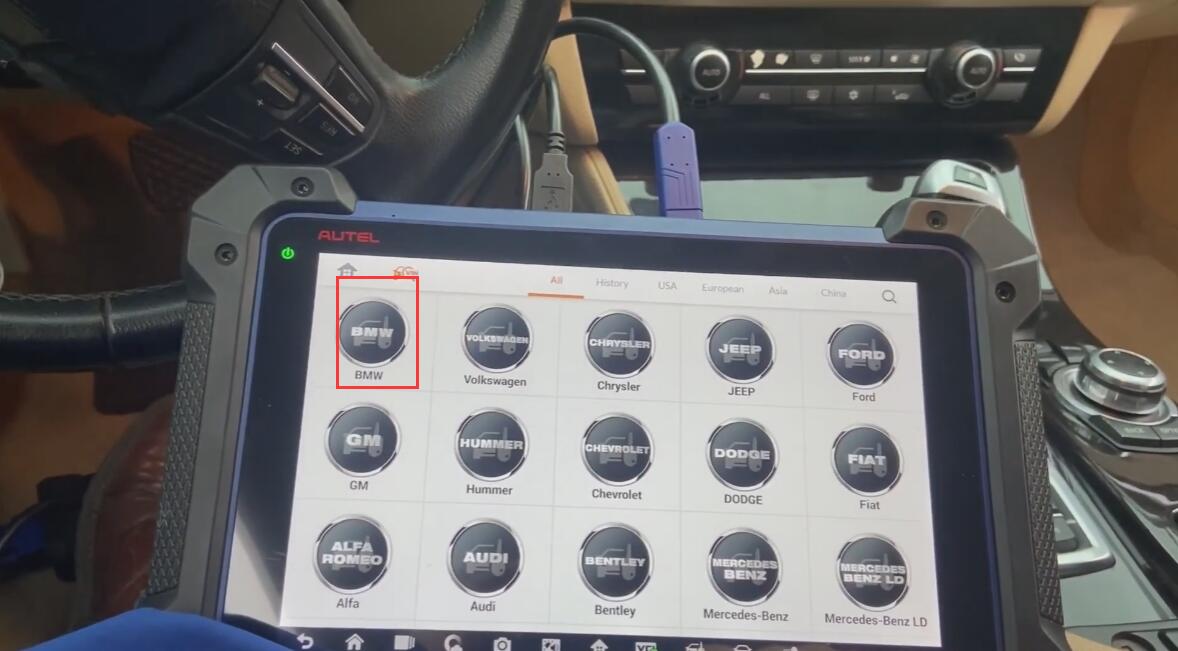
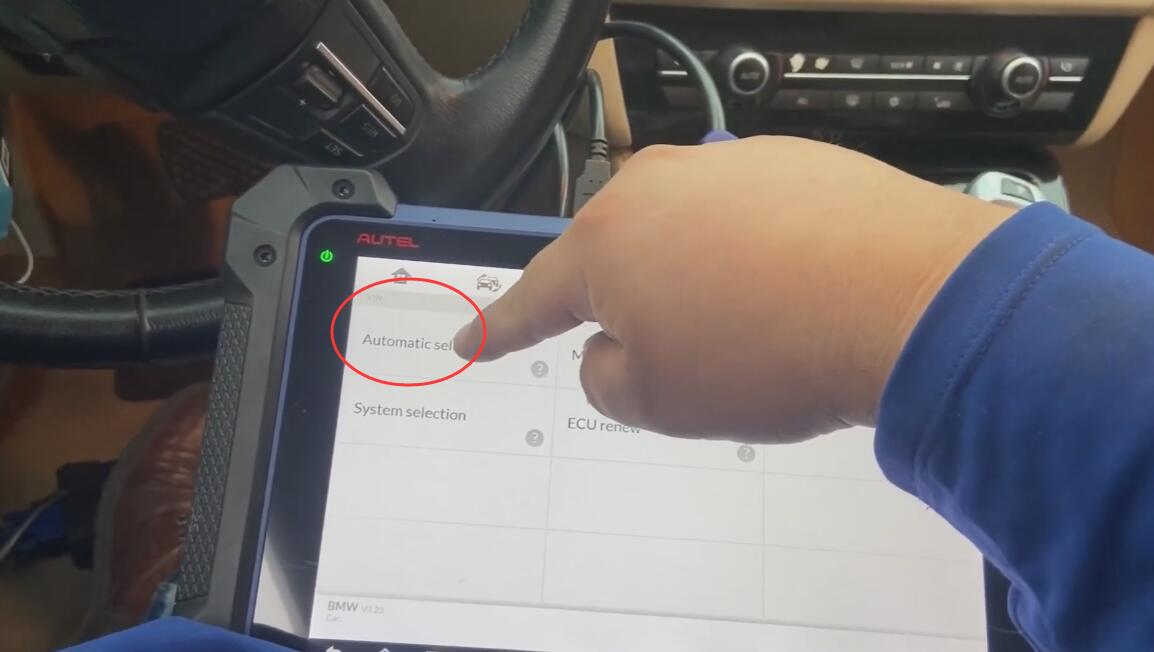
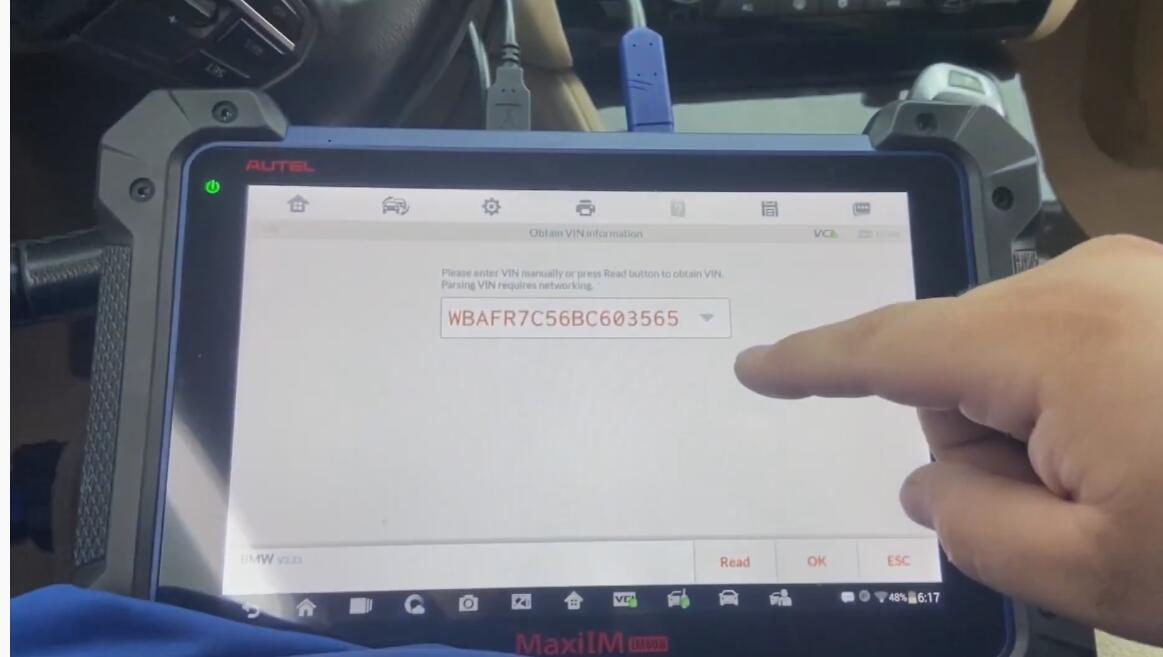
Go to IM608 tablet to start:
IMMO >> Accept >> BMW >> Automatic selection >> Read >> OK >> Yes

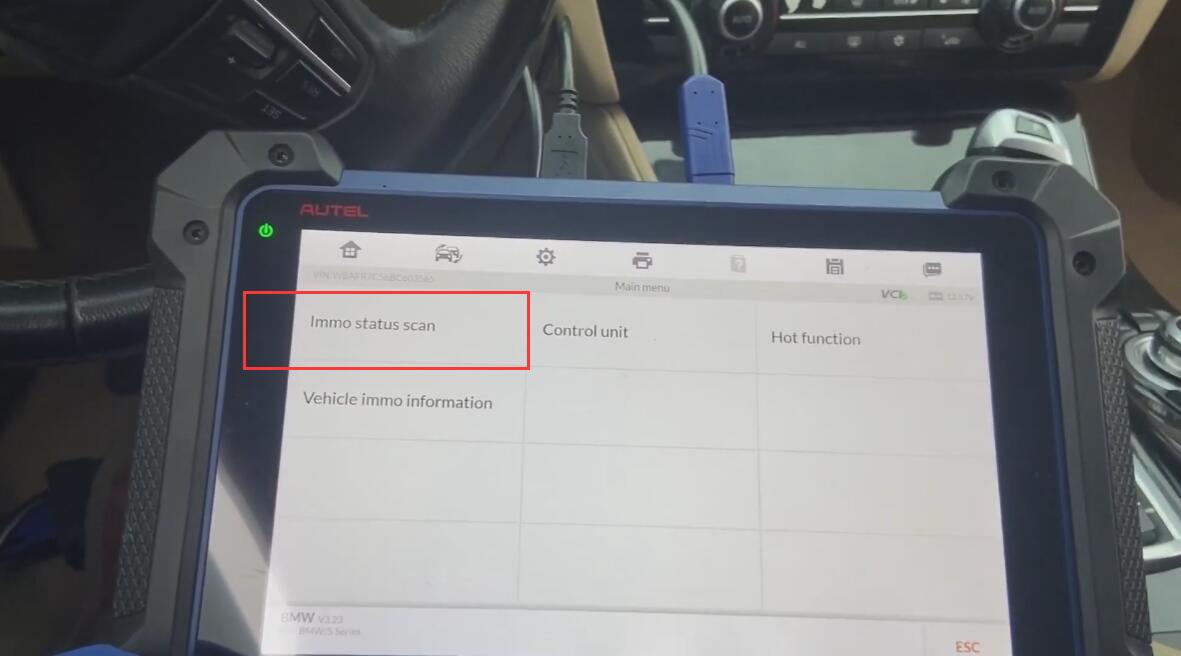
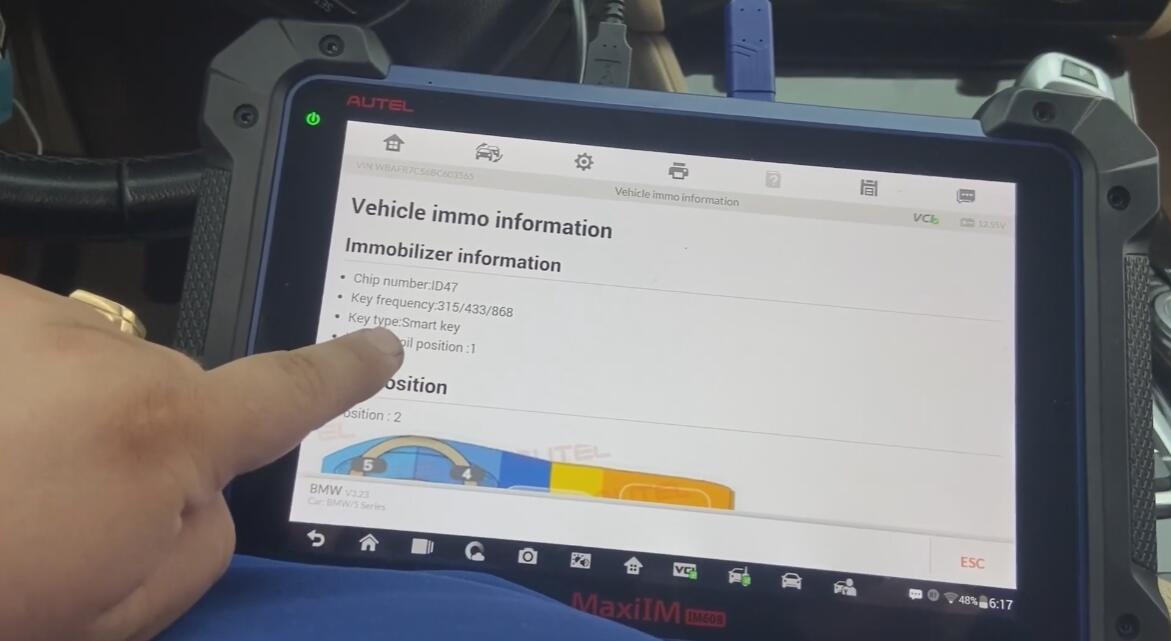
To check immobilizer info, OBD position and key info, press "Vehicle immo informationâ€.
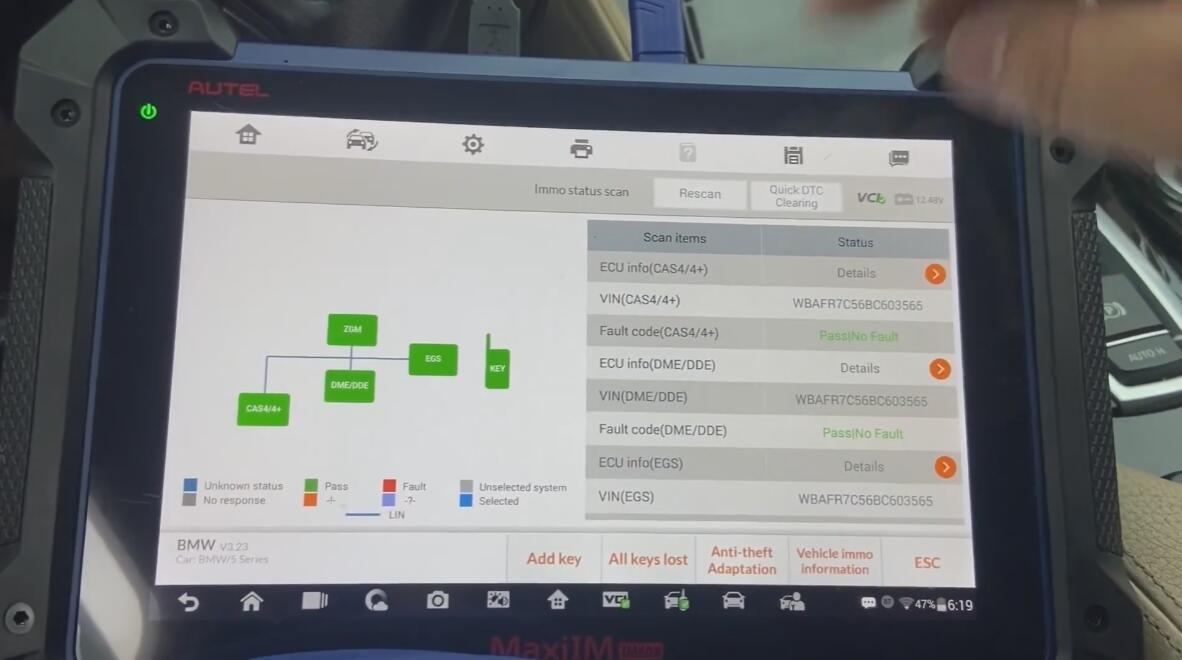
Press "Immo status scan†to go on.
Press "Quick DTC clearing†if there were any DTCs.
Press "Add key†if there were not.
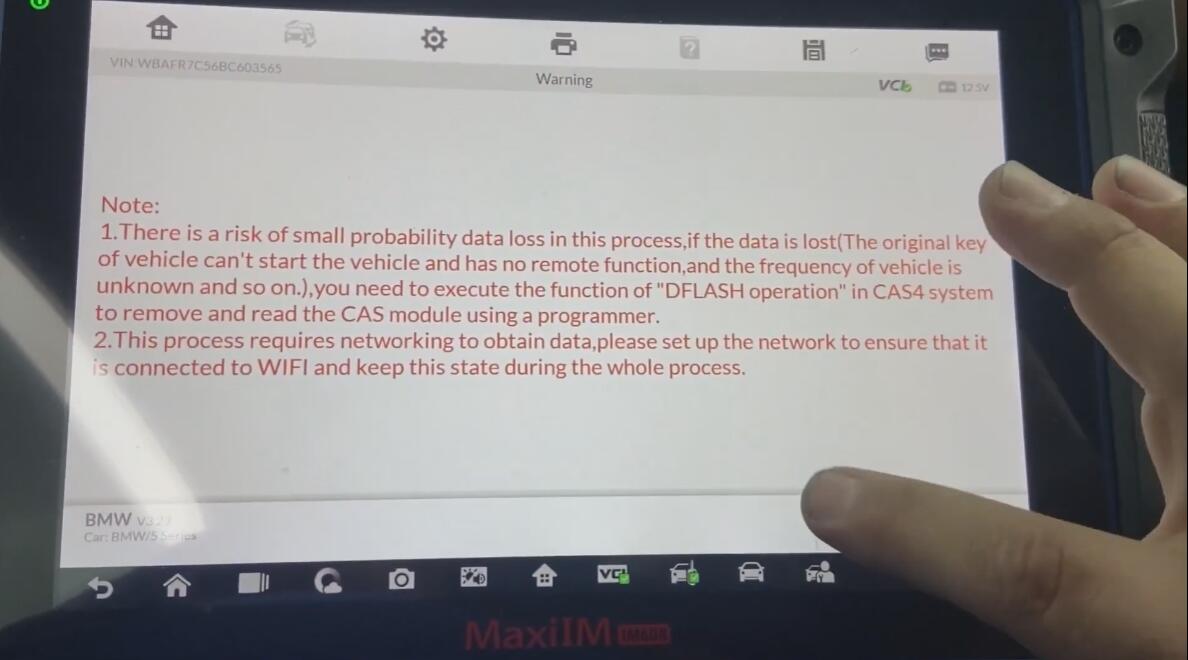
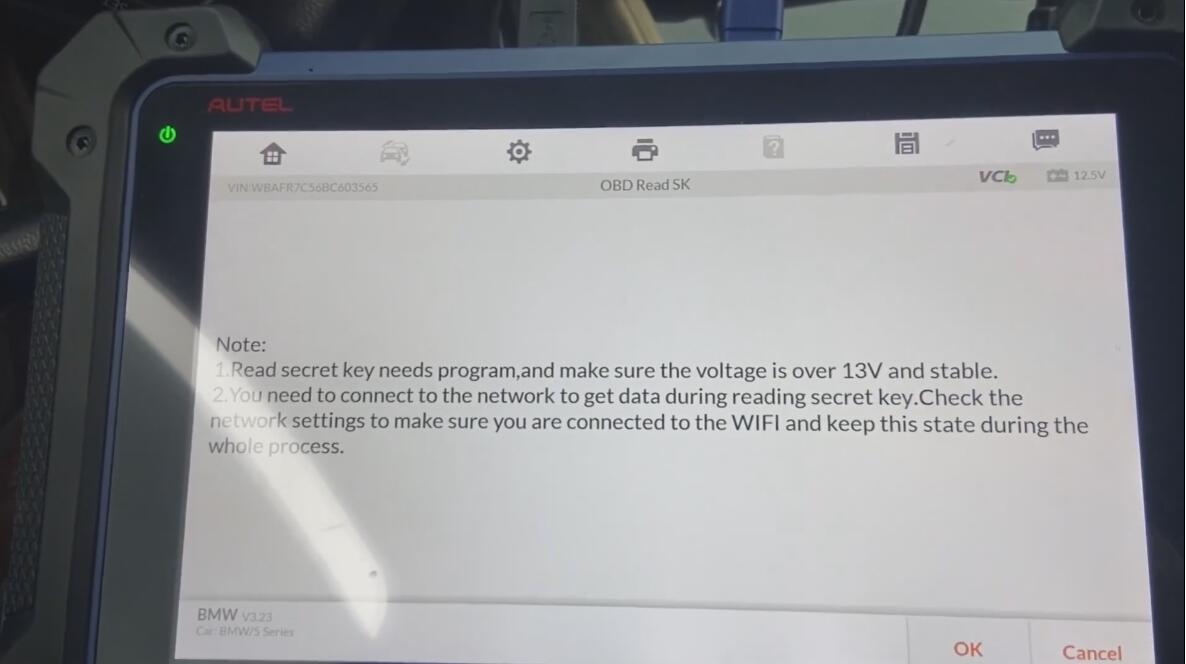
Note: Please make sure IM608 Pro is online with WIFI during processing and carefully read the notes on screen!
OK >> OK >> OK
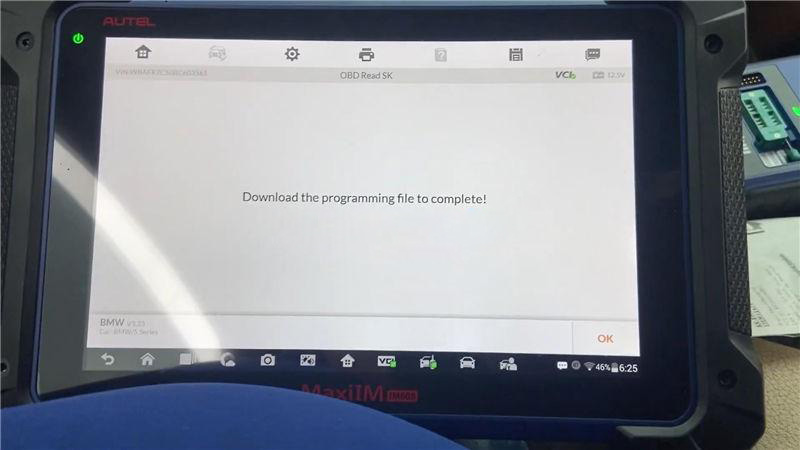
Wait programming until 100%… do not touch any button of vehicle.
Restoring coding file…
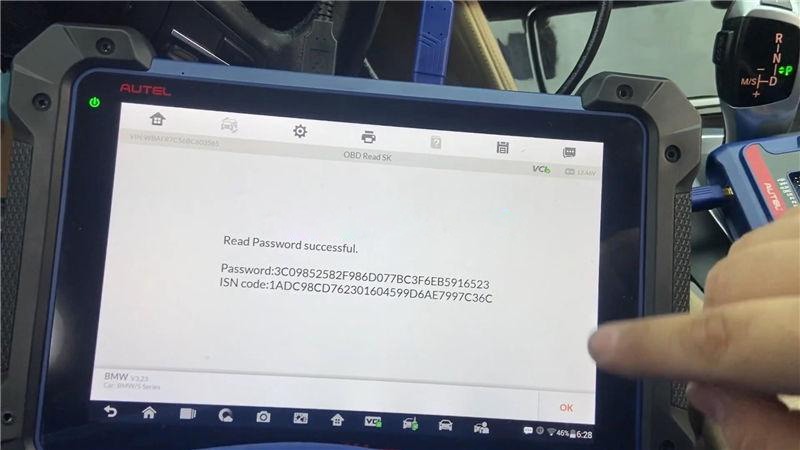
Reading password…
Read password successful. Record it and press "OKâ€.
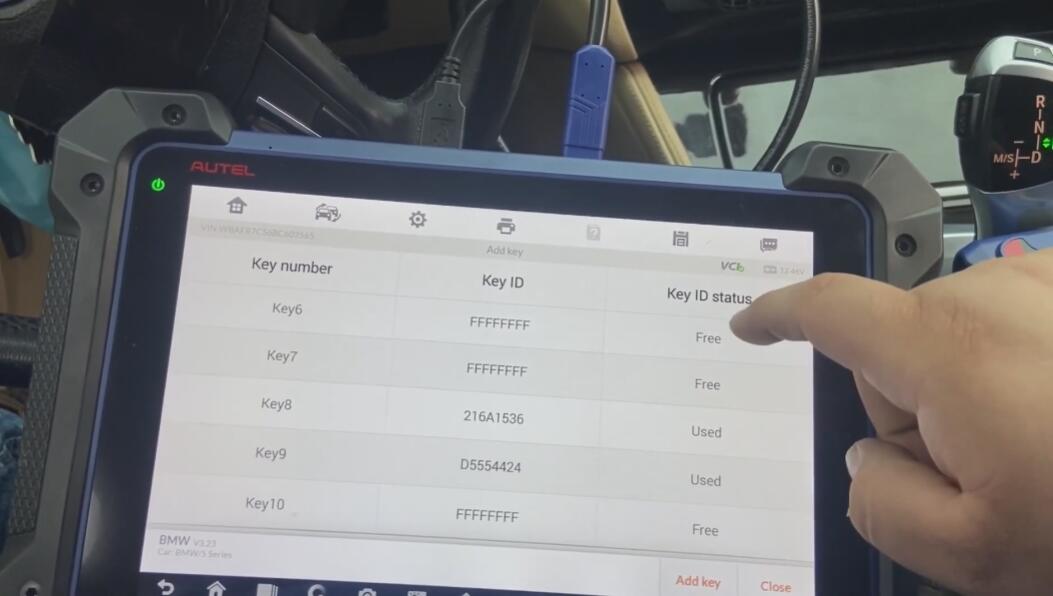
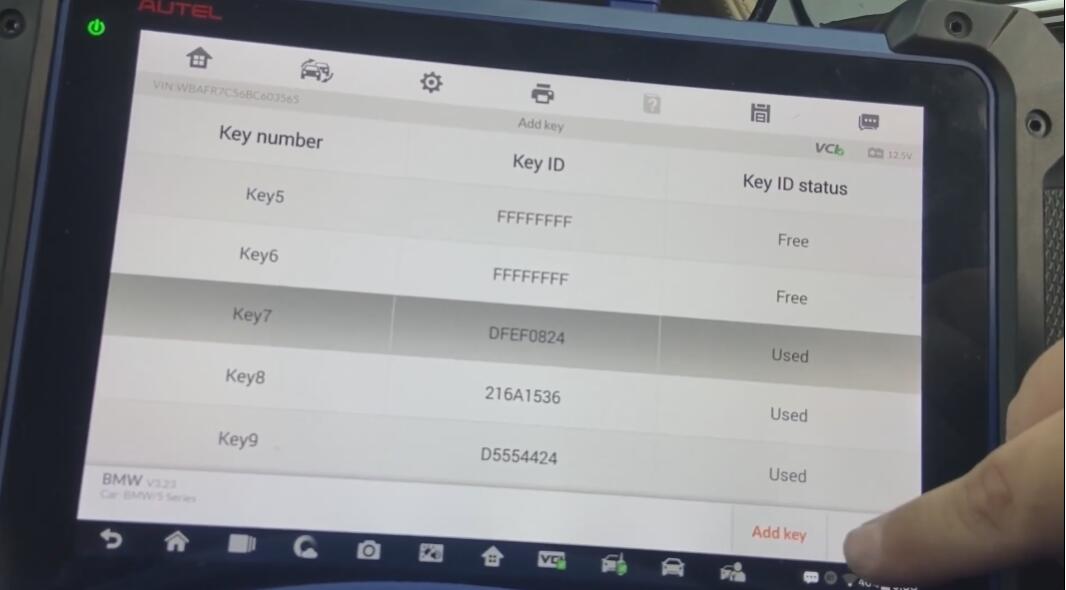
Select a free key position: Key 7, press "Add keyâ€.
Put the new key close to start coil, press "OKâ€.
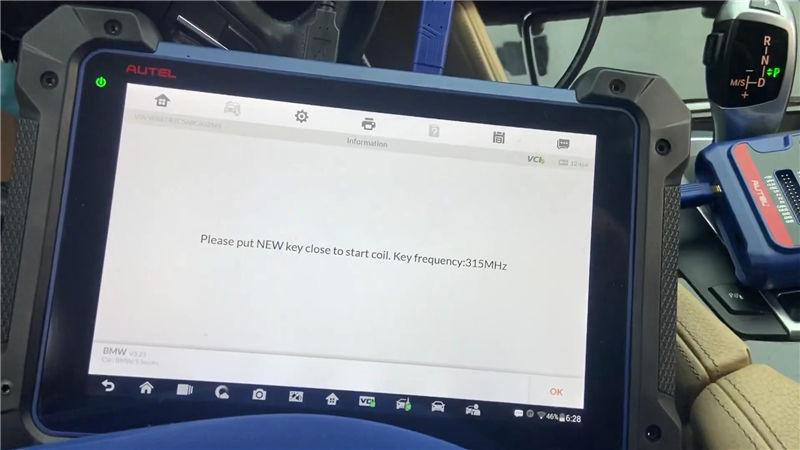
Key learning has 2 steps, please wait…
The 1st step of authenticating key information is in progress…
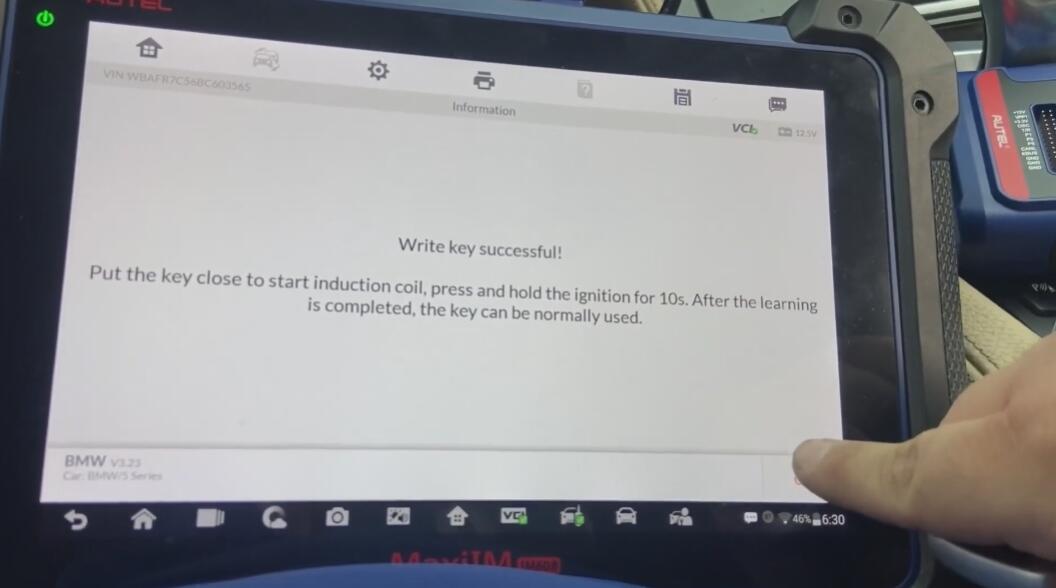
Write key successful!
Put the key close to start induction coil, press and hold the ignition for 10s.
After the learning is completed, the key can be normally used.
Press "OKâ€.
As you can see, the Key 7 turns to be used status with ID data now.
Let’s test the new key finally, it does work well.
Key programming has done!
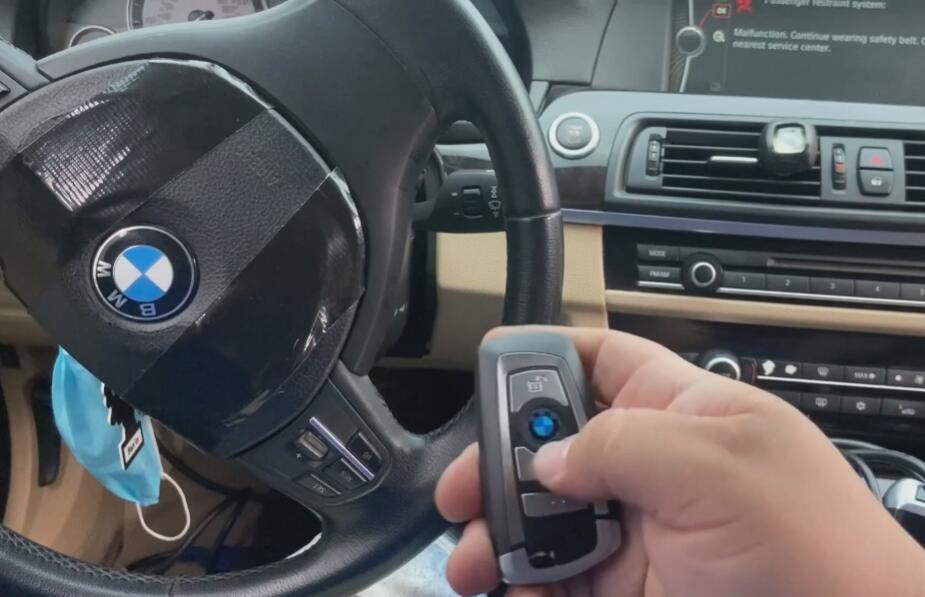
Using Autel IM608 Pro Scan Tool to add a key for BMW 2011 535i CAS4 successfully!
If you want to learn more about Autel Scanner, please visit our website obd2tool.com
Posted by: Emily white at
11:25 AM
| No Comments
| Add Comment
Post contains 302 words, total size 10 kb.
March 30, 2021
User puzzles:
I have installed Xentry 9.2018 in Star C3 multiplexer. It works well so far. Now, I need to make diagnosis on w205 year 12/2018 but It can not communicate with the car. C3 don’t work in all recent cars in xentry but in DAS is ok.
Experienced users’ suggestion:
C3 has many limitation regarding latest vehicles in Xentry.
It can’t diagnose it e.g w205, w212, w222, w906, smart 453 etc.
its glory is already passed unless you deal only with vehicles in DAS.
you have to change to SD Connect C4.
C4’s support also officially has been stop since 12-2015.
It is no different even you change folder.
it is different protocol with recent vehicles.
For your w205 (nice car) you can use one of this :
1.SD Connect C4
2.xentry sd connect c5
Both good at all new models,W222, W221, W212, W203, 211,W 204,W207, W212, GL166, B 246, CLS 218, SLK172 and Smart405, 451, 452, 454
Besides the Star diagnosis software c3 and c4 own, sdconnect c4/c5
added three more software: SD Media, Xentry and Smart TAN Code.
SD Media: Video and PDF lessons;
Xentry: New software released by Company after 04/2009 by diagnosis new cars. Xentry software for diagnosing W 204,W207 and W212 which C3 and C4 does not support;
Smart TAN Code: Opened special function in DAS program with Smart cars
405/ 451/452/ 454.Besides, it also opened more special functions, such
as engineer mode, remove limitations,etc, which Star C3 and Star C4 do
not have.
I have successfully communicated wit my w205 AMG using a SD C4 connect all controllers accessed.
Posted by: Emily white at
11:37 AM
| Comments (1)
| Add Comment
Post contains 274 words, total size 3 kb.
March 23, 2021
Recommend goodHeavy Duty Scanner for trucks Immo / All keys lost, particularly Euro trucks – Benz, Scania, Volvo.
There is no universal tool that will do all. I do repairs on all european truck excluding Iveco, and I can share some experience if it comes to immo.
MAN – Any tool to read/write by E-GPT protocols or by BDM (EDC7) or Boot (EDC17 Euro 6) will be okay for engine ECU, and You would need EEPROM programmer and Macaca for FFR/PTM (FFR only EEPROM). With such tool You will be able to disable the immo (but I’m not sure if there is any Immo off option for EDC17 currently). Or You can get MANCATS II and III with developer software and You will be able to programm keys in truck to about 2016 year production. Newer are blocked and harder to bypass.
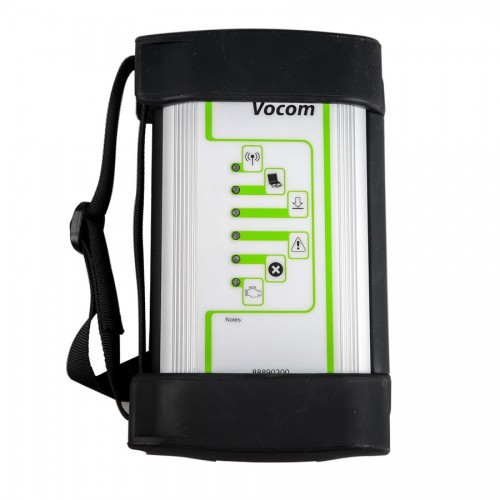
Volvo/Renault – Get Vocom with PTT, You can easily disable Immo in V2 trucks, change two parameters and You have no Immo and no error on dash. Fast and easy. For V4 trucks, never had to learn yet, as there was no client that needed new keys, so can’t tell much. But PTT will let You disable the Steering Lock that tend to fail on those trucks very often.
DAF – Euro 5 DMCI, Get Davie XDCII with DAF MUX-560, You can program keys, change ECUS, change Immo boxes no problem. For Euro 6, Davie will be ok up to 2016. Newer only Davie 4, but if You’re not authorized DAF Dealer, no Immobilizer programming. It’s totally blocked.
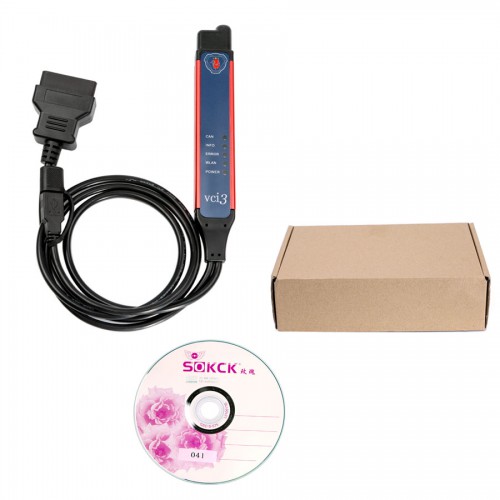
Scania – Get Scania VCI3, install SDP3 and XCOM. Learn how to modify SOPS files and erase Immo with XCOM, and You’re good to go with S6 and S7 Ecus. With S8/EMD1 it’s more complicated but doable. With SDP3 You can teach new keys, delete old ones and with few tweaks to SOPS files, You can also disable the Immo. Still, EMS and COO need to be paired, but it’s easy procedure with SDP3.
So… A lot of money to invest if You want to do every brand. If You want to start cheap – go for Scania. VCI3 is quite cheap, all the necessary software You can find on forum (or bought reliable source sdp3 software). MAN and DAF have the most expensive interfaces right now. There is no do-it-all software, like the ones for cars, that will let You program everything unfortunately.


Good luck!
Posted by: Emily white at
09:52 AM
| Comments (1)
| Add Comment
Post contains 414 words, total size 4 kb.
March 13, 2021
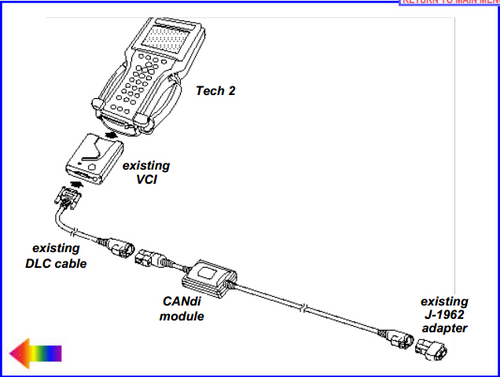
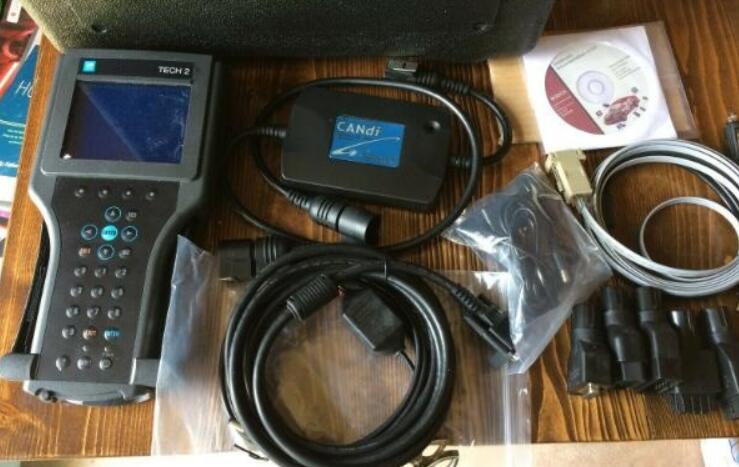
The GM Tech II comes with GM software and provides support for on-board diagnostics on all GM systems 1992 thru 2010.The CANDI module for GM tech2 connects between the GM Tech 2 Flash’s diagnostic link cable and the OBD adapter. Once the CANDI module is connected, it can be used on all GM vehicle applications, even those vehicles using other platforms such as OBD I and OBD II.
The CANdi (Controller Area Network Diagnostic Interface) is an in-line cable module that works with existing Tech 2 components including the VCI, cables and adapters.
CANdi module is fully compatible with current and past Tech 2 software. The module powers up in a way that makes it transparent to the user. This allows the existing Tech 2 software to be used with no changes when the CANdi module is installed. If a vehicle requires the use of a CANdi module, the Tech 2 clone will enable features specific to the module.
Supports simultaneous communications on three CAN buses
Provides high-speed UART communications with the GM Tech2
A self test will help to check well Candi module is well connected or not. Here is the step-by-step instruction on how to do Teh2 candi interface self test.
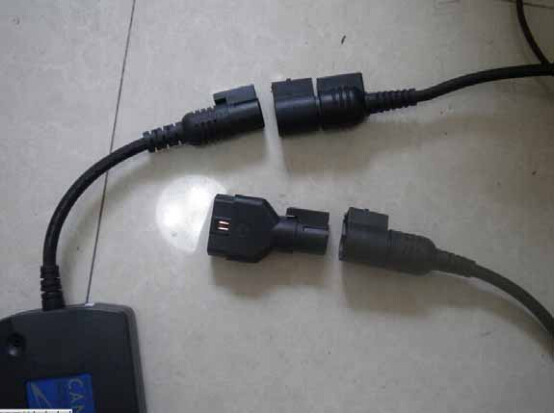
1) Connect CANdi interface to the vehicle via 12 PIN ALDL connector
2) Run and complete all GM tech 2 scanner stand-alone self-test. Disconnect CANdi interface when run Tech2 scan tool self test.
3) Run VCI self test. If the VCI self-test fails, replace VCI module. Disconnect CANdi module when run VCI self test
4) Connect the CANdi module to an existing VCI module via DLC cable, and connect VCI module with vehicle. Make sure there is good connection between scanner and vehicle. Verify that the LED on the CANdi module is flashing.
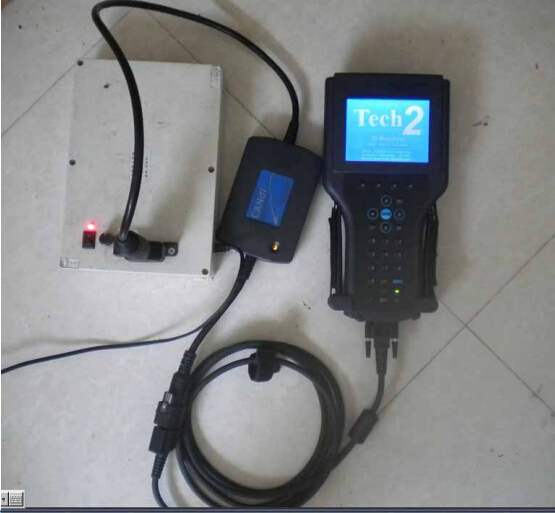
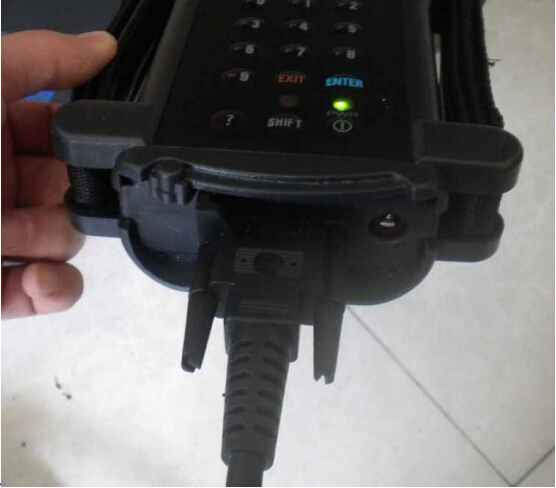
5) After well connected with vehicle and Tech2 main unit, power up the GM Tech2 scan tool, the scanner is flashing. Software update procedure will display on the screen.
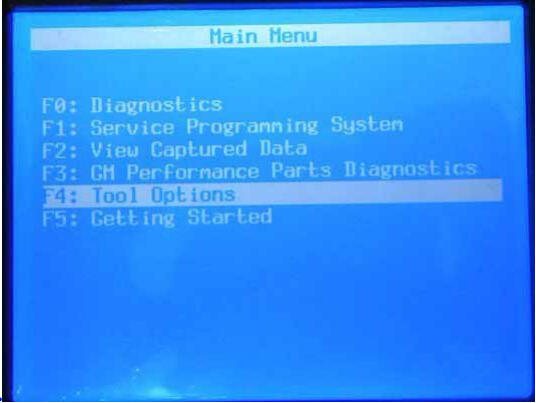
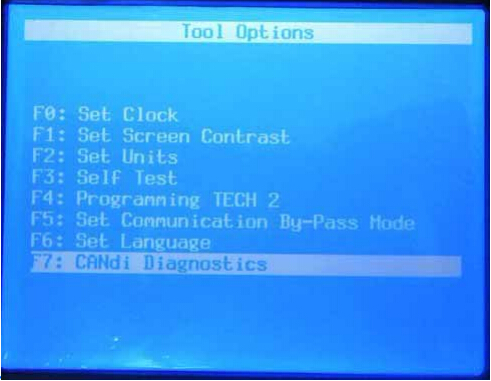
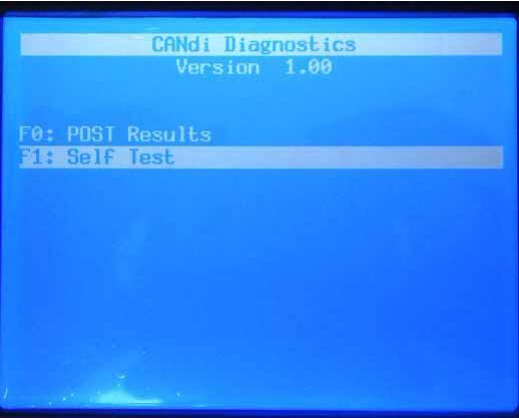
6) Browse to "Tool Options†menu, select "F9 CANdi Diagnostics†option
7) Two options available under CANdi Diagnostics menu: POST Test and Self Test
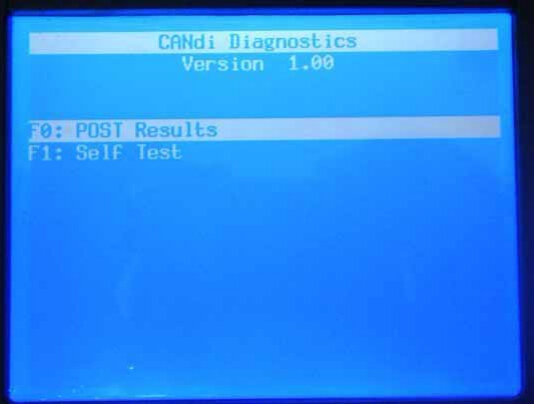
![]() First run a POST Test. The CANdi POST result is used to determine
if the module has any problems during the software upgrade or start-up
sequence.
First run a POST Test. The CANdi POST result is used to determine
if the module has any problems during the software upgrade or start-up
sequence.
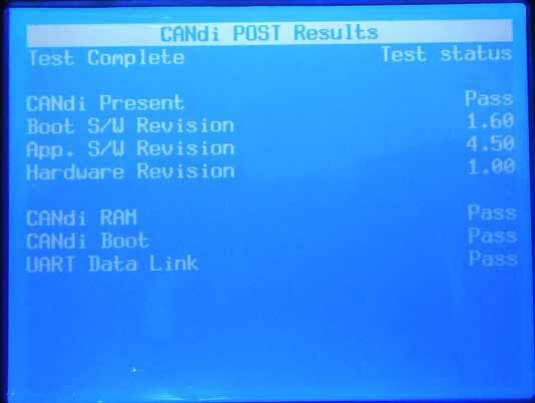
9) Then run Self Test, here is the CANdi Self Test Results figure
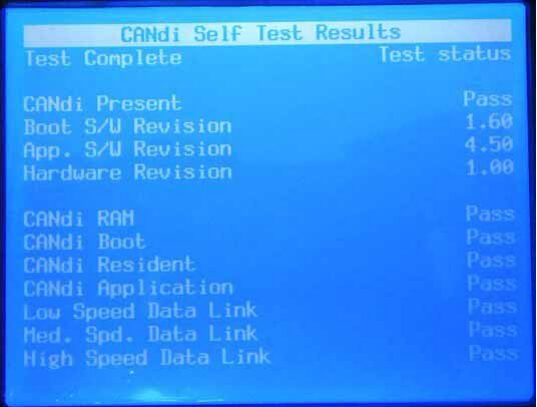
NOTE:
If the CANdi module is connected and an error screen occurs, disconnect the CANdi module from the Tech 2 and perform the test again.
Candi interface support GM vehicle list:
05 Buick Allure (3.6L)
05 Buick LaCrosse (3.6L)
05 Buick Rainier (5.3L)
04-05 Buick Rendezvous (3.6L)
04-05 Cadillac CTS (3.6L)
04-05 Cadillac SRX (3.6L / 4.6L)
04-05 Cadillac XLR (4.6L)
05 Cadillac STS (3.6L / 4.6L)
05 Chevrolet Cobalt (2.2L)
05 Chevrolet Corvette (6.0L)
05 Chevrolet Equinox (3.4L)
05 Chevrolet TrailBlazer (5.3L)
05 Chevrolet SSR (6.0L)
04 Chevrolet Malibu (Body/Chassis only)
05 Chevrolet Malibu (3.5L)
05 GMC Envoy (5.3L)
05 Pontiac G6 (3.5L)
05 Pontiac GTO (6.0L)
05 Pontiac Pursuit (2.2L)
03-05 Saturn ION (2.2L)
Feedback from customer:
GM tech2 would NOT work with All C5’s, if you’re going to use it on a C6, make SURE you have the CANDi modules.
I purchase a used CANDi module so I can use it on my C6.
Posted by: Emily white at
06:52 AM
| Comments (1)
| Add Comment
Post contains 559 words, total size 8 kb.
March 12, 2021
As we know,Yanhua Digimaster 3 can support automotive odometer adjustment, ECU, Airbag ECU data adjustment, computer program matching, audio decoding, automotive memory programming and key programming. Here mainly share the guide to reset Airbag and control computer data.
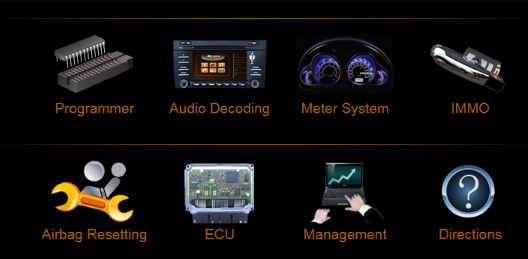
How to reset Airbag by Digimaster 3?
Note: After airbag detonation,the error record will be saved in the memory code of circuit board by airbag ECU. If you write the data generated before detonation when the computer hard disk not destroy, then you no need to change the circuit board.
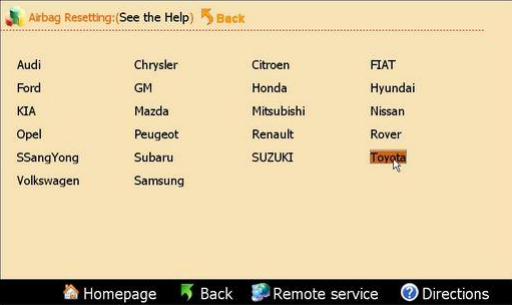
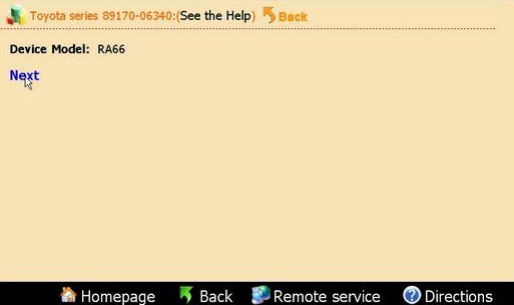
Step1: Enter the Airbag Resetting interface
Choose the relevant model
Here we take Toyota as example
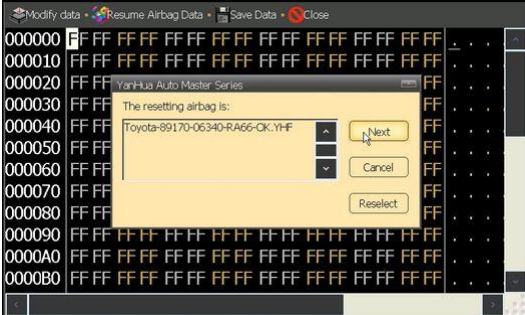
Step2: The airbag will be showed in list by number
Take "Toyota89170-06340†as example
Find out the chip in airbag ECU according to the diagram
Then dismantle the chip to install to OBP adapter, click "next stepâ€
Step3: After finish reading data, it will prompt you whether need to restore airbag
Click "next stepâ€, the data will be restored to airbag chip
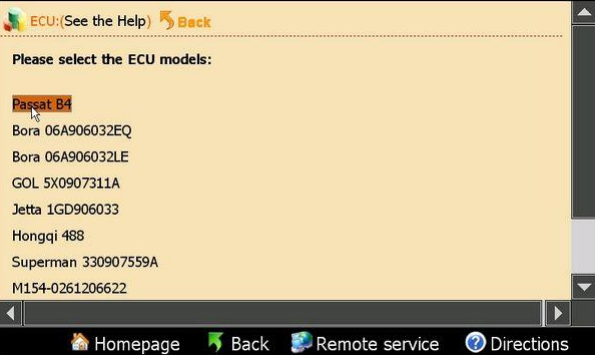
2.How to reset Control Computer data by Digimaster 3?
Step 1: Enter "ECU†main menu
Select the corresponding car model
Here take "Passat B4†for example
Step2: According to the diagram
Dismantle the chip and install to ICP Adapter
Click "next step†to go on
Step3: After finish reading data, it will prompt that "it will cover the engine computer dataâ€
then click "next step†to write data into the engine computer
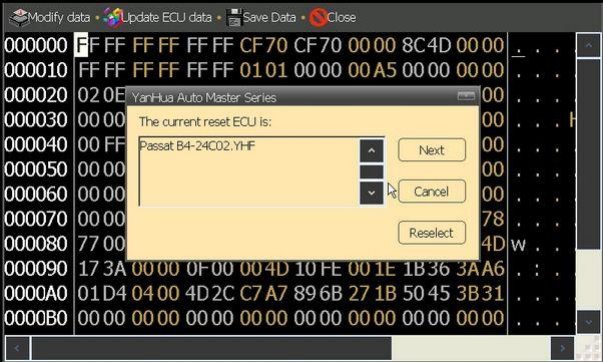
Step4: After all these operations, just need to put the chip back to car
Digimaster III Odometer Correction Master Airbag Resetting Car Model Full List:
http://forobd2tool.com/wp-content/download/Digimaster_3/digimaster_iii_newest_car_list.pdf
Car models: Audi, Chrysler, Citroen, FIAT, Ford, GM, Honda, Hyundai,KIA, Land Rover, Mazda, Mitsubishi, Nissan, Opel, Peugeot, Renault, SSangYong, Subaru, SUZUKI, Toyota, Volkswagen, Samsung, MG Rover, Cadillac and Luxgen.
Please kindly notice: Here is not full car models Digimaster III supported, the car models always have been updating…
Posted by: Emily white at
06:39 AM
| Comments (1)
| Add Comment
Post contains 317 words, total size 4 kb.
March 05, 2021

Post by i6pwr:
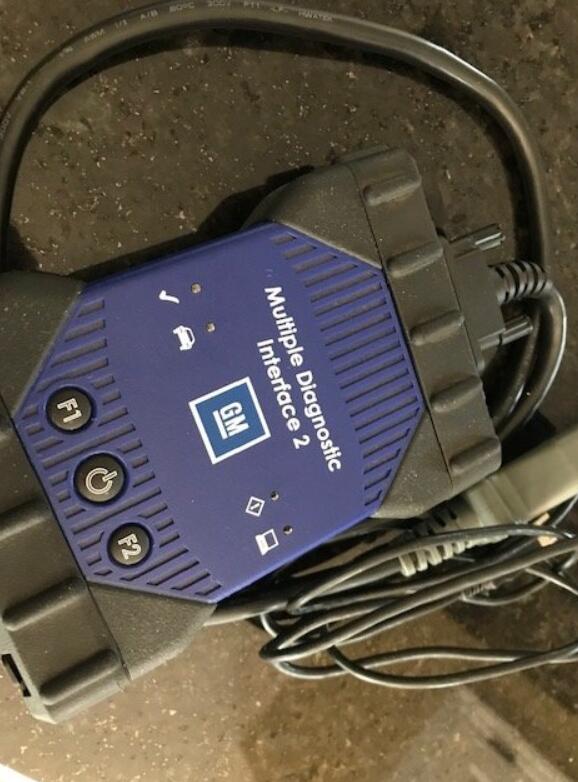
For my 2002 GMC SUV as well as other mid 2000’s GM vehicles, I’m ready to purchase either of the above mentioned. My thoughts are with a Tech 2, I have an all-in-one unit, but the MDI gives me options down tne road especially with our 2014 Toyota.
I’m fine with just a Tech 2 Scanner for the 2002 GMC for time being, but if I go with the MDI, would a regular Win 10 laptop work?
There are so many options I’m not sure where to start, mainly with options. I hear that some overseas sellers may not be the best choice due to customs.
I’m looking to try to stay under $500 for either setup if possible. Anyone who has been down this road, all input and criticism welcome.
Reply by Timmastertech:
As far as scan functions for your vehicle, tech2win is the software package, the MDI is the interface. Without a subscription the MDI is a nice looking paperweight. Global platform GM vehicles (starts with Camaro in 2010 and was all vehicles by 2014) use GDS2 with the MDI. Programming for any of the above is done with an SPS subscription and an interface. GM products that have a class 2 data bus (anything pre-can) does not program well with an MDI/MDI 2 or modern J2534 device. Programming using the tech 2 as the interface is the only reliable way.
A handheld Tech 2 with candi module covers scan functionality on all GM from 1992 to 2009 and all non-global vehicles to 2013. New legit from Bosch they are in the 4500 ballpark and used around 2000. ANything cheaper is a chinese knockoff that may or may not work.
For scan only, there is no reason you need an MDI. A Cardaq M or Cardaq plus 3 works just fine and can also be used as an interface for Toyota Techstream for your toyota.
As far as a laptop. Win 10 is the only OS that GM supports anymore. Here is a link to the PC requirements https://gsi.ext.gm.com/userguides/Aftermarket Infrastructure Guideline v1.0.pdf
Posted by: Emily white at
07:08 AM
| Comments (2)
| Add Comment
Post contains 356 words, total size 3 kb.
Post by i6pwr:
For my 2002 GMC SUV as well as other mid 2000’s GM vehicles, I’m ready to purchase either of the above mentioned. My thoughts are with a Tech 2, I have an all-in-one unit, but the MDI gives me options down tne road especially with our 2014 Toyota.
I’m fine with just a Tech 2 Scanner for the 2002 GMC for time being, but if I go with the MDI, would a regular Win 10 laptop work?
There are so many options I’m not sure where to start, mainly with options. I hear that some overseas sellers may not be the best choice due to customs.
I’m looking to try to stay under $500 for either setup if possible. Anyone who has been down this road, all input and criticism welcome.
Reply by Timmastertech:
As far as scan functions for your vehicle, tech2win is the software package, the MDI is the interface. Without a subscription the MDI is a nice looking paperweight. Global platform GM vehicles (starts with Camaro in 2010 and was all vehicles by 2014) use GDS2 with the MDI. Programming for any of the above is done with an SPS subscription and an interface. GM products that have a class 2 data bus (anything pre-can) does not program well with an MDI/MDI 2 or modern J2534 device. Programming using the tech 2 as the interface is the only reliable way.
A handheld Tech 2 with candi module covers scan functionality on all GM from 1992 to 2009 and all non-global vehicles to 2013. New legit from Bosch they are in the 4500 ballpark and used around 2000. ANything cheaper is a chinese knockoff that may or may not work.
For scan only, there is no reason you need an MDI. A Cardaq M or Cardaq plus 3 works just fine and can also be used as an interface for Toyota Techstream for your toyota.
As far as a laptop. Win 10 is the only OS that GM supports anymore. Here is a link to the PC requirements https://gsi.ext.gm.com/userguides/Aftermarket Infrastructure Guideline v1.0.pdf
Posted by: Emily white at
07:08 AM
| No Comments
| Add Comment
Post contains 356 words, total size 3 kb.
February 25, 2021
Many clients get confused when choose a Mercedes diagnostic tool. Here OBD2TOOL share comparison of MB Star C3 C4 C5 and C6.
Mercedes Benz Star Diagnosis MB Star C3
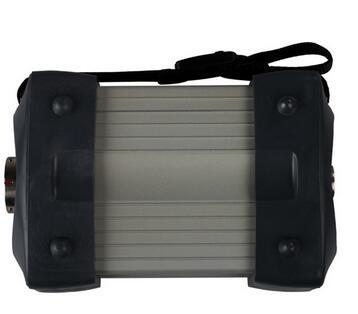
SD Connect MB Star C3 is much better for the old Mercedes Benz and support truck speed limited function (other tools cannot do it).
Star C3 xentry software data latest version is V2016.12 and now stop update anymore so that it cannot support online SCN Coding.
Mercedes Benz Star Diagnosis MB Star C4
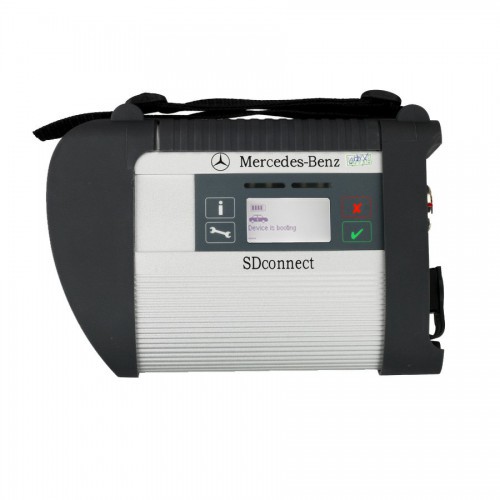
MB Star C4 is the hot sell baby Mercedes diagnostic tool with low price and strong functions work stable.MB Star C4 with vediamo and DTS Monaco software support offline programming and can support online SCN coding with online dealer account.MB Star C4 software is keep in update but it cannot support DOIP prototol.
Mercedes Benz Star Diagnosis MB Star C5
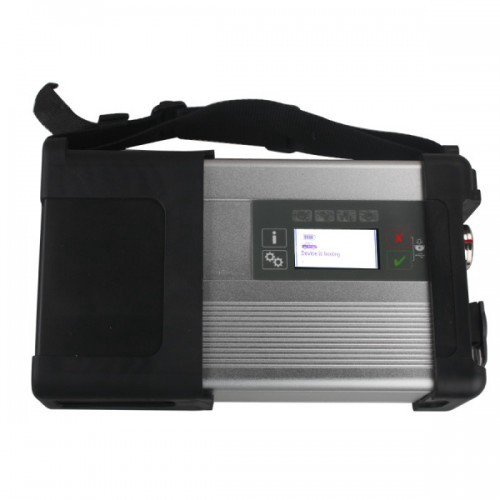
Original MB STAR C5 Mercedes C5 Support wifi connection and latest Xentry SSD Software installed well in Mercedes C5.SD Connect C5 including DOIP protocol and work with new W222 Mercedes.MB Star C5 support online SCN coding with dealer account.
It is much better to get a low cost MB Star C4
Star Diagnosis C6 MB Star C6 with DOIP&AUDIO Function
Star Diagnosis MB STAR C6 VCI is the latest interface for For Mercedes & SMART vehicles can replace MB Star C4/C5 .SD Connect MB Star C6 Pass-through Interface support DOIP&AUDIO function and Support SCN Coding.Multi-language Star Diagnosis MB Star C6 work for Mercedes Benz & Smart vehicles up to 2018 year.
But MB Star C6 software cannot support Vediamo and DTS Monaco for offline programming.
Summary:
Star Diagnosis MB Star C3 is old and Star C5 is very expensive, MB Star C6 quality is not good as Star C4,we recommend you to use the MB Star C4. MB Star C4 cover all the functions of MB Star C3 C5 C6 except the DOIP protocol. It is a value to own one.
OBD2TOOL offer hot sell good quality MB Star C4 with full chips and SN 100925 support hardware update.
Posted by: Emily white at
07:16 AM
| Comments (1)
| Add Comment
Post contains 352 words, total size 4 kb.
February 21, 2021
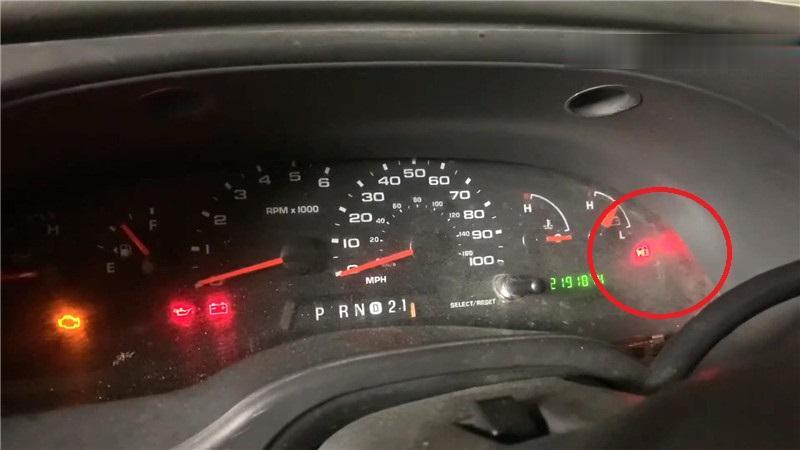
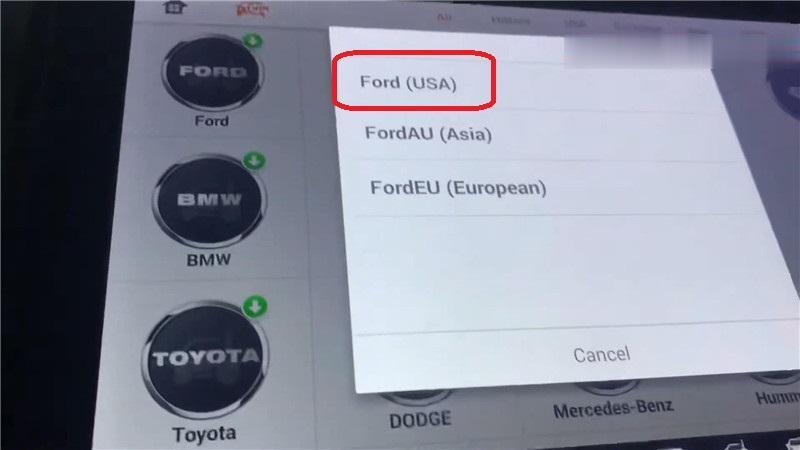
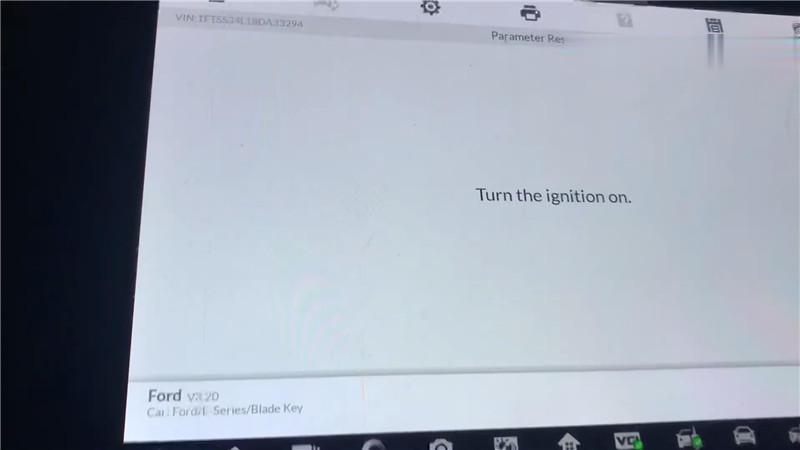
Today I’m going to use the Autel MaxiIM IM608 diagnostic tool to do a parameter reset for a 2008 Ford E350. I just reprogrammed a used PCM for this vehicle, so the red light keeps blinking on the dashboard. That is the anti-theft system functions, which is not letting the vehicle start.
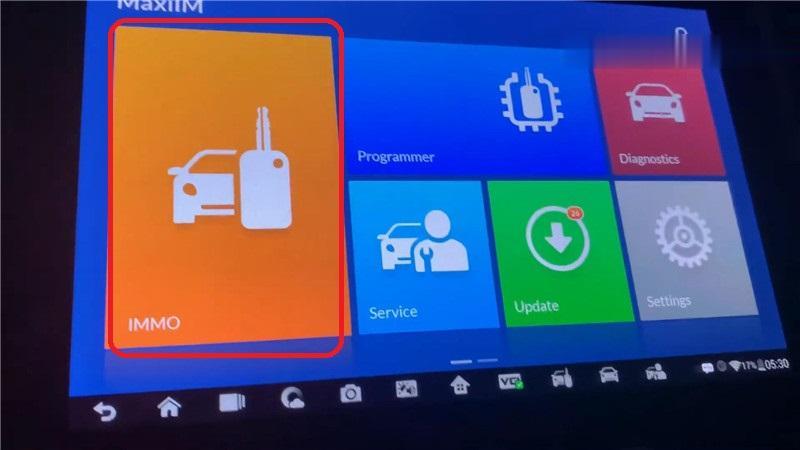
All I have to do is to reset the parameter, here we go to the Autel IM608 scanner.
IMMO >> Accept >> VIN >> Auto detect >> Ford(USA)
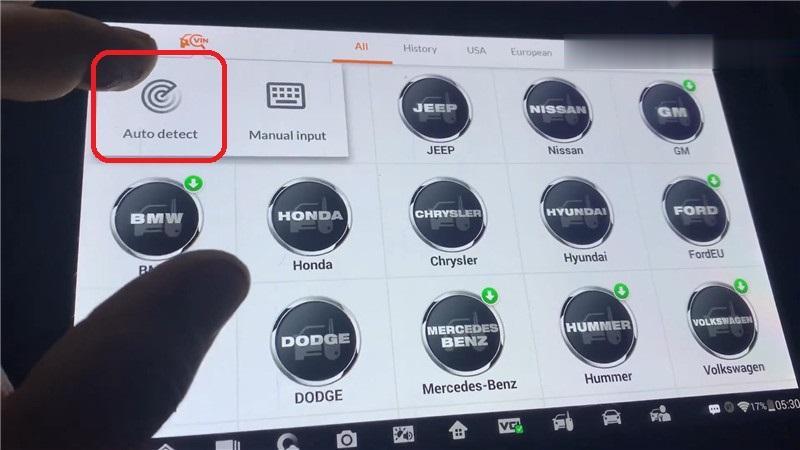
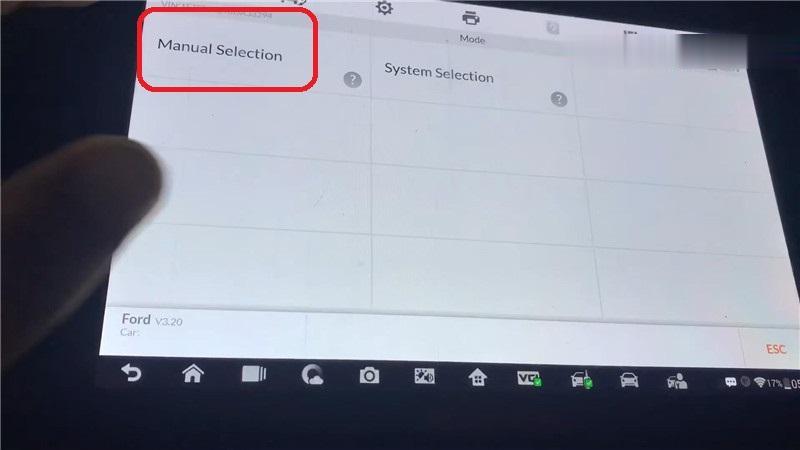
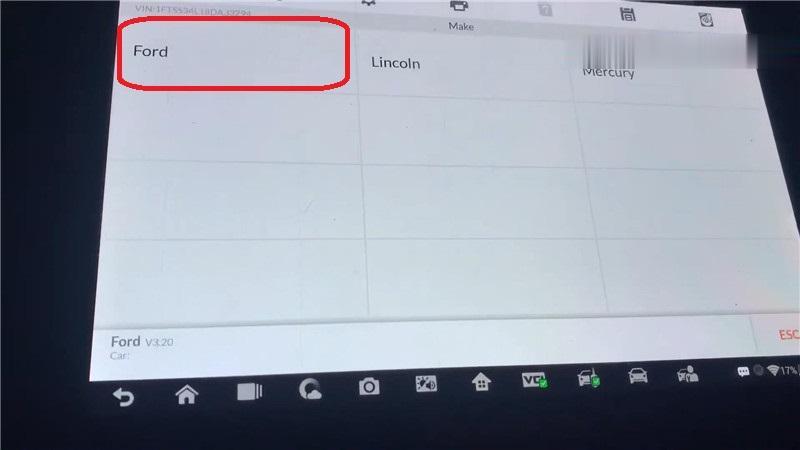
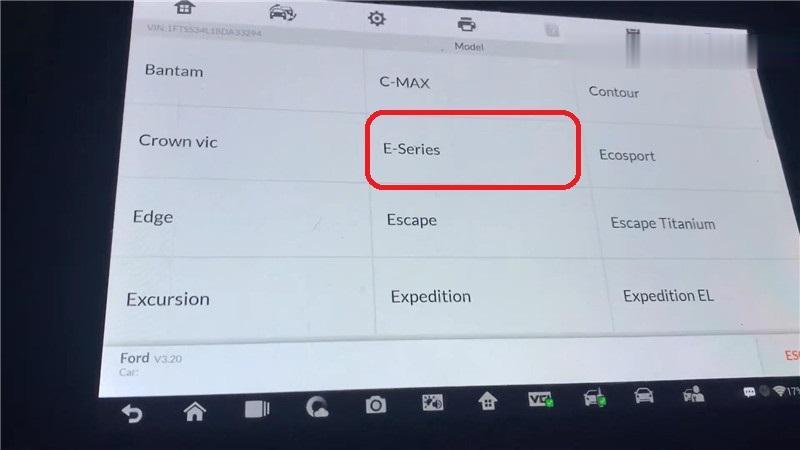
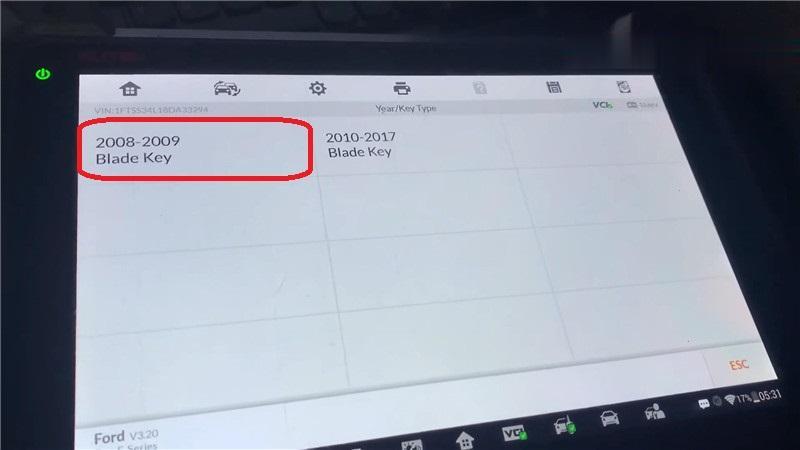
Manual selection >> Ford >> USA >> E-series >> 2008-2009 Blade Key
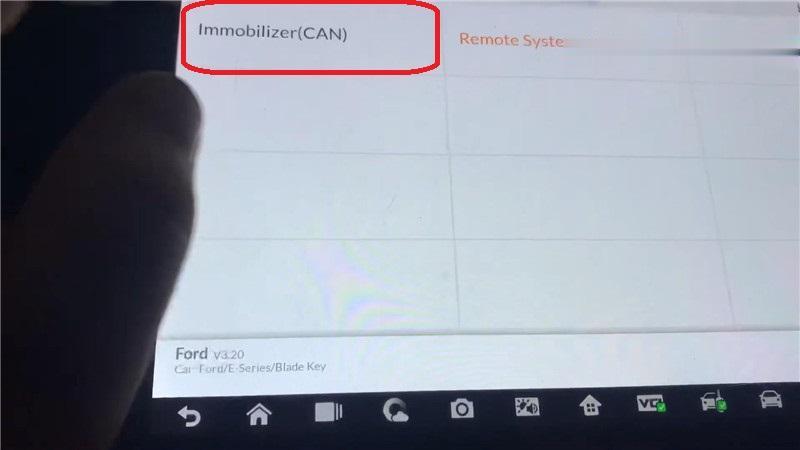
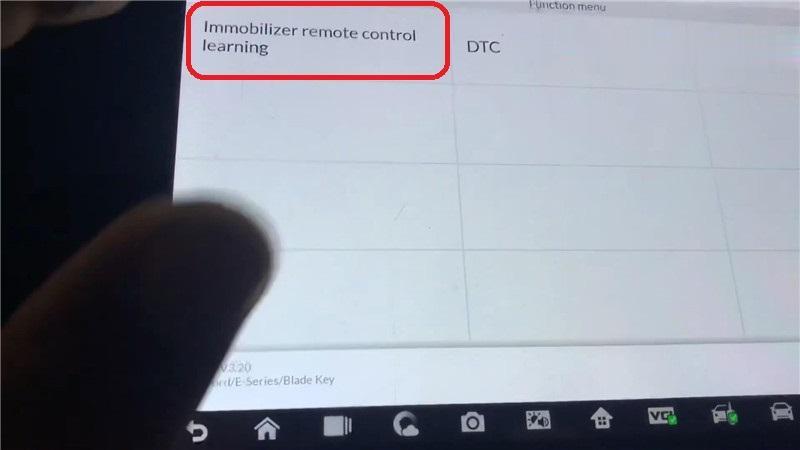
Immobilizer(CAN) >> Immobilizer remote control learning >> Parameter reset
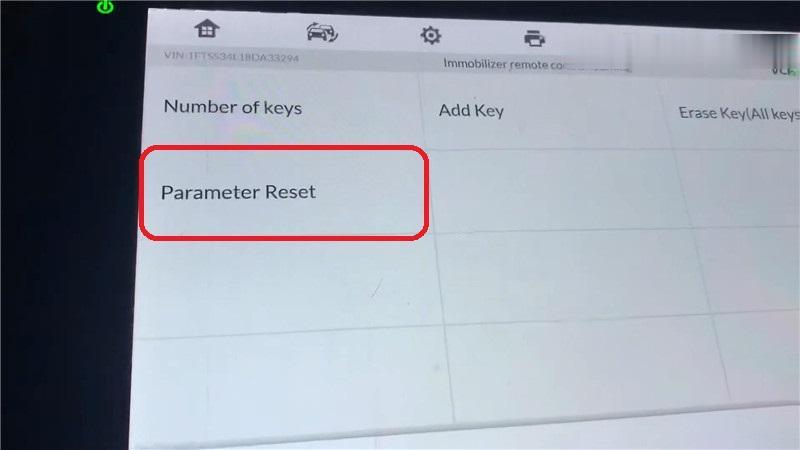
Turn the ignition on, press "OKâ€.
Warning: You should only perform this procedure if you have replaced either the PCM or PATS on this vehicle. Press "Yes†to continue.
Learning successful, press "OK†to complete.

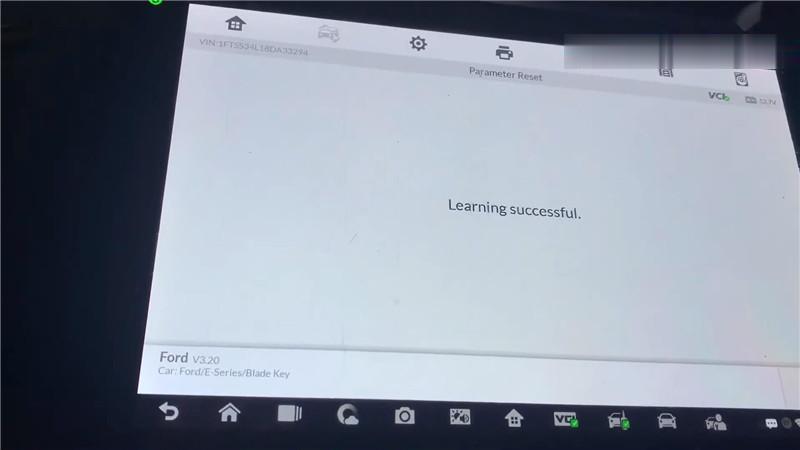
It is surprisingly quick, now the red light is off.
I’m gonna turn off the ignition to see if the light has gone. All right, it is completely off.

As you can see, Autel IM608 Scan Tool does do a parameter reset in 3 minutes.
Posted by: Emily white at
04:46 AM
| Comments (1)
| Add Comment
Post contains 193 words, total size 4 kb.
How to upgrade the firmware of SVCI 2020? In this post, you will find the answer.
Here are the steps:
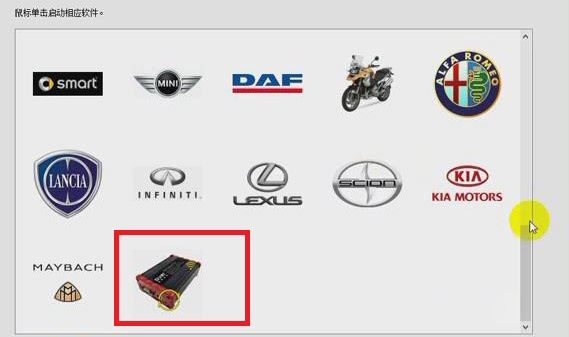
1.Click "SVCI 2020†button>> "Update firmwareâ€.
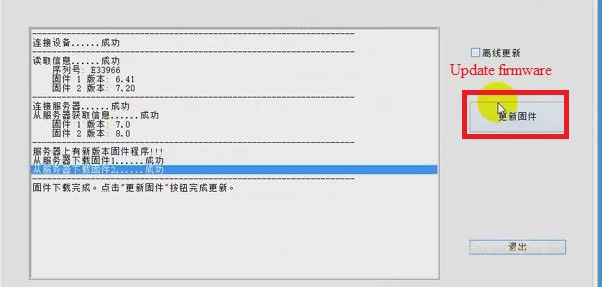
2.Choose "Firmware Program 2†and click "Beginâ€. Then Firmware Program 2 will be downloaded.
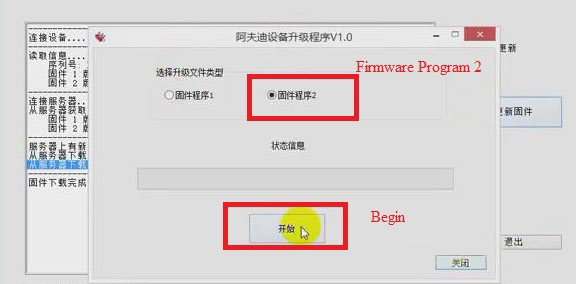
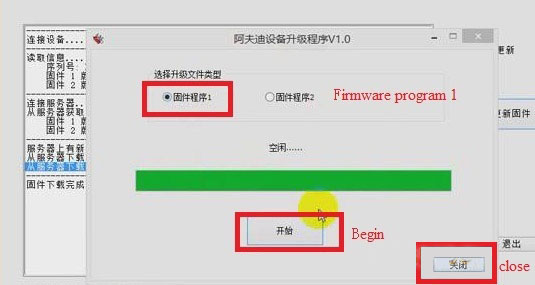
3.When the downloading of firmware program 2 is successful, click "Confirmâ€, and choose "Firmware program 1†and click "Beginâ€.Then firmware program 1 will be downloaded.
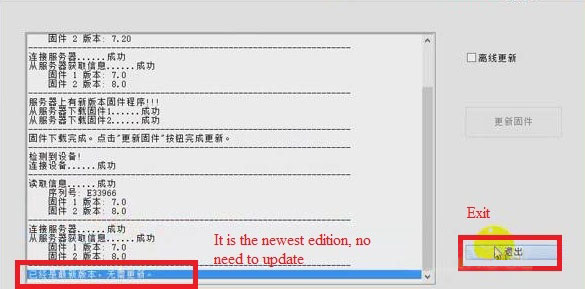
4.When the downloading of firmware program 1 is successful, click "Confirmâ€.
5.Click "Closeâ€, now we can see that the firmware has been updated to the newest. Then click "Exitâ€.
Job is done!
Posted by: Emily white at
04:39 AM
| Comments (1)
| Add Comment
Post contains 105 words, total size 2 kb.
February 19, 2021
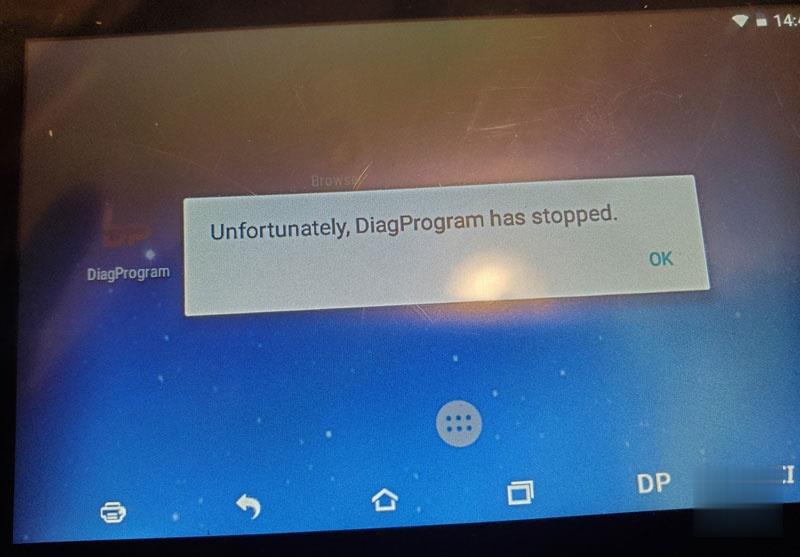
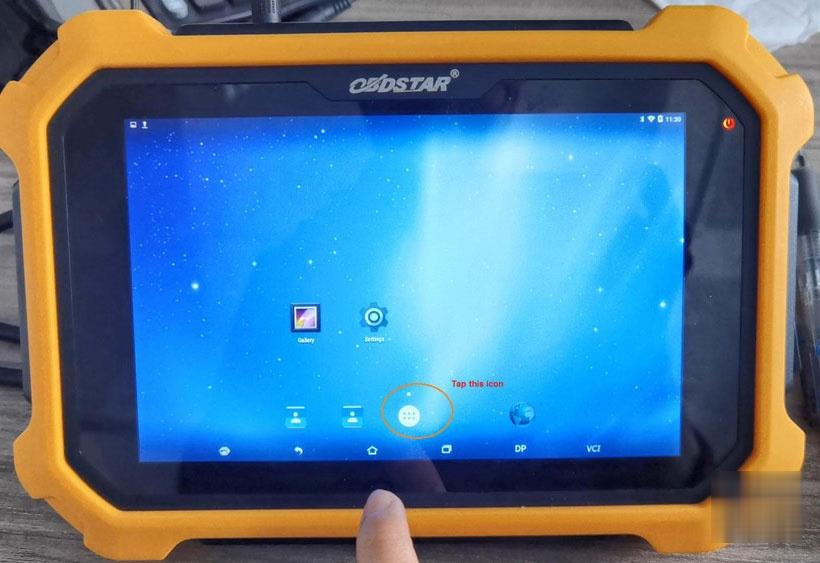
To obdstar users: regarding the problem "Unfortunately, DiagProgam has stopped.†that frequently appears recently, it is caused by compatibility issues.
A new apk version v3.8.1 has been released this week to solve this problem. (Note: The solution is applied to any of x300dp, x300 dp plus, odomaster, x300pro4.)
For the obdstar machine which update service is valid, you can directly upgrade the apk to solve this problem.
For the obdstar machine which update service expired, please clear the cache to solve the problem, the drawback is that this problem may occur repeatedly, because there is no way to upgrade the new apk v3.8.1 after the expiration, you have to clear the cache repeatedly.
Please look at the last paragraph on how to clear the cache.
Attention Please:
Never restore factory settings, otherwise the software will be lost and there is no way to restore it.
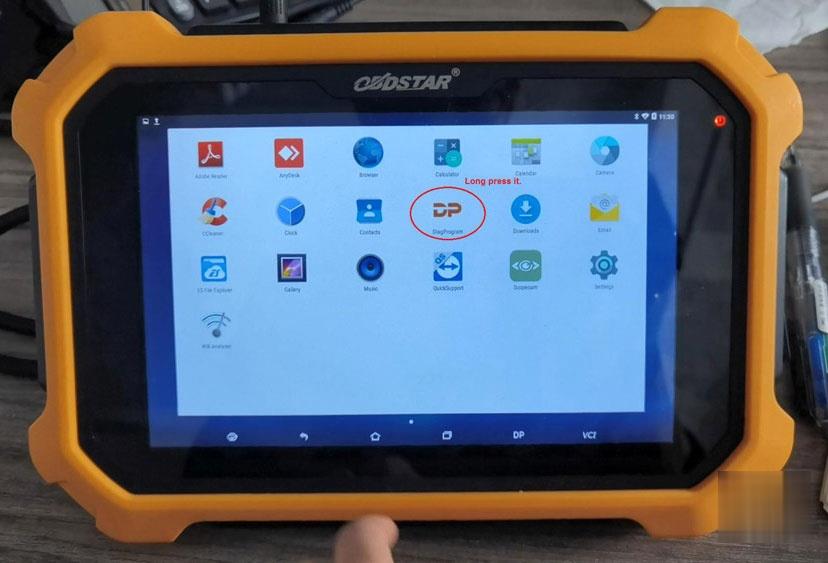
Guide on how to clear the cache:
Enter †DiagProgamâ€, long press it and drag it into "App Infoâ€
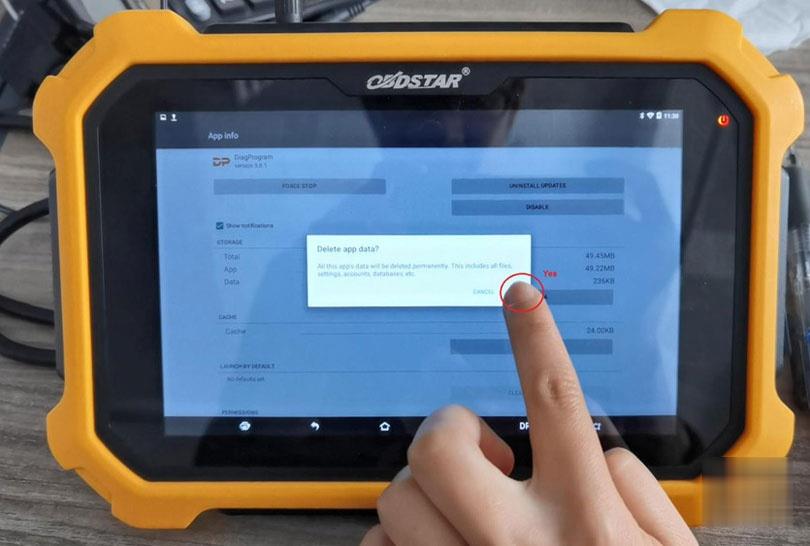
In the APP info, tap "Clear data†and "Yes†to confirm.

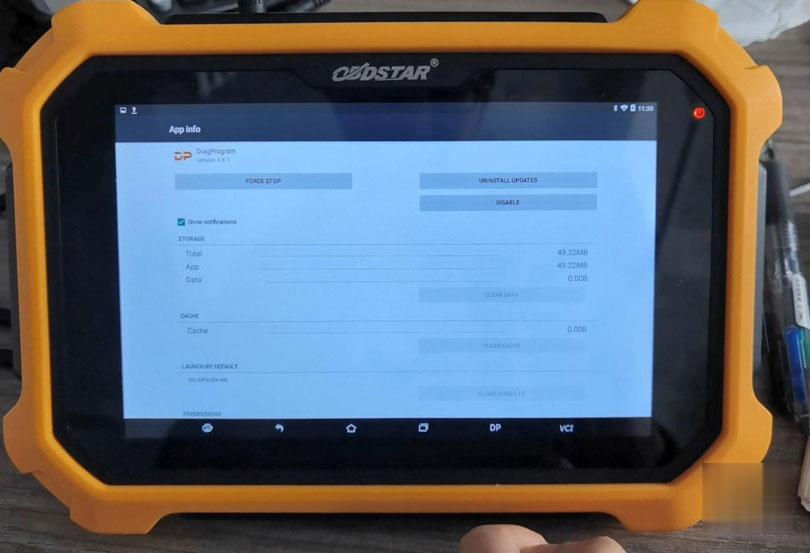
Okay, the catche is cleared, and the problem is solved. However, please keep in mind, better continue subscribing the update service and update the newest APK.
Posted by: Emily white at
09:42 AM
| Comments (2)
| Add Comment
Post contains 209 words, total size 4 kb.
To obdstar users: regarding the problem "Unfortunately, DiagProgam has stopped.†that frequently appears recently, it is caused by compatibility issues.
A new apk version v3.8.1 has been released this week to solve this problem. (Note: The solution is applied to any of x300dp, x300 dp plus, odomaster, x300pro4.)
For the obdstar machine which update service is valid, you can directly upgrade the apk to solve this problem.
For the obdstar machine which update service expired, please clear the cache to solve the problem, the drawback is that this problem may occur repeatedly, because there is no way to upgrade the new apk v3.8.1 after the expiration, you have to clear the cache repeatedly.
Please look at the last paragraph on how to clear the cache.
Attention Please:
Never restore factory settings, otherwise the software will be lost and there is no way to restore it.
Guide on how to clear the cache:
Enter †DiagProgamâ€, long press it and drag it into "App Infoâ€
In the APP info, tap "Clear data†and "Yes†to confirm.
Okay, the catche is cleared, and the problem is solved. However, please keep in mind, better continue subscribing the update service and update the newest APK.
Posted by: Emily white at
08:11 AM
| No Comments
| Add Comment
Post contains 209 words, total size 4 kb.
February 10, 2021
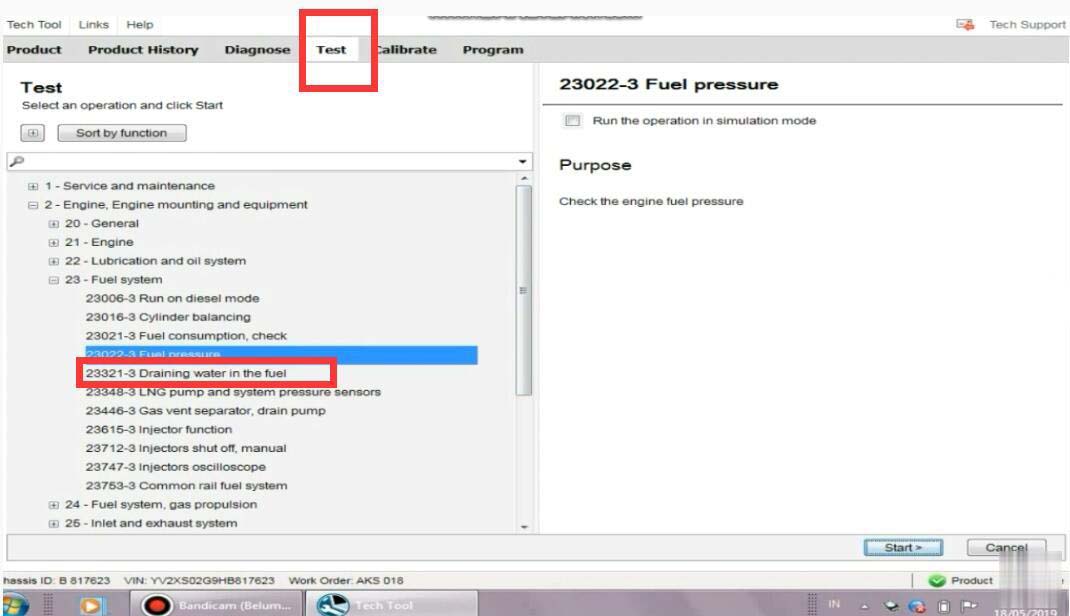
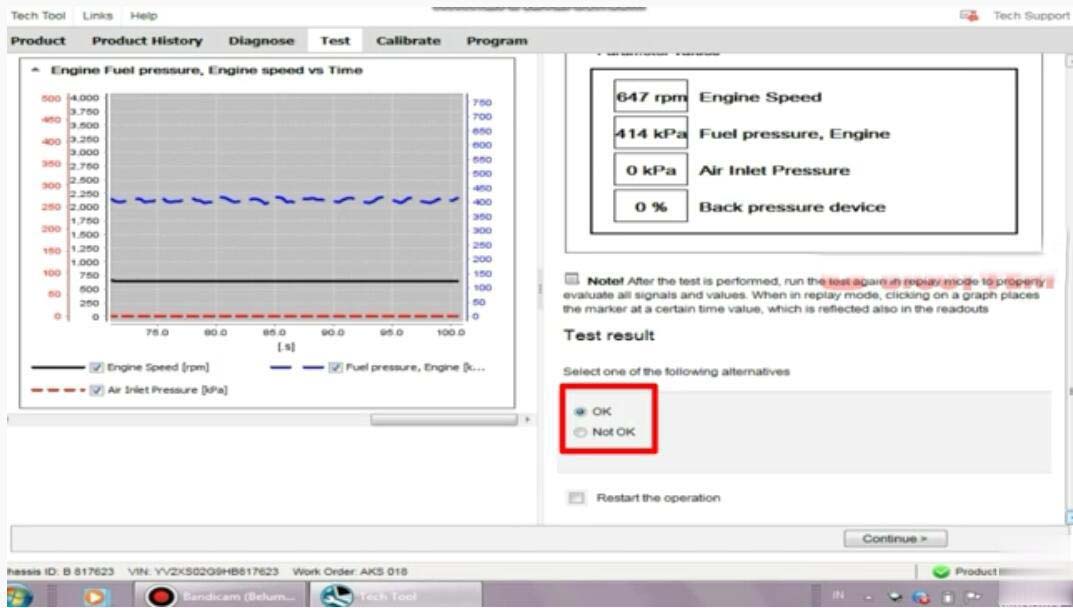
This is a instruction show you guide on how to use Volvo Tech Tool diagnostic software do to fuel pressure monitor for Volvo FM4 truck.
Procedures:
Run Volvo Tech Tool software on your PC,then input user ID to login (offline)
Select "Testâ€â€“>â€23-Fuel systemâ€â€“>â€Fuel pressureâ€
Then click "Start†button
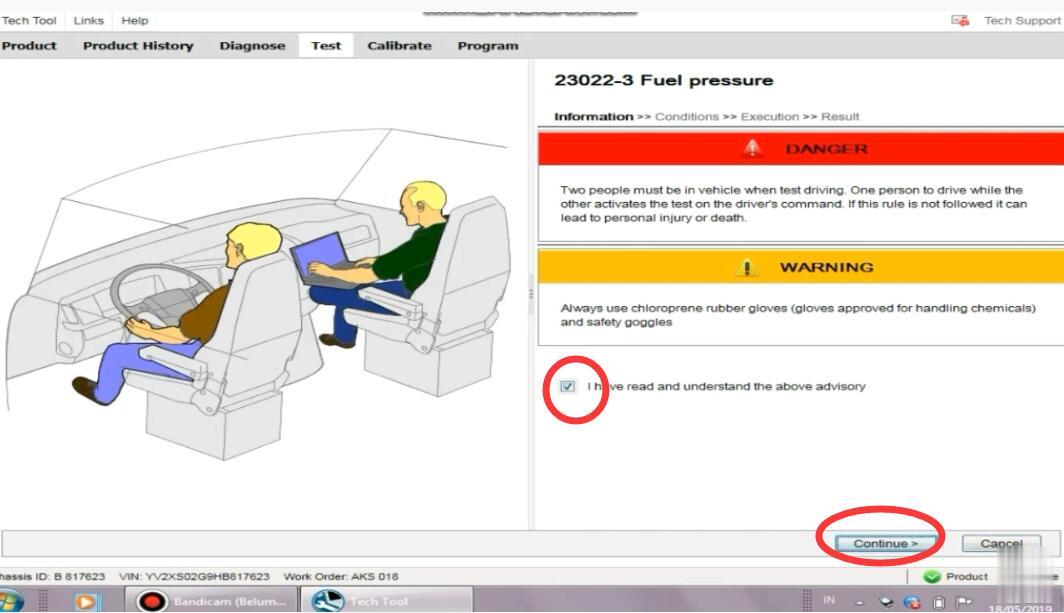
It show you warning message,select "I have read and understand the above advisoryâ€
And click "Continueâ€
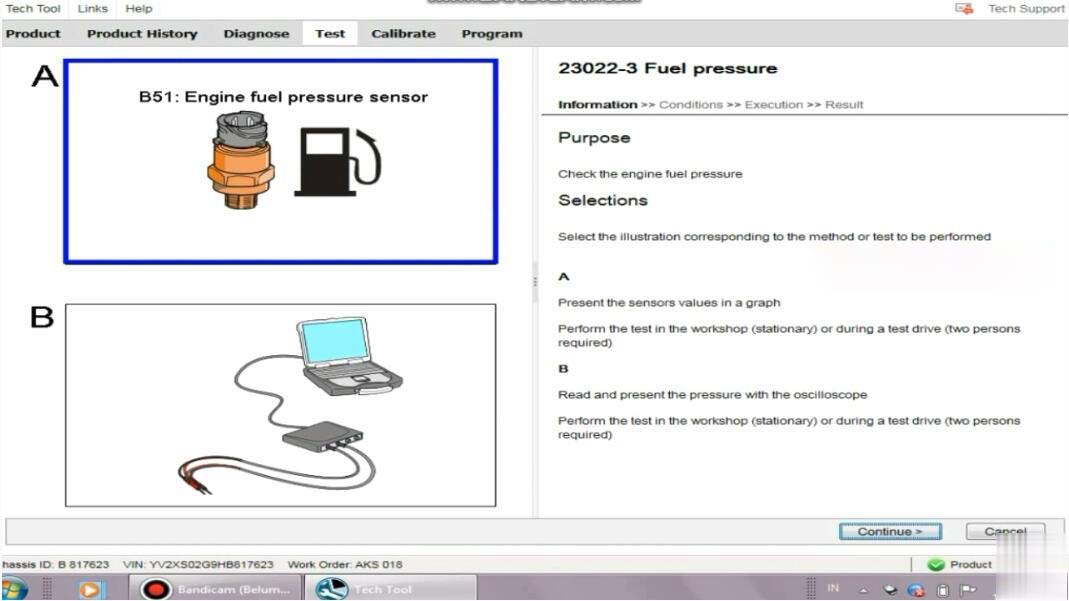
There are two options:
A![]() resent the sensors values in a graph
resent the sensors values in a graph
Perform the test in the workshop(stationary) or during a test drive(two persons required)
B:Read and present the pressure with the oscilloscope
Perform the Heavy Duty Scanner in the workshop (stationary) or during a test drive(two persons required)
Select "A†and click â€Continueâ€
To monitor the fuel pressure in various conditions for example during a test drive;either the oscilloscope test in this operation or a manual pressure gauge must be used.Manual fuel pressure test instructions can be found by selecting the symptom Low power in the diagnose tab.
Action:
Read out the status of the operating conditions:
1.Engine not running
2.Run the engine at 600rpm
3.Check the engine fuel pressure
4.Run the engine at 1200rpm
5.Check the engine fuel pressure
6.Engine running
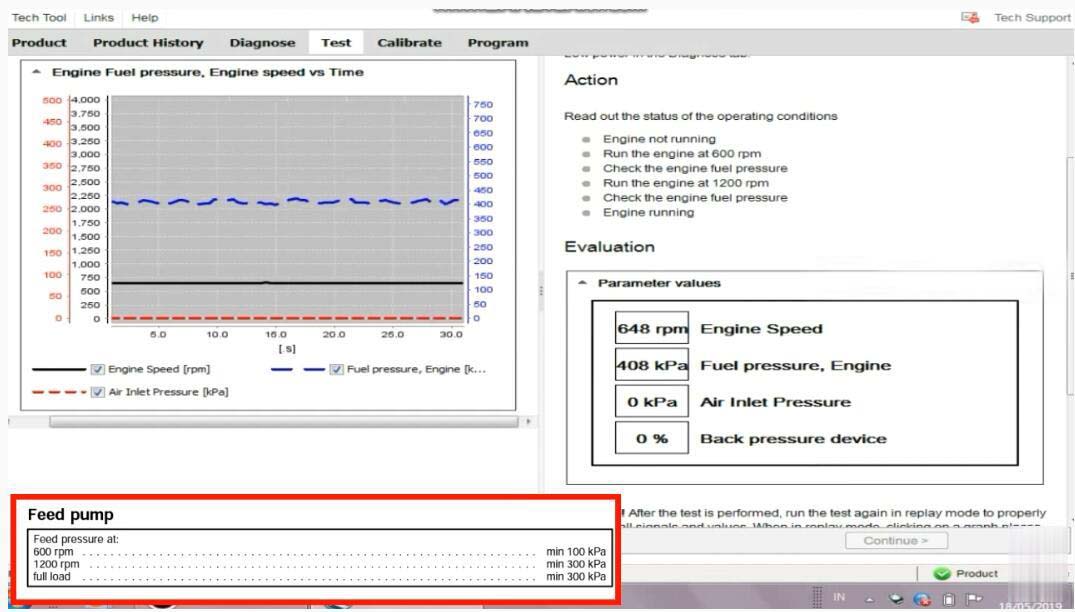
Now here you can record the fuel pressure
After then select "OKâ€,and click "Continue†exit Volvo fuel pressure monitor.
Posted by: Emily white at
09:59 AM
| Comments (1)
| Add Comment
Post contains 228 words, total size 4 kb.
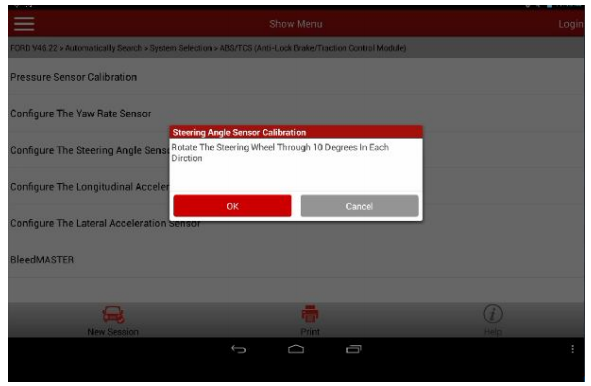
X-431 PRO Test: 2012 Ford Mondeo Steering Angle Sensor Calibration Instructions
Tested Model: Ford Mondeo, 2012, VIN=WFOGXXGBBGCB*****
NOTES:
1. This function is used to configure the steering angle sensor and calibrate the steering wheel position. Perform this function when corresponding sensors are replaced or the steering wheel position is not accurate.
2. Keep the vehicle on a flat surface, and the steering wheel is set at straight ahead position.
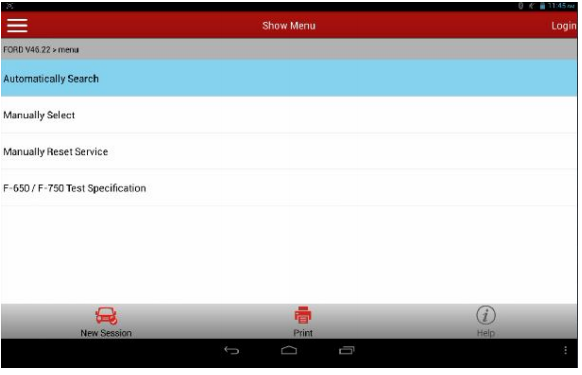
Operation Procedure:
1. Select Ford version above V45.20.
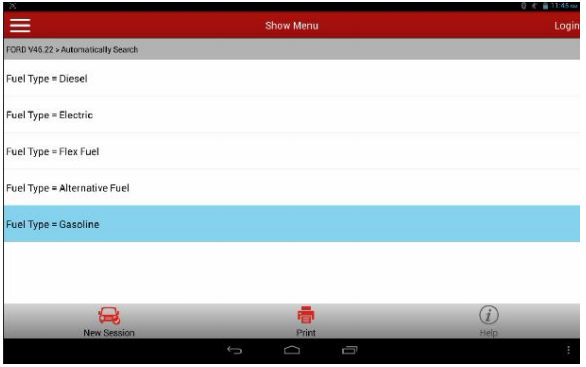
2. Select automatic search.
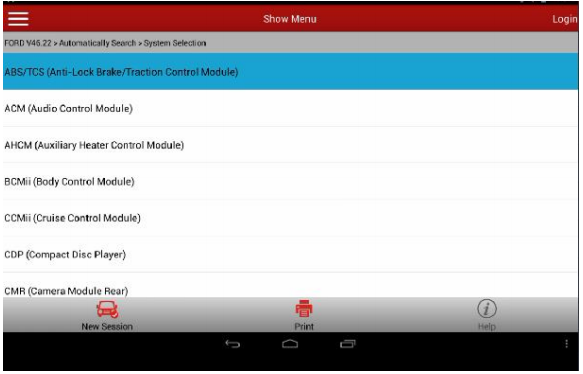
3. Select Fuel Type=Gasoline.
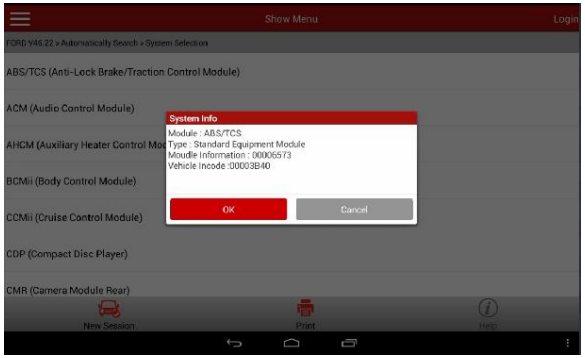
4. Select "System Selectionâ€
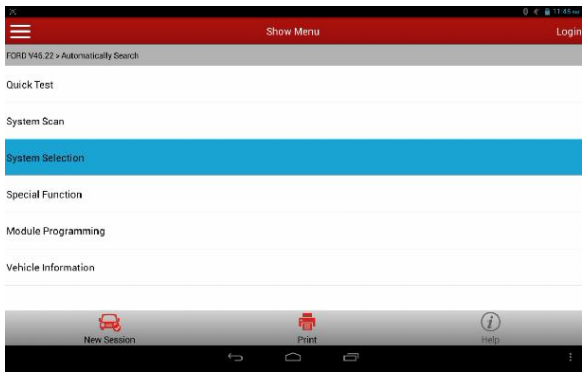
5. Select ABS (Anti-lock Brake System)/ESP (Electronic Stability Program) exhaust.
6. Check vehicle status and ensure that the vehicle is in required status: Vehicle on a flat surface, and the steering wheel is set at straight ahead position.
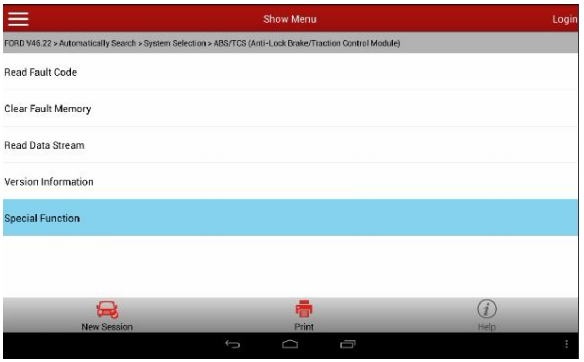
7. Select Special Function
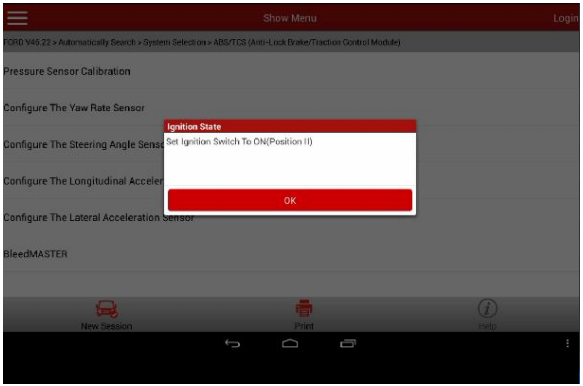
8. Place the key to ON position in order to turn the steering wheel. Because of the great force of friction between tires and the ground, in order to turn the steering wheel more easily, it is advised to start the engine at this moment
9. Turn the steering wheel to the left and right respectively about 10 degree, then back to the straight ahead position.
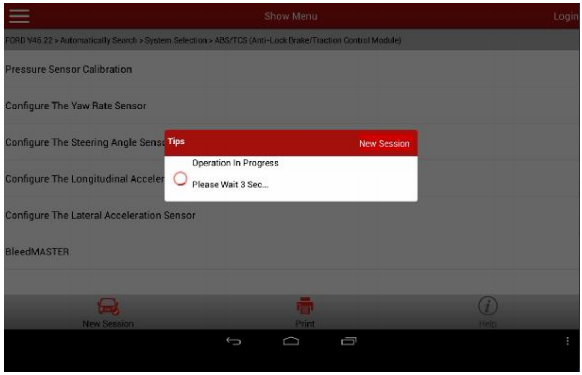
10. After clicking OK, it counts down from 4 seconds configuring the module.
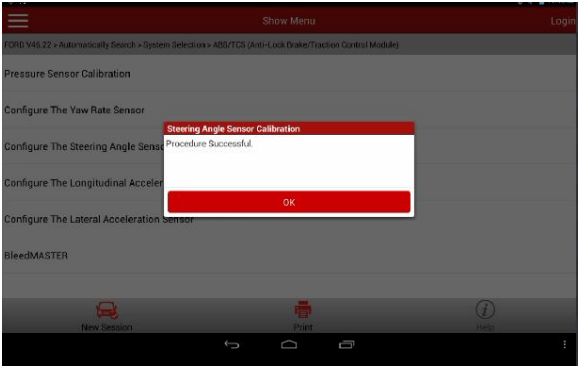
11. It prompts the procedure succeeded once the ECU configuration completed.
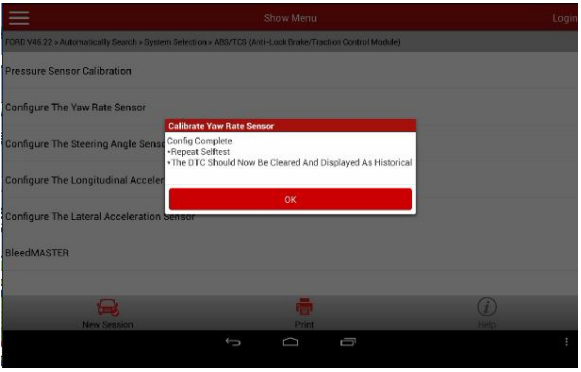
12. After this procedure succeeded, some vehicles may produce fault code due to this function execution, thus it is required to do self-test and clear the DTC, but most of the vehicles will not set fault codes.
13. After confirmation, it prompts to turn the ignition key to OFF to end the test.
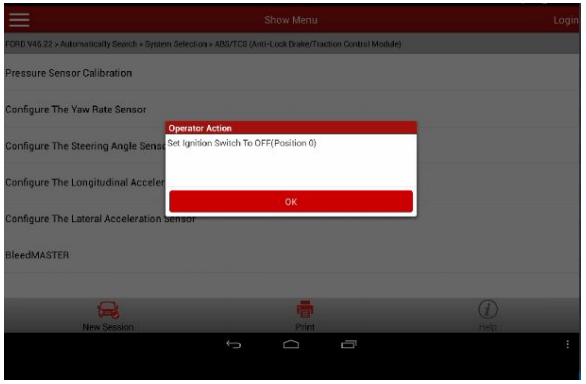
Posted by: Emily white at
06:10 AM
| Comments (1)
| Add Comment
Post contains 284 words, total size 7 kb.
January 26, 2021
This tech article will share the practical experience of using Xtool X100 Pad3 to correct or adjust the mileage of Ford cars. The frequently-asked questions (FAQs) of the users who bought the products from the OBD2TOOL will be listed as the supplement part for reference.
We can’t even wait a second to move on with the content below…
Detailed Operation Instructions:
Let’s first have a look at the current mileage of my Ford car:

It’s 68,679 miles now.
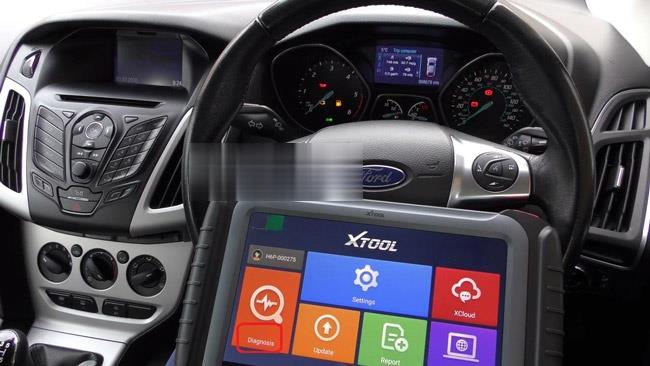
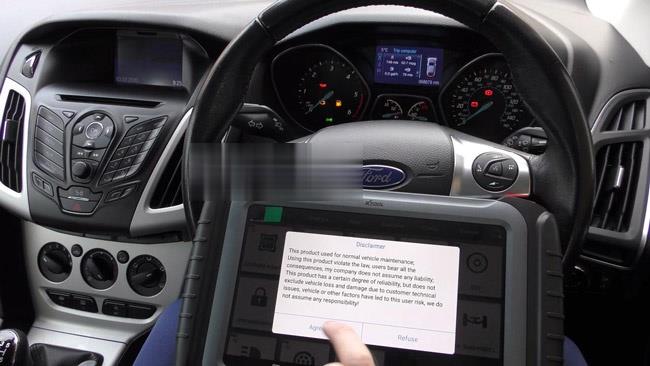
Click "Diagnosis†on the desktop menu>>Click "Odometer adjustmentâ€>>Click "Agree†to confirm the disclaimer
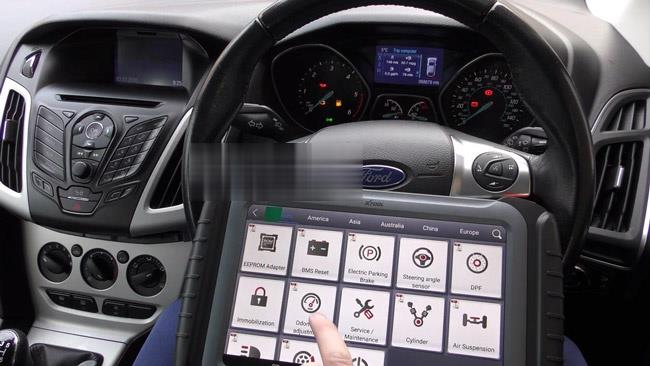
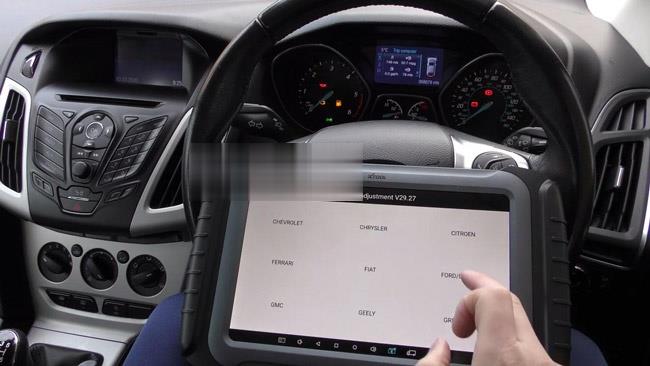
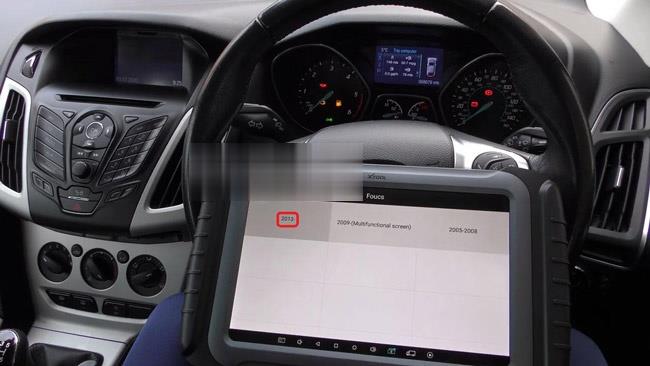
Then, it’s time for us to choose the car models. Here, the car model is Ford Focus 2013.

Then Click the button "Mileage adjustmentâ€. The screen will prompt the message as shown below:
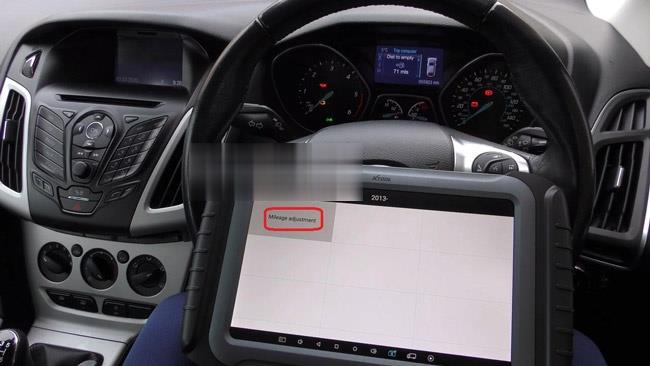
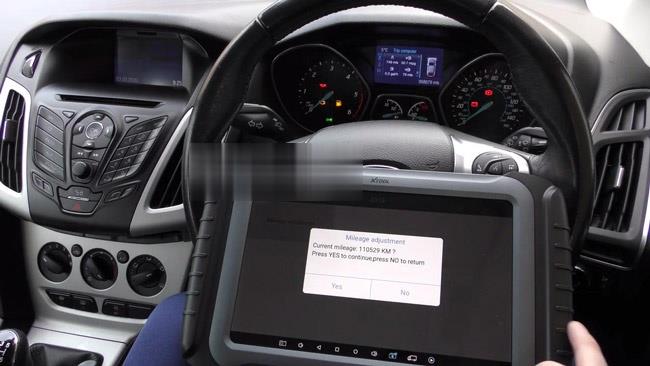
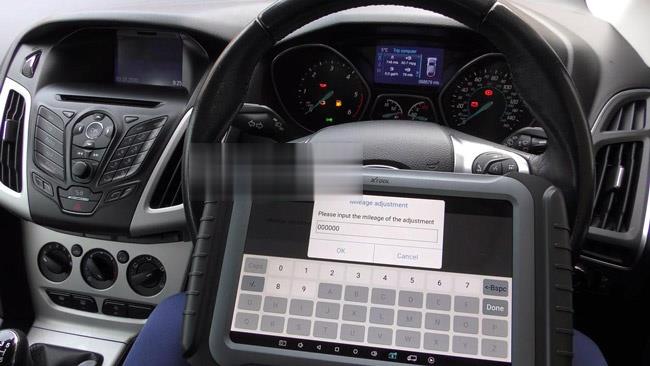
Just press "Yes†to continue. The screen will show you "Please input the mileage of adjustmentâ€. Just type in the mileage number you want to correct in the box below.
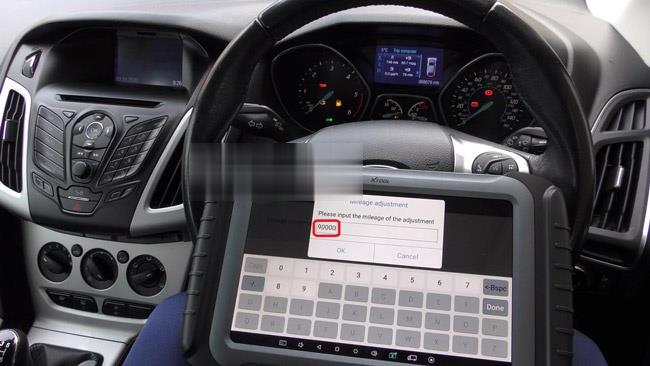
Here, let’s adjust it to 90,000 km. Wait a few seconds and the device will complete the mileage adjustment. At the same time, the mileage system of the car will restart and show the updated mileage on its screen.

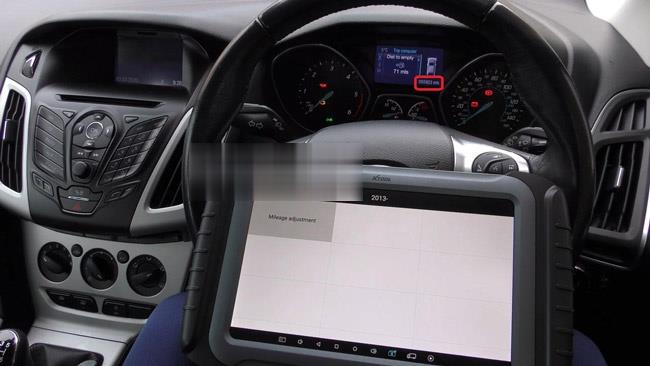
We can see the car screen displays 055923 mls. (1km=0.62137mile). That means we have completed today’s task successfully with X100 PAD3.
This is not being the ending, FAQs collected in recent days is to be added…
This will help us know more about the practical needs or problems that customers care mostly about.
Q1: Will X100 Pad3 program a 2013 Kia Soul Base model with a flip key fob?
A1: Yes, it will work for this car on keys.
Q2: Would Pad3 be able to read BMW codes on a BMW e65/e66 7 series or just read generic OBD codes?
A2: We are not sure about BMW codes, this tool will support engine and some other system’s diagnosis for BWM car brand.
Q3: Is it possible to use Pad3 to program new keys for a 2010 Camry vehicle?
A3: Yes, it will do your 2010 Camry on key programming and add keys.
Q4: May I ask if this X100 Pad3 support blanking or erasing the information of the normal and wireless keys of the Toyotas?
A4: It will work for major car models before 2017 year of Toyota by adding keys orr even all keys lost. And you can provide the specific car models and we will check for you if we tested before.
Q5: Can Pad3 support correcting odometer for American cars, European cars and Asian cars?
A5: For partial car models of these areas car makes, it can support. But for new car models released in recent years, it may not support. You can check the PDF file of the official website below to confirm:
http://www.xtooltech.com/EN/ProductView/X100PAD.html
Q6: Is it possible to use PAD3 to do mileage correction or adjustment and program keys for Honda (crv, accord)?
A6: No, all of our xtool products won’t work for Honda car brand to do odometer correction or key programming.
Q7: 2004 BWM 6 Series (E46) all keys lost with CAS2 security. Will PAD3 support programming a key for it?
A7: Yes, it will do key programming on your BWM for all key lost.
Q8: I want to ask you a question. For the KC100, it needs a registration with its serial number or not?
A8: Yes, it is with the serial number, and need to bundle with x100 pad 3.
Q9: I am interested in buying Xtool diagnostic scanners, want to know
what is the best diagnostics of Xtool currently? Function require: key
coding, coding, special functions, ….
which diagnostic device is the best and which one includes it all?
A9: You can choose X100 Pad3, the current most powerful key programmer. It will totally be worth your money and have all the special function you need for diagnosing your car.
Posted by: Emily white at
06:24 AM
| Comments (1)
| Add Comment
Post contains 658 words, total size 10 kb.
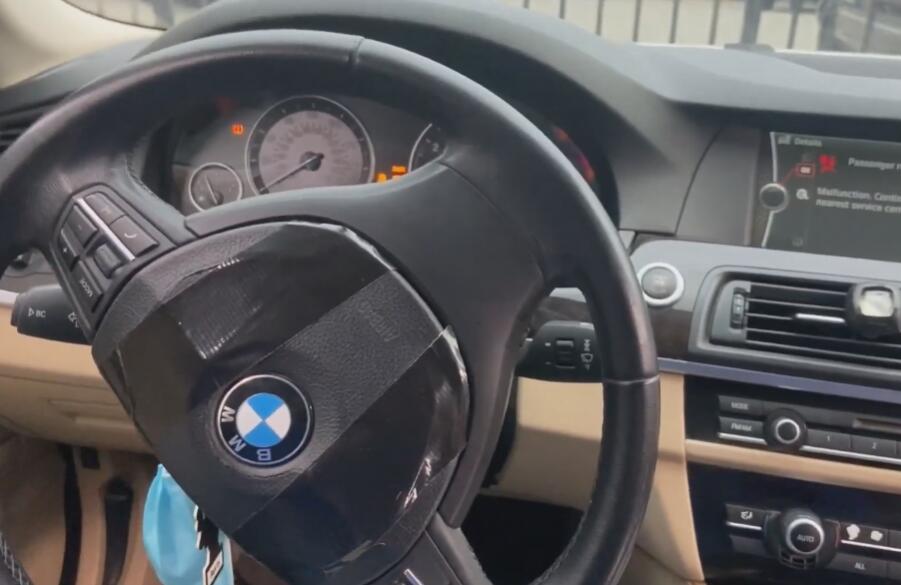
Car model and year: BMW E36 1996 – 2002
Symptom: Seats airbag light on
Take the seats out and have them reupholstered why the car is sitting. I ended up starting the car during the procedure of removal. Now the seats are out and the airbag light is on
How to reset BMW E36 Seats airbag light on?
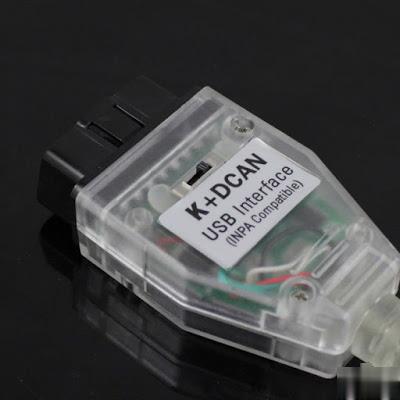
You need BMW ICOM INPA or a diagnostic tool (I.E Foxwell nt530) to clear it. Airbag lights are not self-clearing. Once the cluster light illuminates the error needs to be corrected (reattach the wiring in this case) and the trouble code erased.
Which current market tools can read the error codes?
1. Inpa: Confirmed
INPA software has reset the light a few times. That’s why I loaded it onto an old laptop. It’s free, except for cost of cables, about $20. Here’s the inpa cable link:
INPA is a factory tool that BMW still uses today. Not dealer, factory. We have access to an older version that snuck out the side door years ago. It provides all the functionality you could need or ask for for this era of BMW. Of course, it needs to be installed on a laptop, but compatible machines can be obtained very cheaply if you dont have one just laying around.
2. The Peake tool: has bug
The Peake tool is NLA, the entire company is gone… about a decade too
late. It is a 1980’s grade tool that they kept trying to limp into this
century with marketing. The Chinese offering off Aliexpress and
Amazon/eBay is a clone of the Peake circuitry and software. It has a
nasty bug in it that has cost many people much time and $$$ chasing the
wrong fault. That bug was copied from the Peake tool.
Go INPA
3. Foxwell N530 BMW scanner: Confirmed
I have the Foxwell N530 tool and it also resets the SRS light as well as OBD2,
maintenance minder, and other modules. Not as capable as INPA but it is
a self contained handheld unit and doesn’t require a laptop.
I just sold my Peake SRS tool.
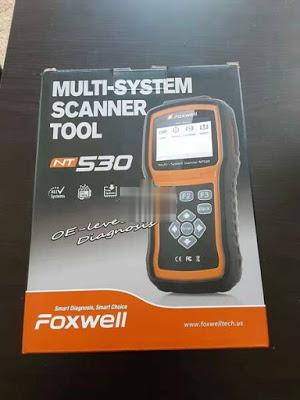
PS: Get a Foxwell tool along with the round 20 pin connector for about $170 and you will have a capable scan tool for this and future work.
Posted by: Emily white at
05:46 AM
| No Comments
| Add Comment
Post contains 388 words, total size 3 kb.
January 04, 2021
This post comes with the introduction to updateMB SD Connect Compact 5 /SD C4/ SD C4 PLUS.
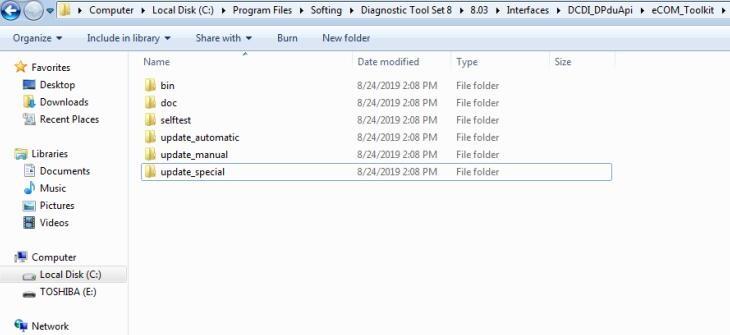
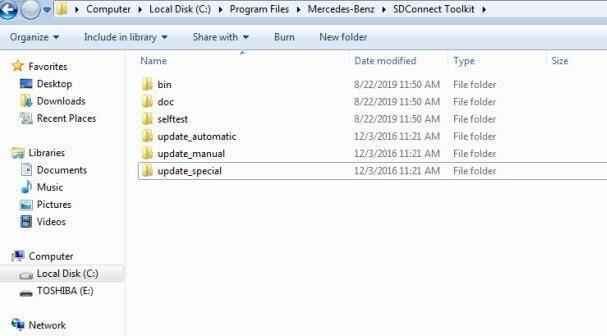
Step 1: Change file name
There are two storage path for MB SD Connect Compact 4/ new SD C4 plus/ SD C5.
Path 1: C:\Program Files\Mercedes-Benz\SDConnect Toolkit
Path 2: C:\Program Files\Softing\Diagnostic Tool Set 8\8.03\Interfaces\DCDI_DPduApi\eCOM_Toolkit
Please modify the file name of "update_automaticxâ€, "update_manualx†and "update_specicalx†to "update_automaticâ€, "update_manual†and "update_specicalâ€, it means remove the last letter of all the three file names.


Posted by: Emily white at
12:12 PM
| No Comments
| Add Comment
Post contains 86 words, total size 2 kb.
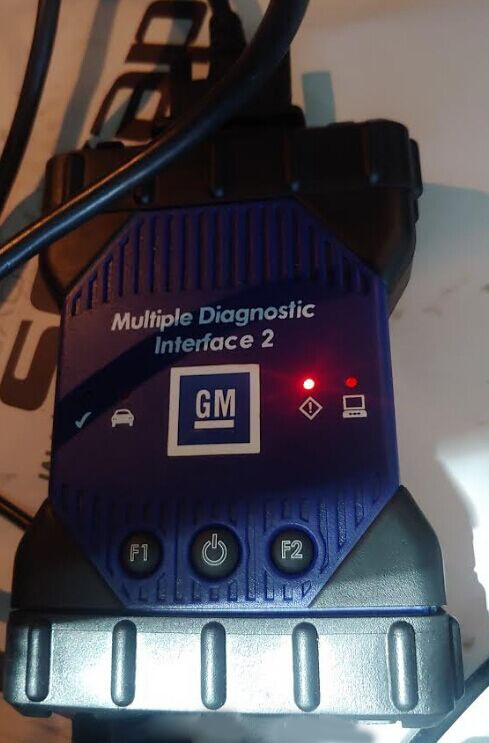
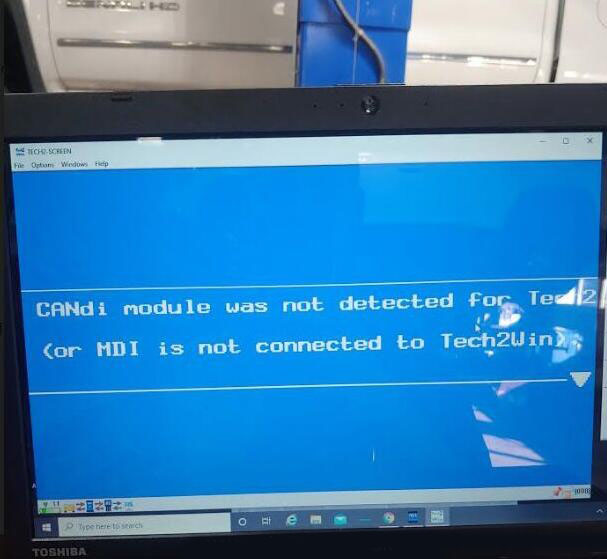
Thanks for the feedback @ Chris on GM Tech2. Here share the problem he got trouble in and offered the corresponding solution.
Problem:
I received the tech 2. Thank you.
But, when I connect to obd2, it says "cannot detect CANDI module, please verify module is connectedâ€. If it helps you, the green light on the candi module is flashing (not solid). I am not sure what to do. Can you help?
 1
1
The solution:
I think I selected the wrong engine designation (there are 3) for my truck and the tech 2 could not communicate
because it was looking for a controller that was not present (which presented the error message "no candi moduleâ€).
So, I think the tech 2 was OK.
It was my fault in my selections. I got it to work now!
Posted by: Emily white at
12:01 PM
| No Comments
| Add Comment
Post contains 143 words, total size 1 kb.
46 queries taking 0.1636 seconds, 212 records returned.
Powered by Minx 1.1.6c-pink.

