


February 15, 2022
Question: Can someone please recommend the best place to buy the most reliable clone VCM2? I would only use this for diagnostics as I have the OEM device to flash. Or can someone suggest an inexpensive place where I might get an OEM device? What I would really like to get my hands on is aVCM2 that can run on Windows 10 with a native installation of IDS V124, that supports ALL F-series diesel trucks up to 2019+ and does online flashing / programming.
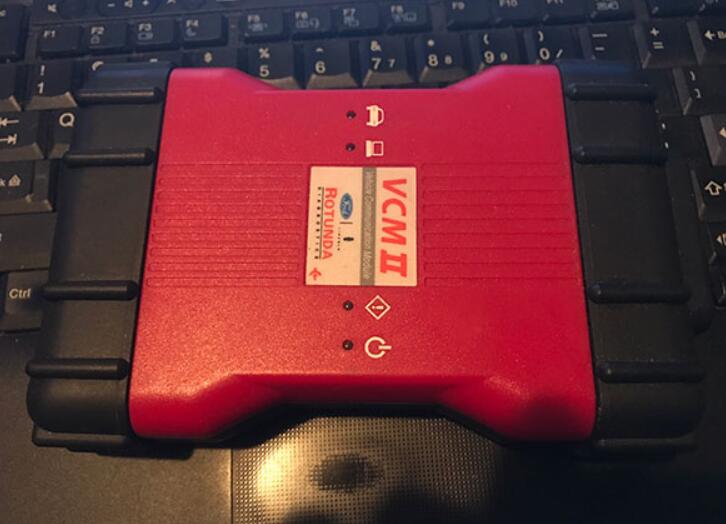
Experiences / feedback on sharing: I will give you two options that I use in the shop: VCM2 interface: there are several, with or without WiFi, different quality levels, processes, etc. Me have some of them on different software versions and all of them work well with IDS, diagnostics and programming. I recommend using WiFi VCM2 only for diagnosis, always VCM2 with USB cable for programming.
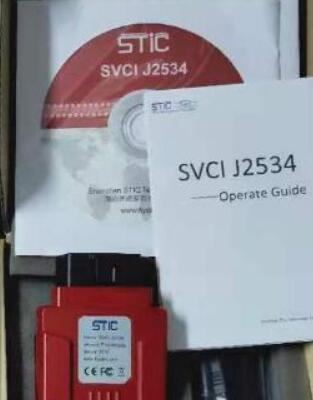
SVCI J2534 Interface: It’s a great tool that overcomes the VCM2 interface. You can always use it with the latest IDS software version, provide the license for the program yourself (see flyobd.com website for software installation and instructions) and make your life really easier as it uses no virtual machine and date can roll back. Works great with diagnostics and programming. Can also be used as a J2534 pass-thru interface with other software. Only works via USB cable.
Posted by: Emily white at
02:22 AM
| No Comments
| Add Comment
Post contains 234 words, total size 2 kb.
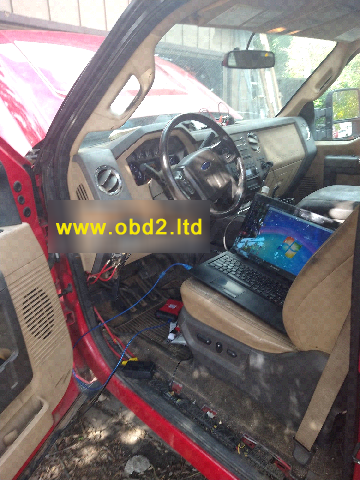
This article comes with an eastern European customer who bought Ford VCM 2 Diagnostic Tool that have this Module Programming & Configuration Timed Out Error.
Firstly, let’s check what he is saying:
Hi, Enclosed are a set of 7 pics, and Ill start with explaining what it is that I need to do… The Original PCM is no longer available to us and so a manual programming of the PCM MUST be COMPLETED… Keys must also be set for truck to operate… All Input values are known and ready to be uploaded to the PCM… The Exact process of programming may or may not be correct So Correct any Flaud Step that maybe the reason that this is not working correctly
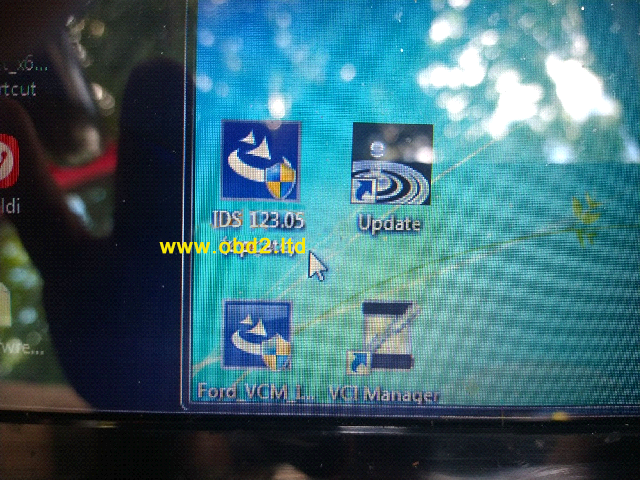
IDS
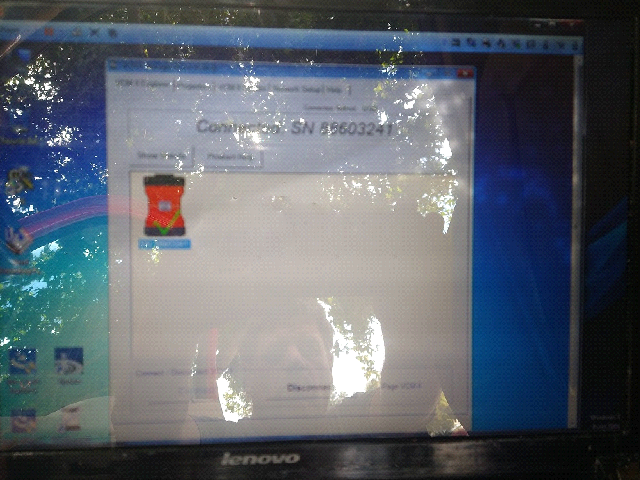
The VCM2 is Found and Connected and Handshaking is establishe and
Varrified by Acknowledgment through IDS Software… Within the IDS GUI,
after the establishing and the successful connection with IDS, and
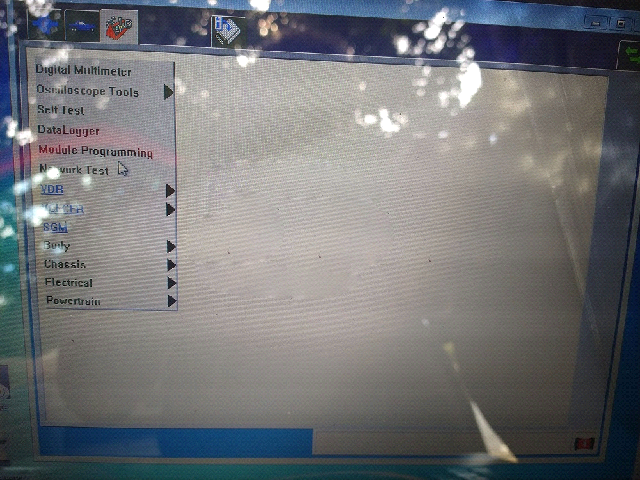
Downloading the PCM’s Internal saved data… Next Selecting the "Toolbox
Icon†(Left side top 3rd Icon) I select "Manual Programming†and hit the
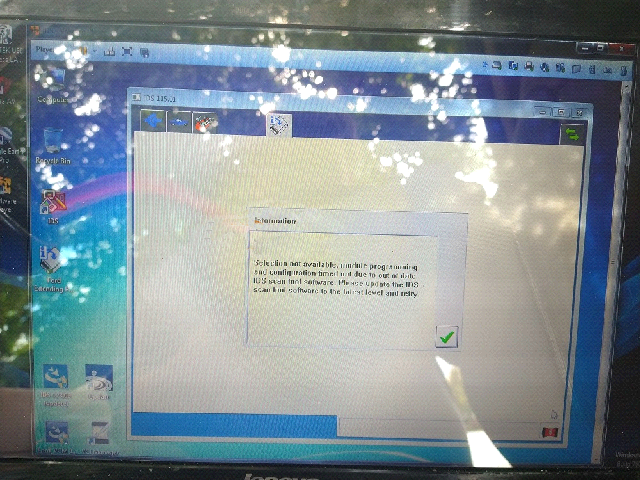
"Checkâ€, After a couple seconds an Error occurs:
————————————————————
Selection NOT AVAILABLE, module programming
and configuration timed out due to out of date
IDS scan tool software. Please update the IDS
scan tool software to the latest level and retry.
————————————————————
(See provided pic for actual error)
What his attempts to solve:
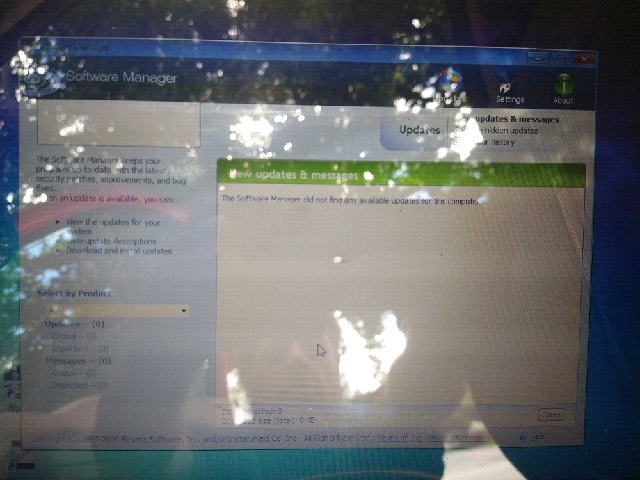
I did attempt to download and install the Genuine Ford Update at www.motorsportservice.com but update Fails with "Wrong Version Found†This Update will update Ver 123.01 to 123.05 only (there is a Pic included on the desktop of the update) This Ver is 115.01
What I need to know is Can this IDS UPDATE, or Is there a
work-a-round or method of programming a PCM With this Hardware/Software
Comb as it sits out of the box…
Please Advise… Thank You in Advanced, your help is much needed and appreciated
Check provided pics to find actual error:
What suggestions given by our tech engineers:
This error occurred because the software used here is not the latest version. So customers can try if they can get access to the original IDS 123 software with license. All problems are gonna be solved! The functions can be realized easily through online coding. Any further problems, contact us directly.
Posted by: Emily white at
02:10 AM
| No Comments
| Add Comment
Post contains 394 words, total size 6 kb.
January 22, 2022
This article is about to show you how to program a new PCM for most Hondas and Acuras using Autel MaxiIM IM508/IM608.
The support list: https://www.autel.com/vehicle-coverage/coverage2
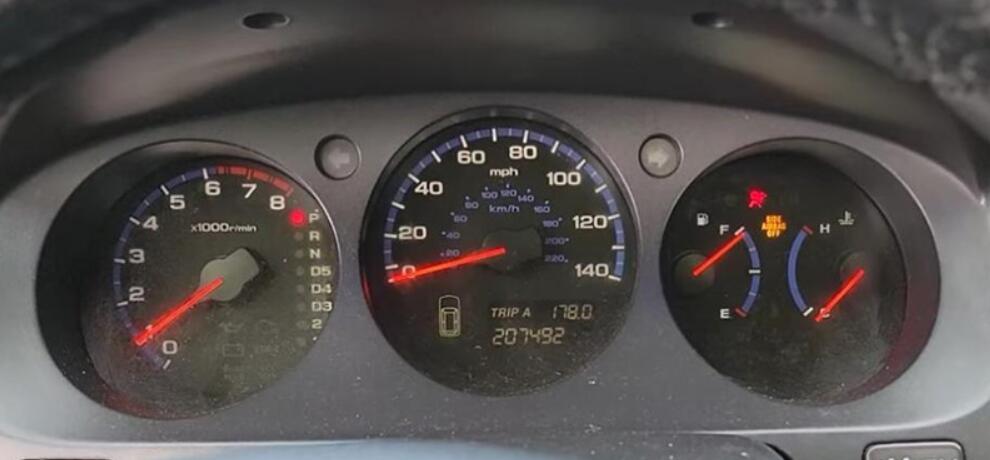
Here we have a Acura MDX 2005 to handle by the Autel IM508 Key Programmer.
This is the 3rd generation immobilizer, which is used on many Hondas like Accord or Acuras like TLX.
The car won’t start because of the new ECU in.
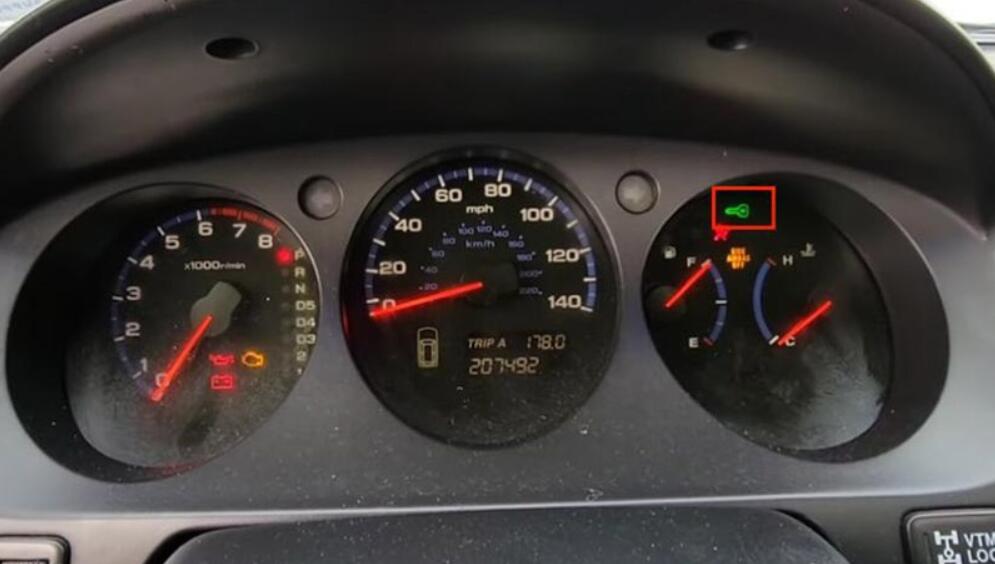
We will reprogram it, so the key will work again.
Go to
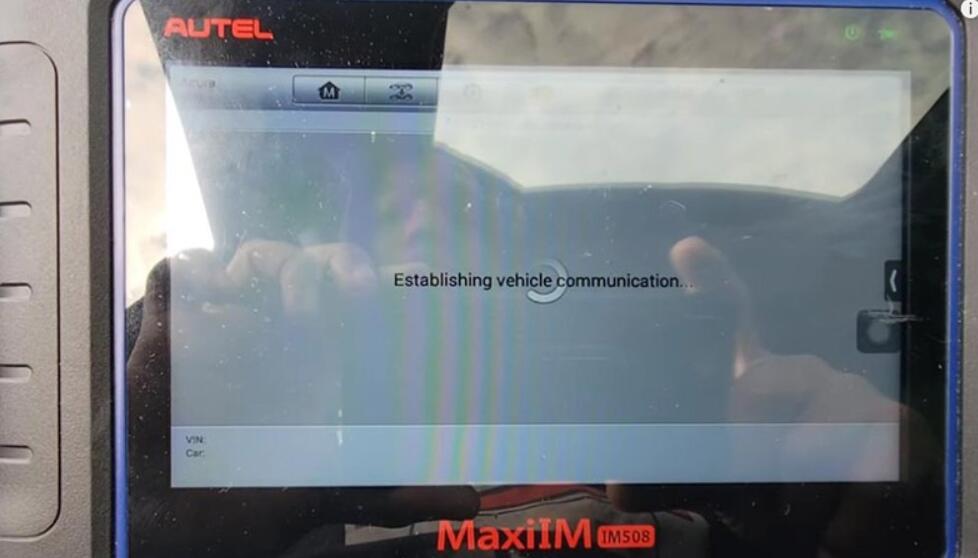
IMMO>>Acura>>Automatic selection
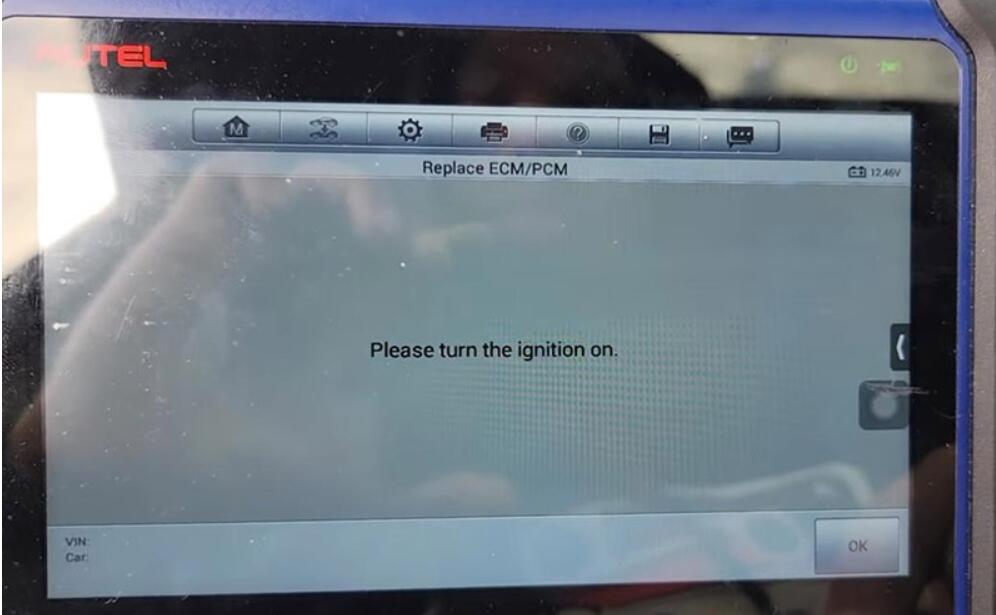
Turn on the ignition so it will pull out the VIN.
Then go to
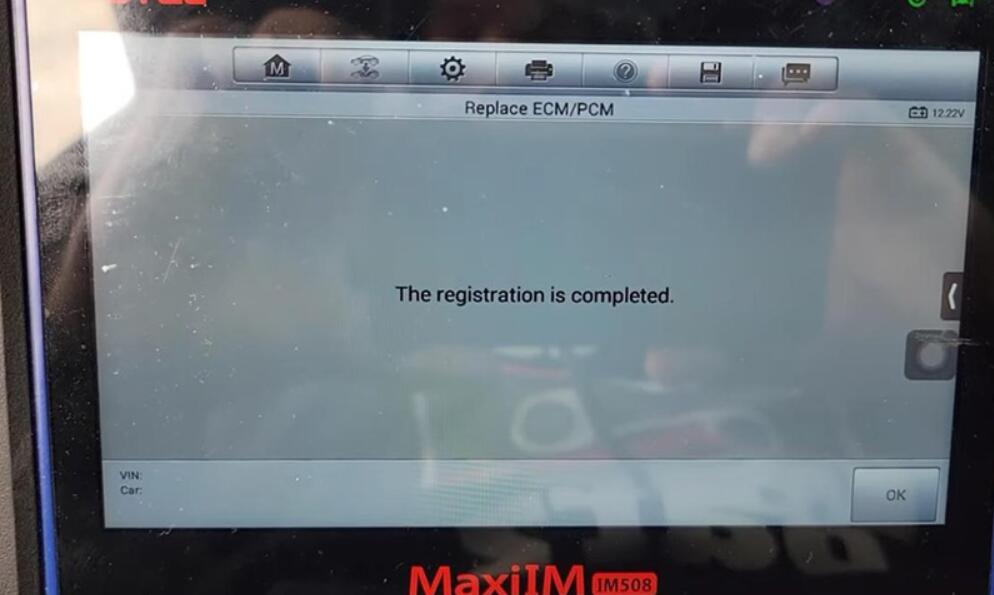
The 3rd mechanical key system>>Replace ECM/PCM
After about 5 minutes, we’ve registered the PCM.
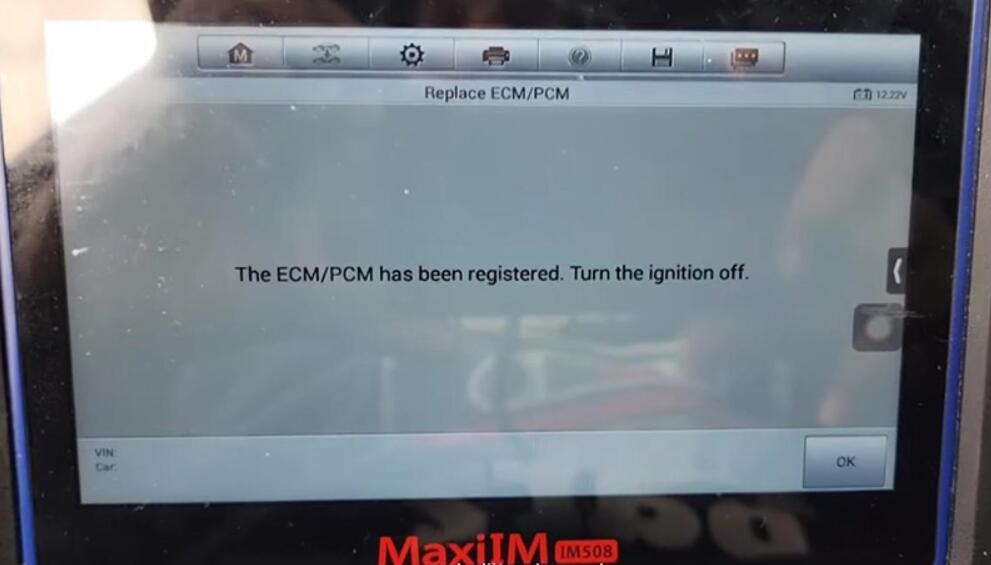
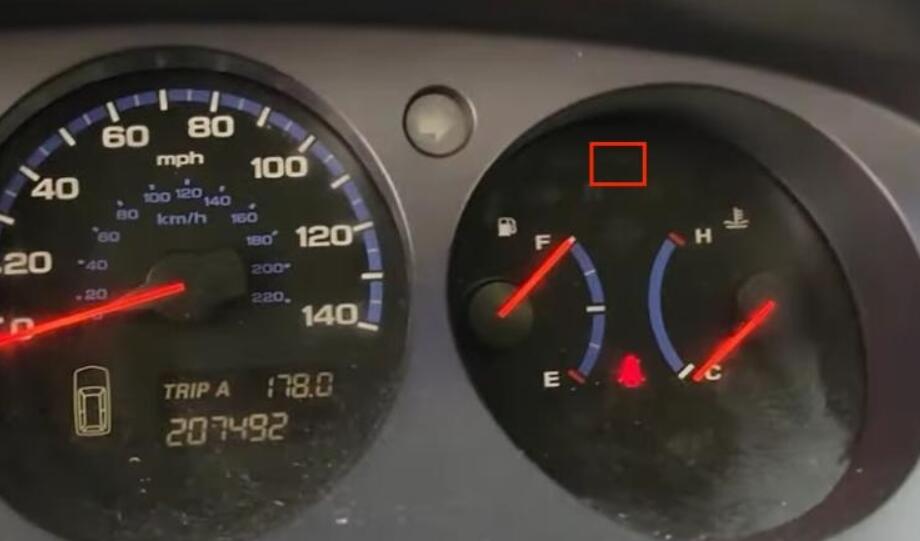
Meanwhile, the immobilizer light disappears.
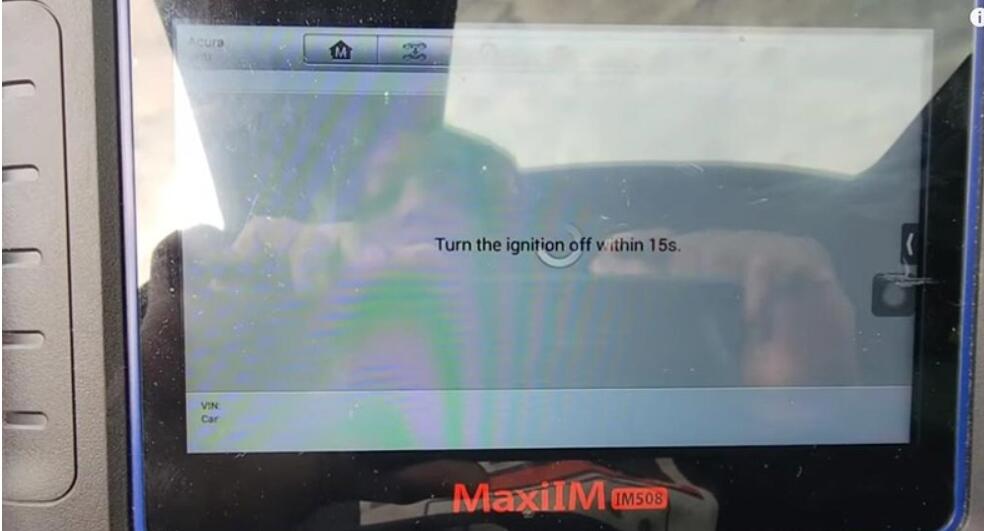
Turn off the ignition as required.
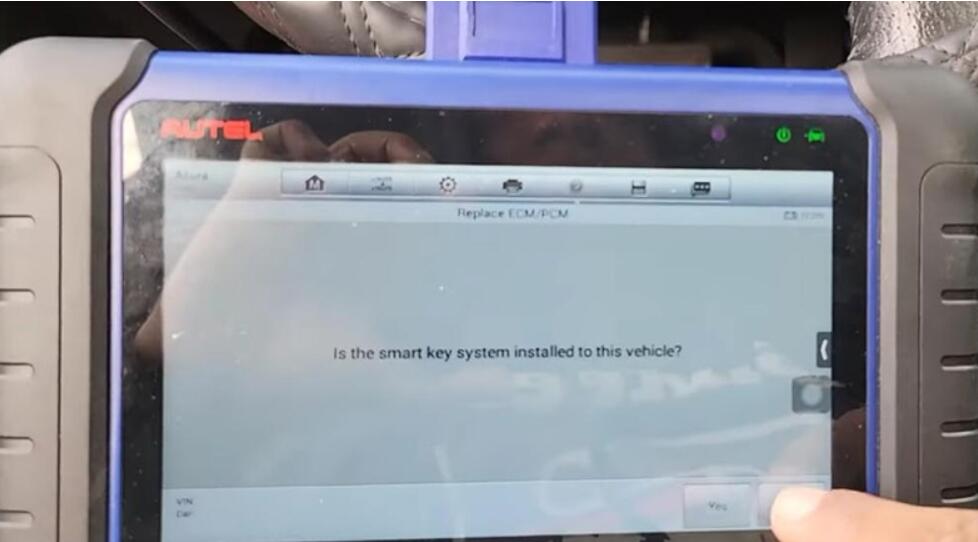
Follow instructions to check keys.

The car starts without any issues.
Done! Nice and simple!
That’s the guide of programming a new PCM module using Autel IM508/Autel IM608.
This guide is from MODS FOREVER Team.
Any questions, contact us.
Posted by: Emily white at
07:36 AM
| No Comments
| Add Comment
Post contains 171 words, total size 5 kb.
Problem:
Will you know why I get this when trying to enter tis2web? I am in Mexico.
Using VXdiag vcx nano gm as j2534 passthru.
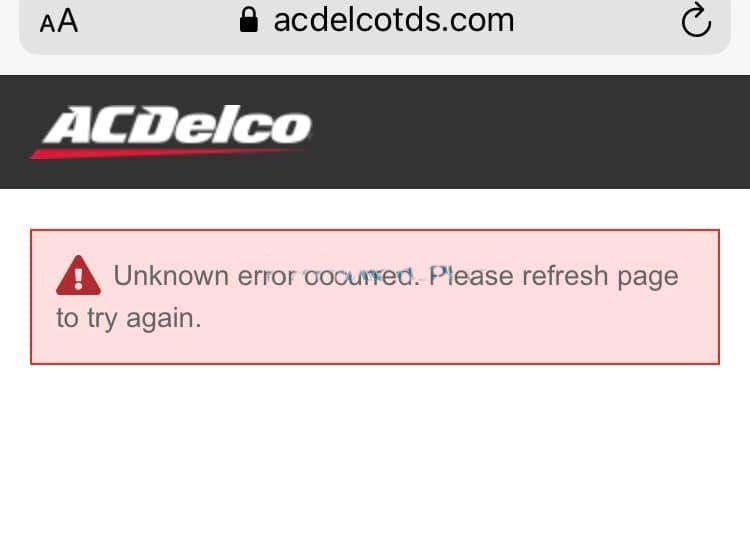
Solution:
Apparently, it only works in the US and for other countries you have to have the VPN.
Try installing a North American vpn and access the web if you can
In addition to vpn you need a USA credit card. There are people who rent the account by session or by times.
Posted by: Emily white at
07:19 AM
| No Comments
| Add Comment
Post contains 84 words, total size 1 kb.
December 15, 2021
Launch X431 PAD V, Pad VII, PAD III all support online programming function , but some equipment was shield by original factory , you can open the function as bellowing steps :
Setting online programming functions operations :
Enter into other – equipment-File management – cnlaunch folder – X431PADV – assets folder find out the StdCfg.ini file

Open the StdCfg.ini with text editor ,Click the edit button on the upper
right, make the file in edit state, Find out OnlineFlash and Flash ,the
default value is 0 , means not support online programming , Click on
the corresponding field and change the value to 1 , click save . Let the
value to 1 like the bellowing picture :
Then , the diagnostic software of your machine can support online programming function .
Be attention : America north countries not support online programming recently , the other area can do it like the above steps , and the online programming menu will not display on front page,you should enter into the diagnostic software then can find the Corresponding menu .
Posted by: Emily white at
10:07 AM
| No Comments
| Add Comment
Post contains 195 words, total size 3 kb.
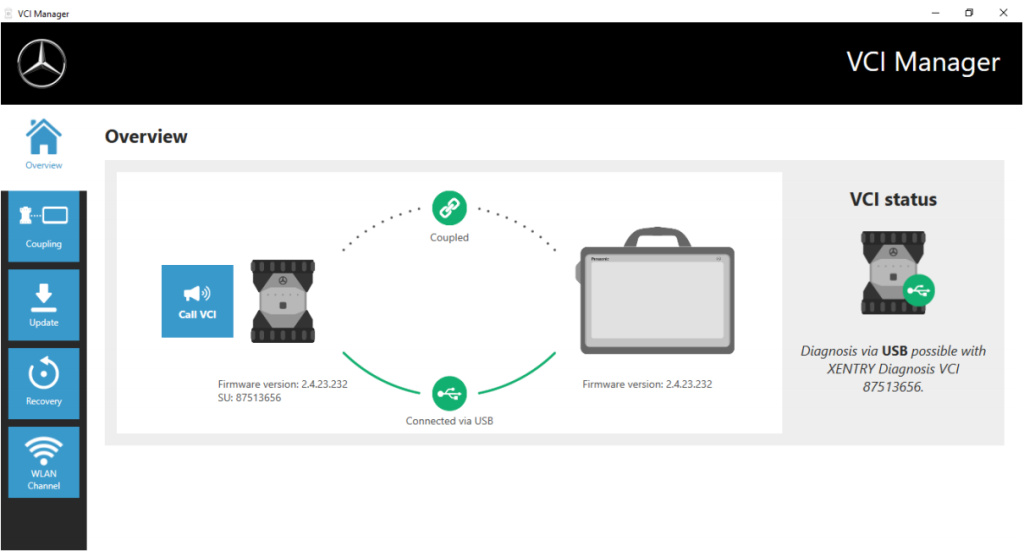
After an update to the XENTRY Diagnosis Pad 2, you may then need to update the firmware for the Xentry diagnosis VCI.
You can also see this in the VCI Manager on the overview page:
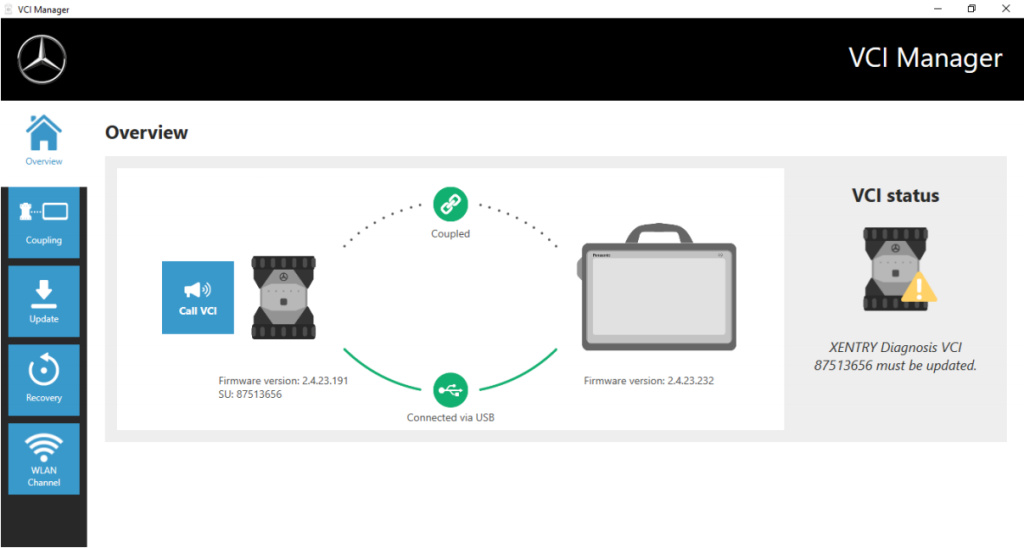
Click in the "Update†menu item in the VCI Manager and then on the "Start update†button.
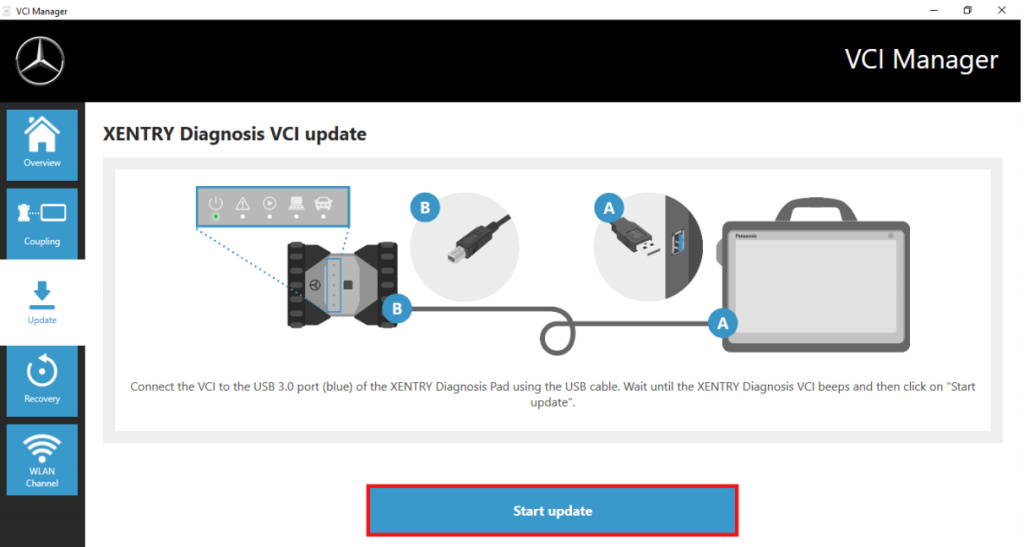
When executing the update, please ensure that the USB connection between XENTRY Diagnosis Pad and VCI is not
interrupted.
Once the update has completed, you can then continue to work with XENTRY Diagnosis Kit 4 as usual.
Posted by: Emily white at
09:23 AM
| No Comments
| Add Comment
Post contains 96 words, total size 2 kb.
October 28, 2021
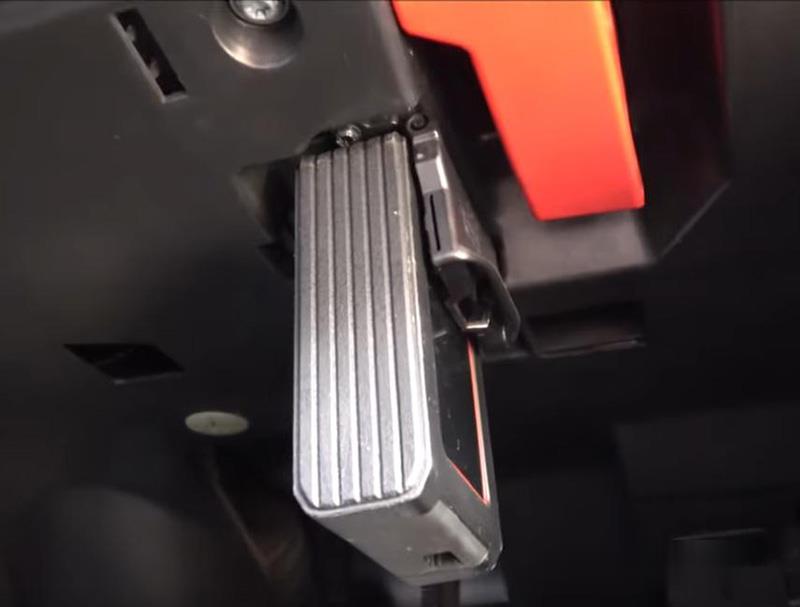
Today OBD2TOOL is going to show you an interesting case. That’s how to use Launch X431 V+ Bi-Directional Diagnostic Tool to increase speed limit on a Mercedes E55 2005.
Let’s start it.
Connect DBScarII to OBD port.
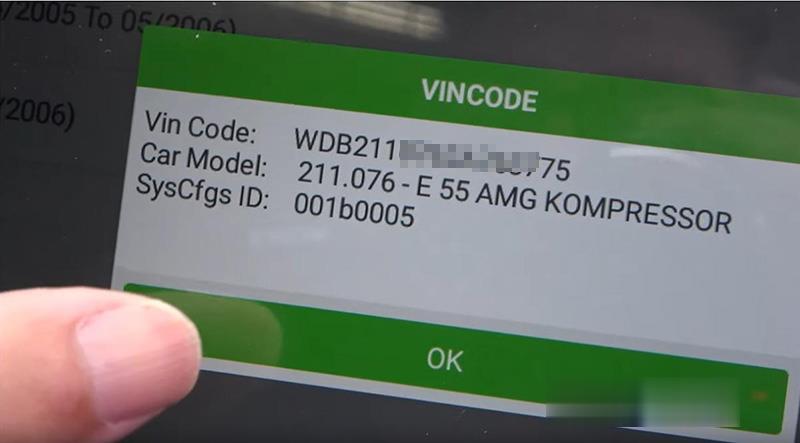
Enter diagnosis menu and select "Automatic identificationâ€.
Select "211-E Class(Up To 05/2005)†to get VIN number.
Select
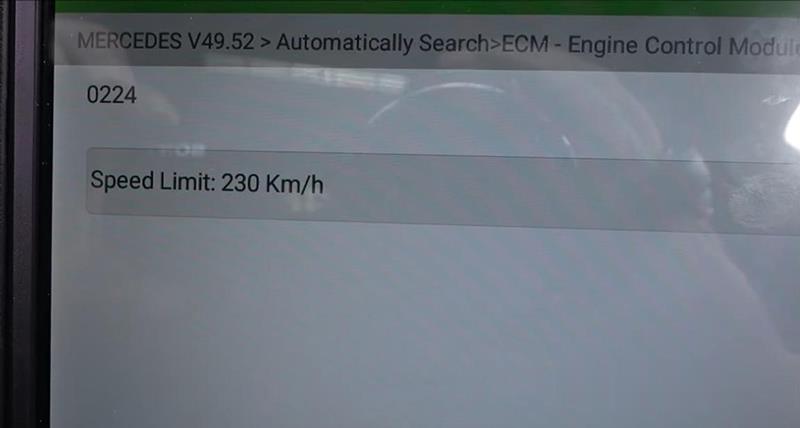
System Selection>>ECM – Engine Control Module(ME)>>Variant Coding
Scroll down to view Speed limit – 230kph
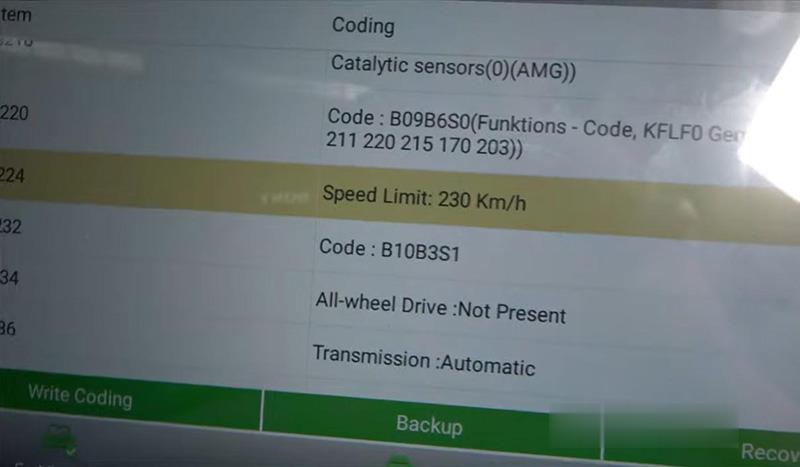
Enter the menu, unfold options we’ll get 250, 280, 300…
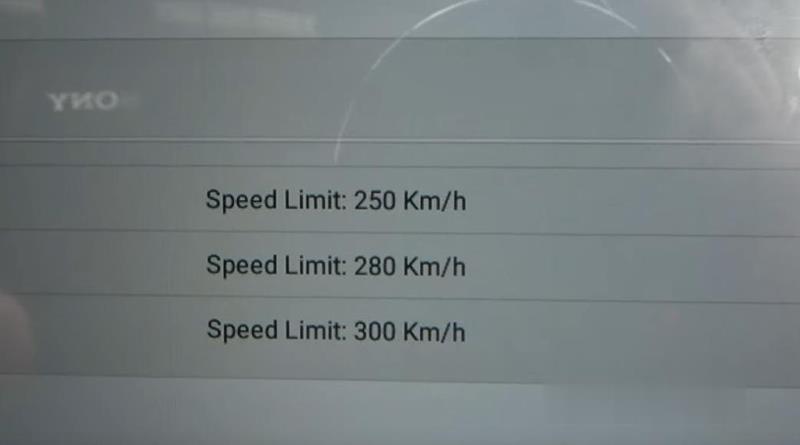
We set it at 300kph.
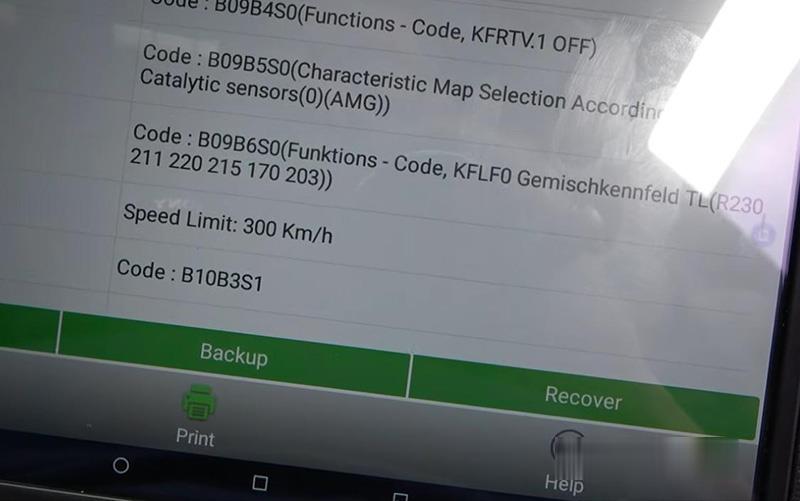
Re-enter to confirm the setting.
Note: I can increase speed limit of my car because my tires are capable of 300.
Then we go back to do "System Scanâ€.
Here we can view what modules our car is equipped with.

Then we enter "System Selection†again.
Select
Transmission Control Module>>Read Fault Code, no fault.
Suspension>>Read Fault Code, no fault.
Done! Simple and nice!
That’s how we increase Mercedes E55 2005’s speed limit to 300kph by Launch X431 V+.
Posted by: Emily white at
01:55 PM
| No Comments
| Add Comment
Post contains 173 words, total size 4 kb.
Customers feedback recently from European areas have told OBD2 tools e-shop that they have detected the MB SD C4 Plus professional diagnostic tool has connection problem with Mercedes-Benz. What’s the problem gonna be like? And what solution our engineer would provide? Let’s check together.
MB SD C4 Plus SD Connect Compact 4 Star Diagnosis Support Doip for Mercedes Benz Cars and Trucks Without Software
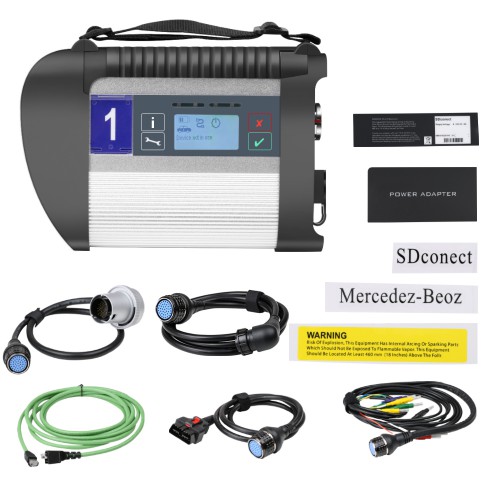
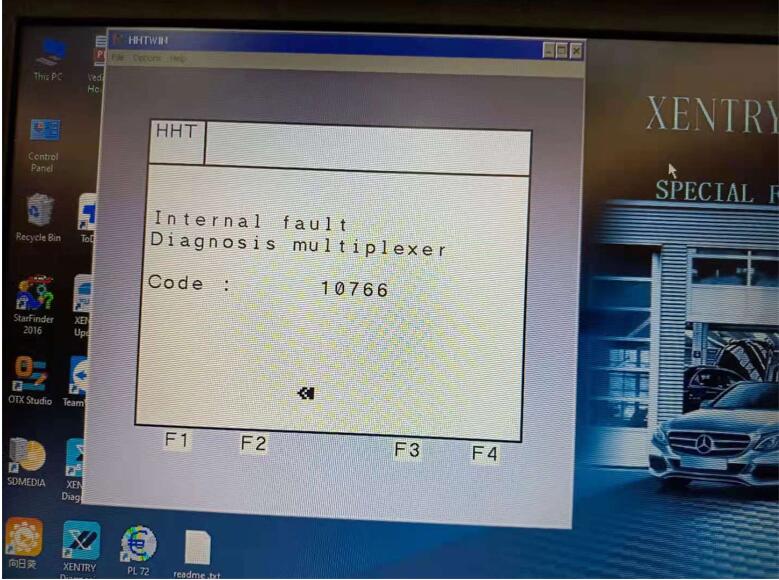
The Connection Problem is shown like below:
Feasible Solution Provided for Customers:
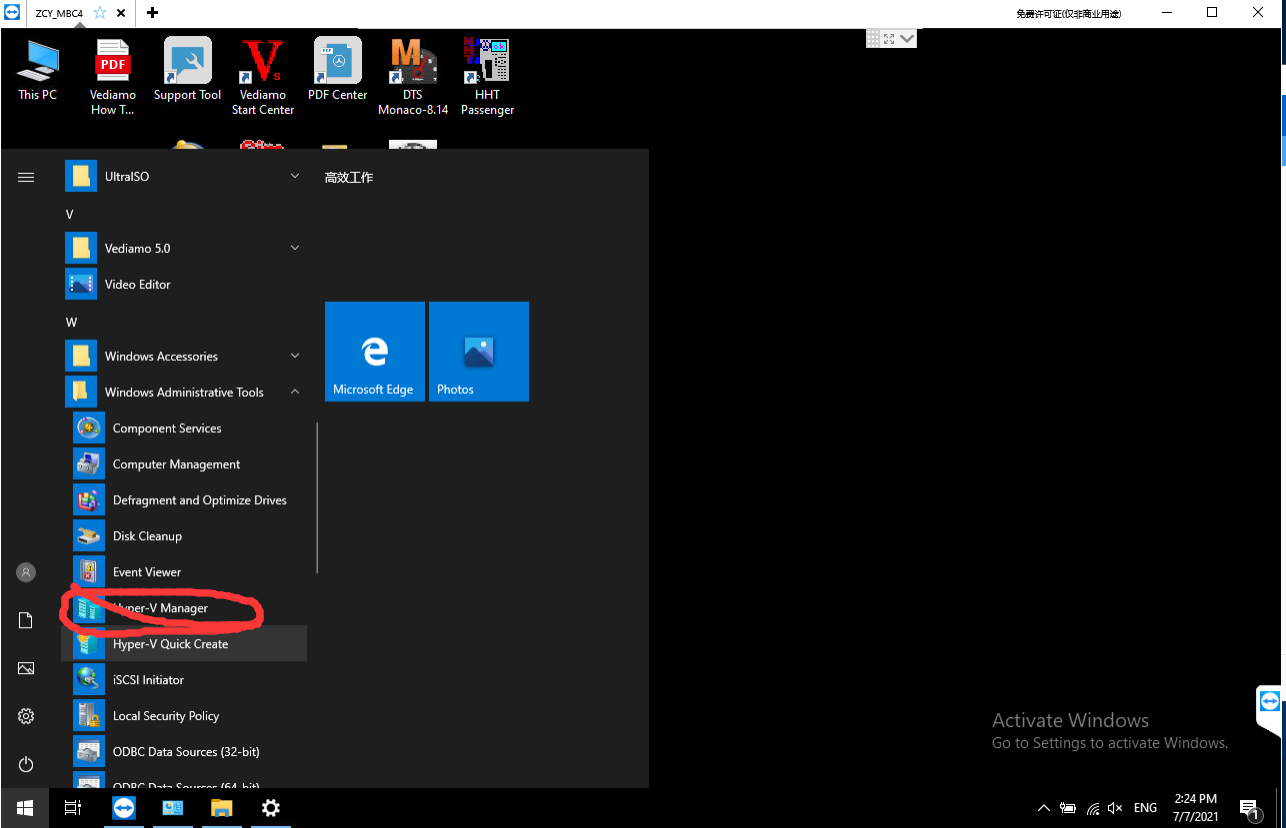
First step: In the system file, find Hyper-V manger in windows administrative tools ,then click it.
Second step:Click the Virtual Switch Manger
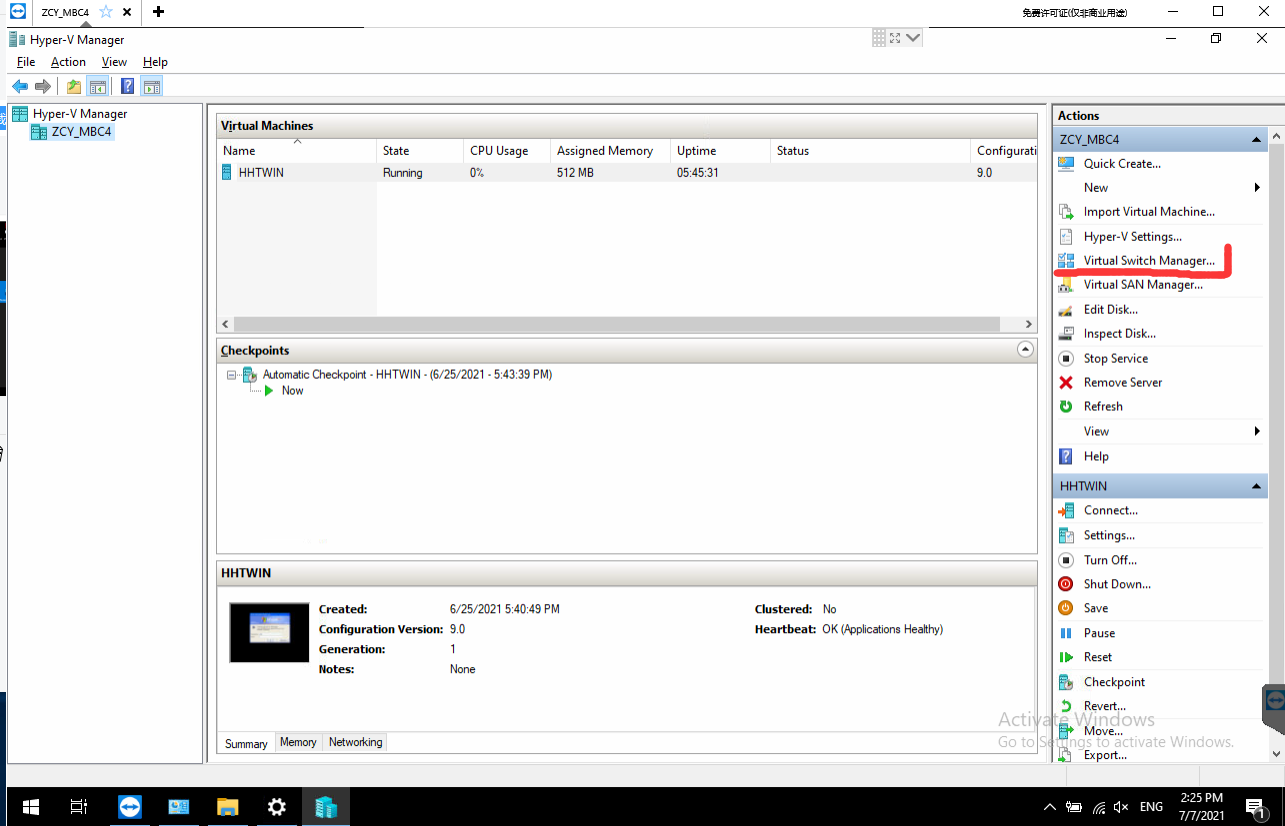
Third step:click the Ether
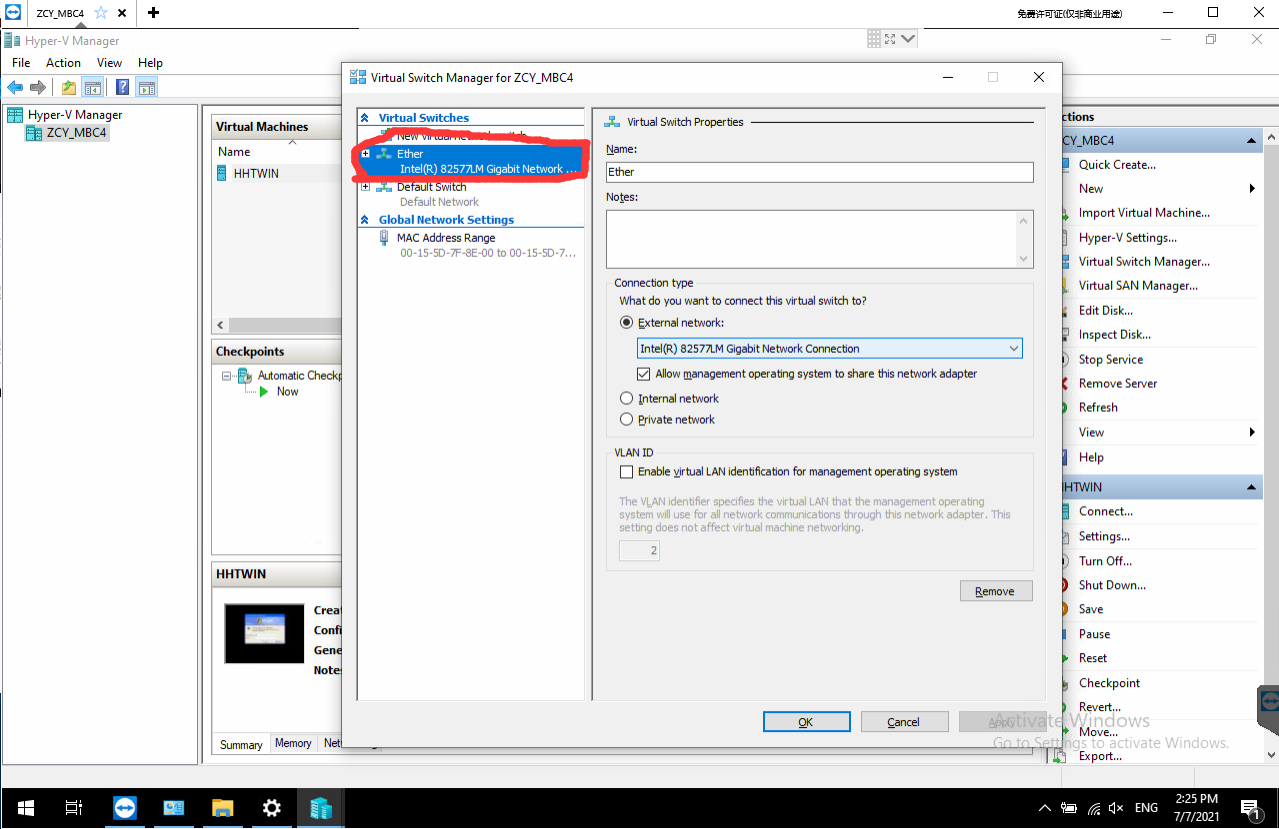
Fourth step: Choose your computer network card in here

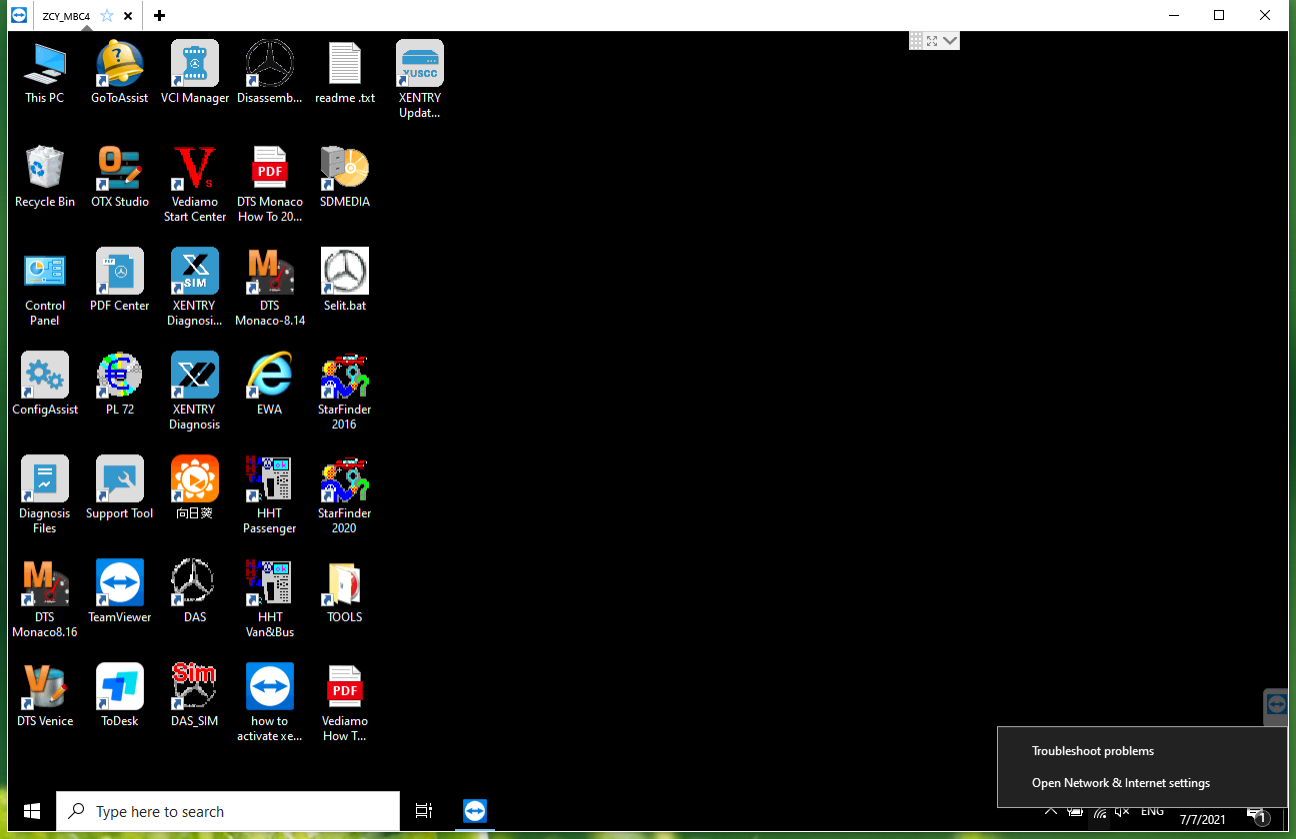
Fifth step: Right click on the network,Open network&internet settings
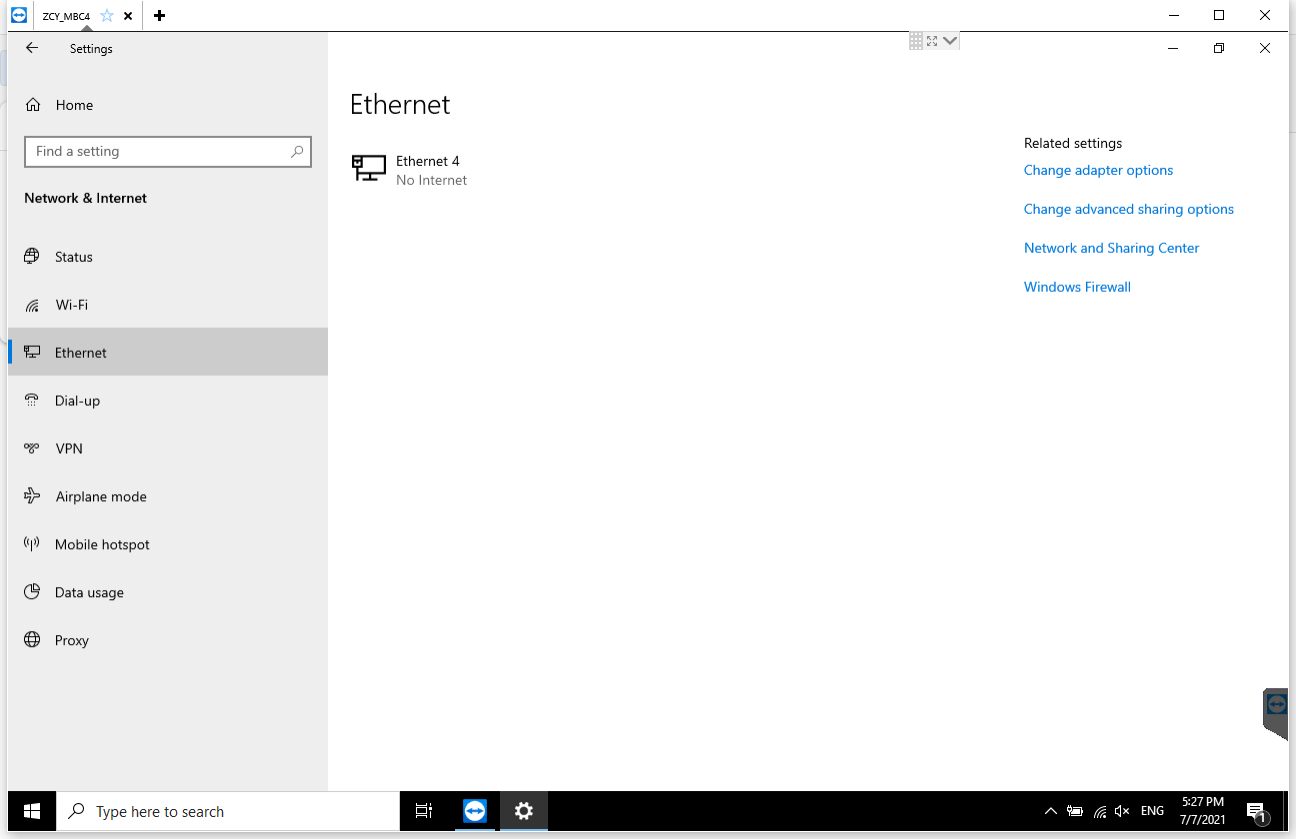
After entering this interface, select Ethernet, Then select the place marked by the arrow
Right click vEtherent Then select the place marked by the arrow
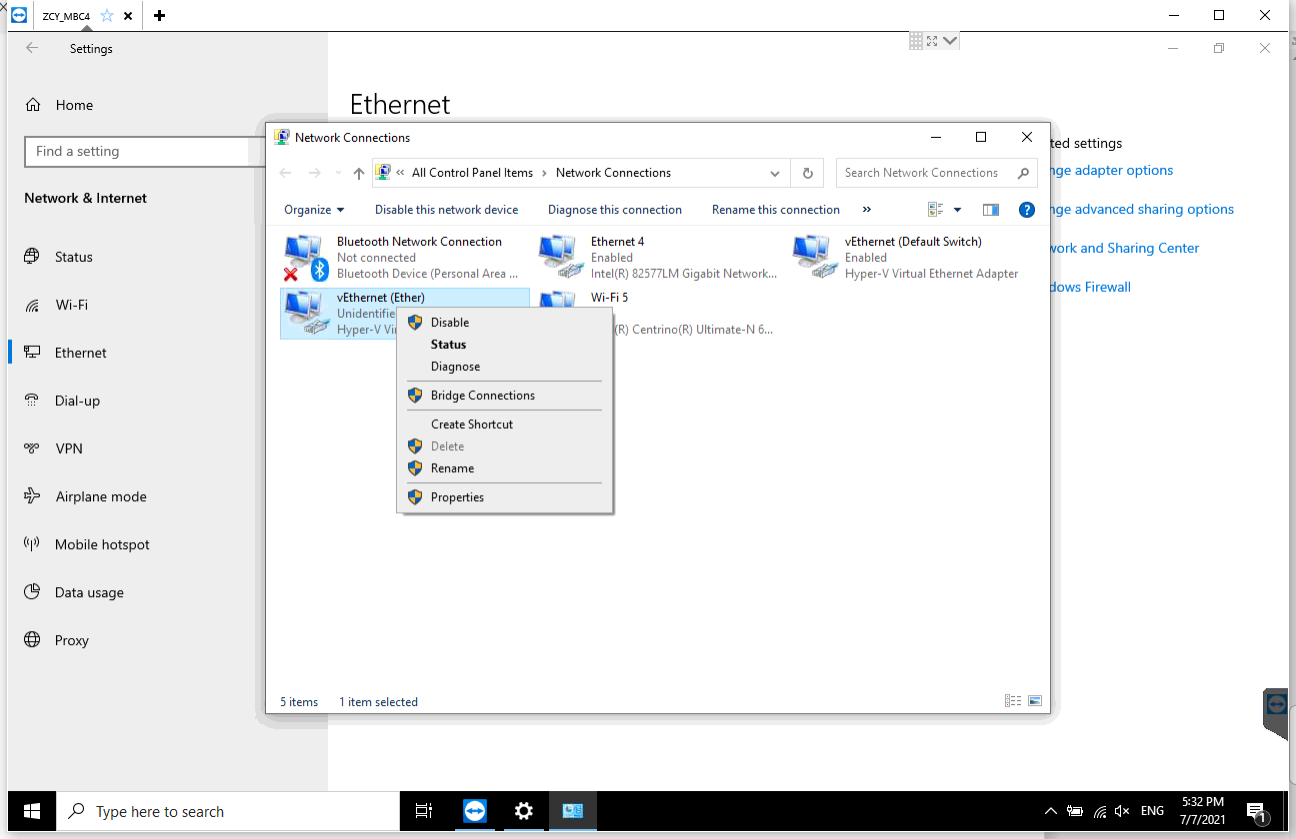
Double click here
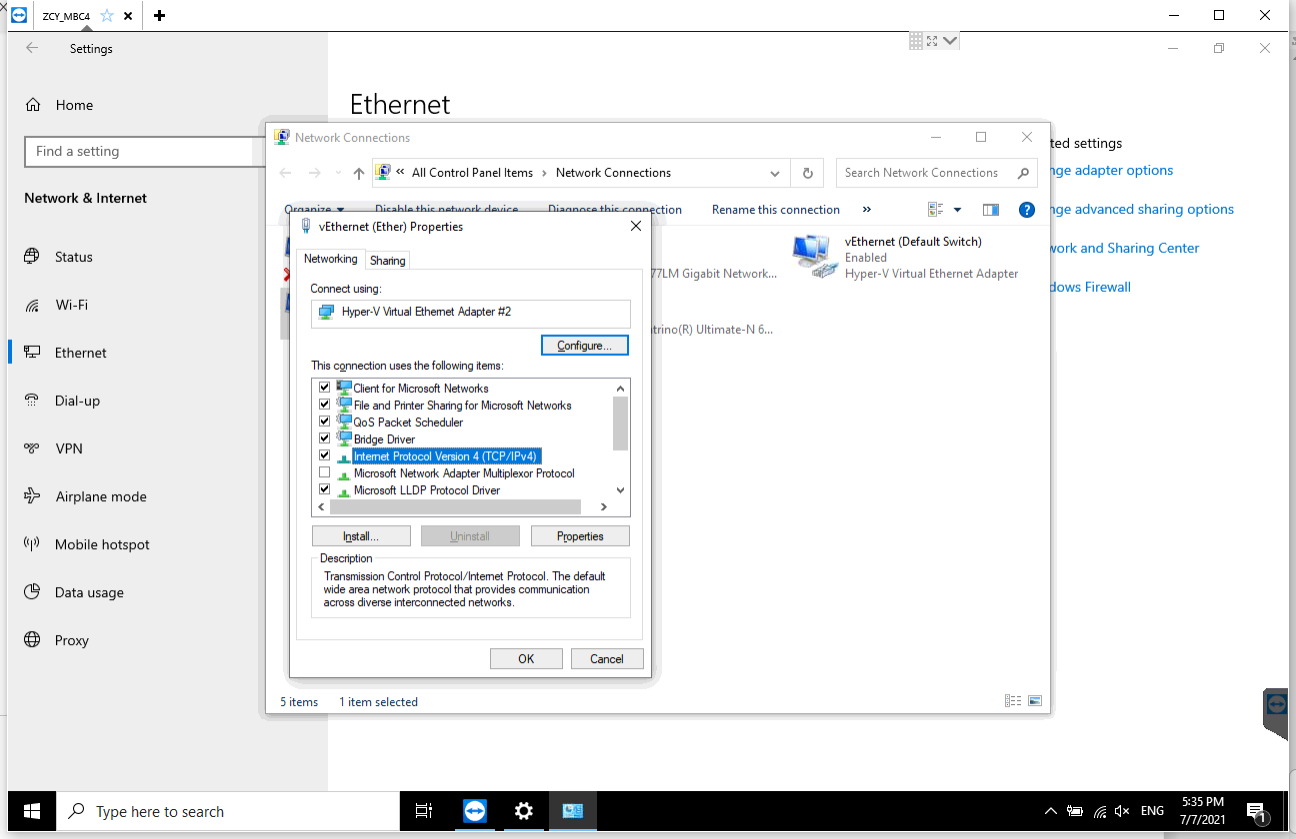
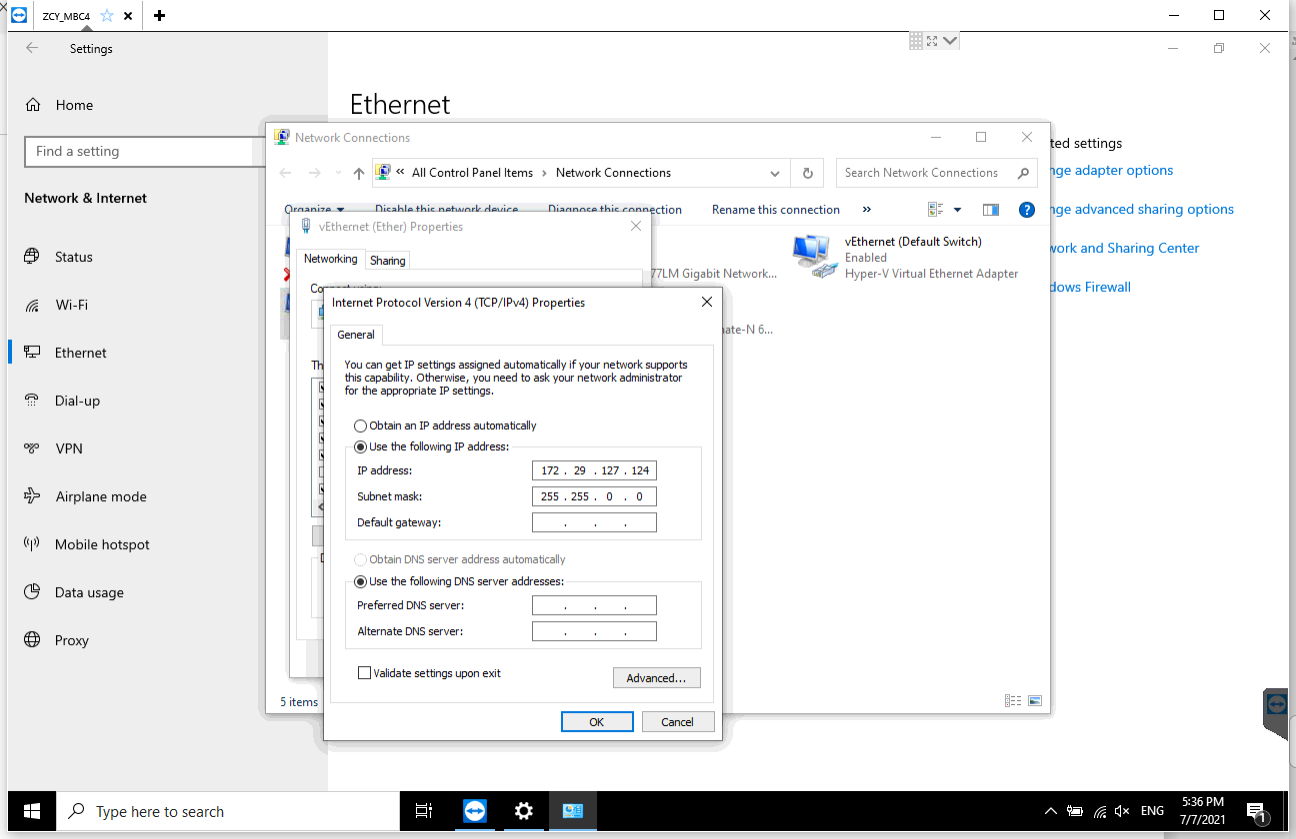
Choose the place marked by the arrow,Enter the following IP address.
Amazing job! This is the solution for MB SD C4 PLUS professional diagnostic tool Mercedes-Benz connection problem.
That’s all. Thank you for sharing your time with us!
Posted by: Emily white at
01:46 PM
| No Comments
| Add Comment
Post contains 196 words, total size 6 kb.
October 06, 2021
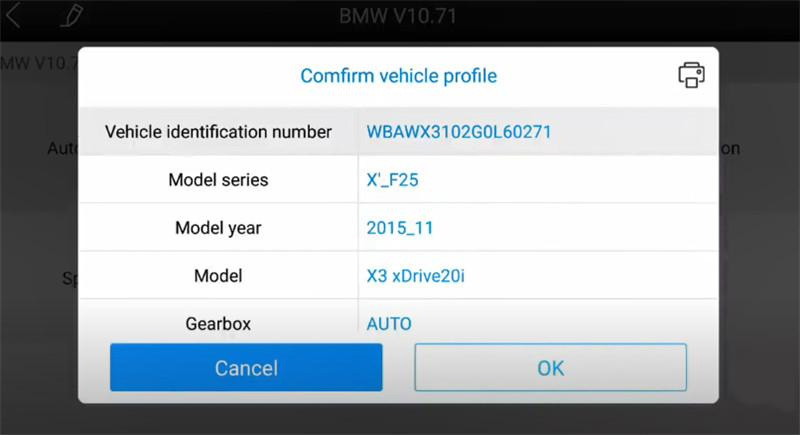
It is a 2015 BMW X3 F25 X3 xDrive20i (Europe). The seat memory, driver programming and coding were completed byXTOOL A80 Pro (H6 Pro).
Note: the device used is Xtool H6 Pro, but A80 Pro covers the same function.
Operation guide:
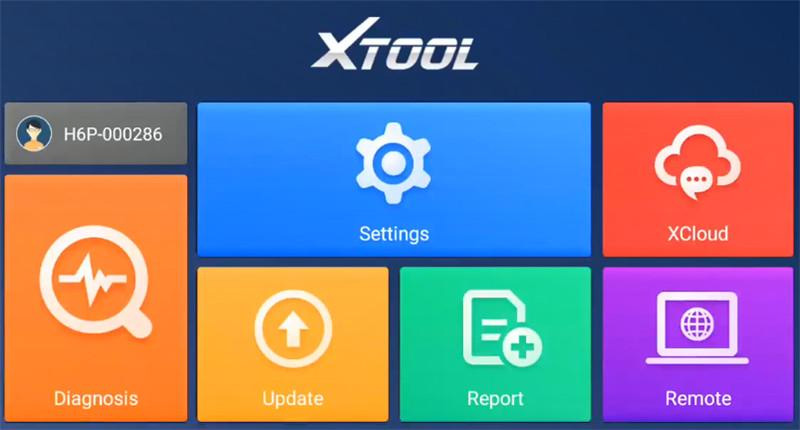
Turn on Xtool tablet
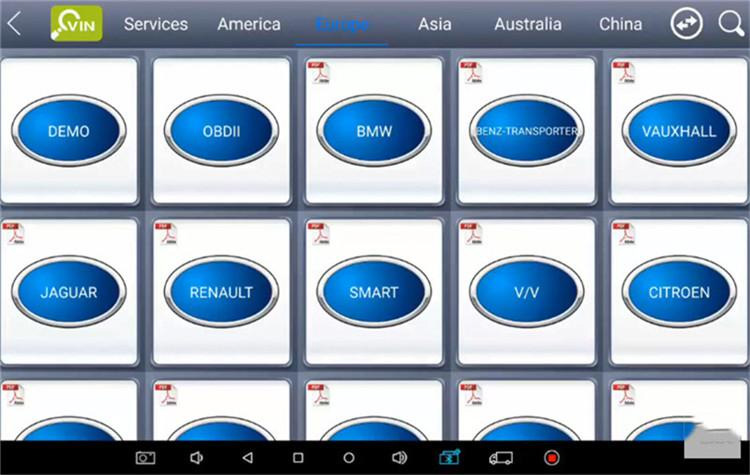
Select Xool Diagnosis>> Diagnosis>> Europe>> BMW>> Automatic selection
Confirm the vehicle profile
Select Programming/Coding, the corresponding programming connection diagram will appear on the screen

Connect VCI box to the vehicle via OBDII+ USB cable, and connect to A80 Pro via BMW cable
Read the disclaimer carefully and go to next step
It will show the vehicle details.
All systems are calculating configuration file of programming and coding. It will take about 3 minutes, just keep patient.
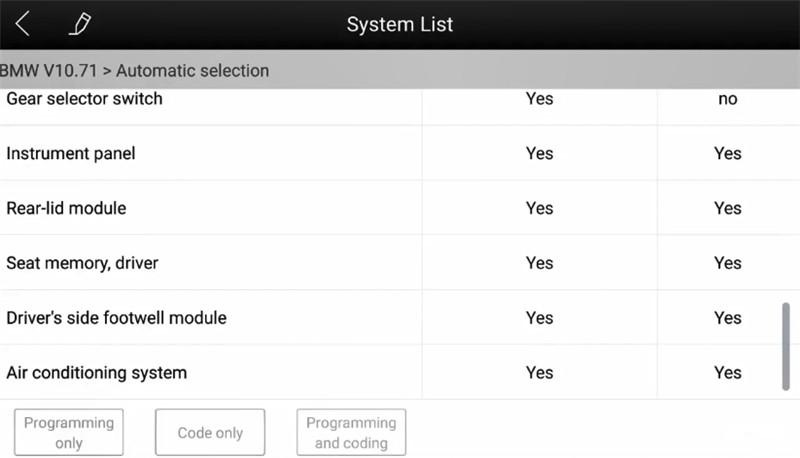
Then follow the prompt to select the system to be programmed in the list
Note: Before programming/coding for the dashboard, make sure that the device is not modified, otherwise the operation may fail, and users shall bear the consequences it may result in.
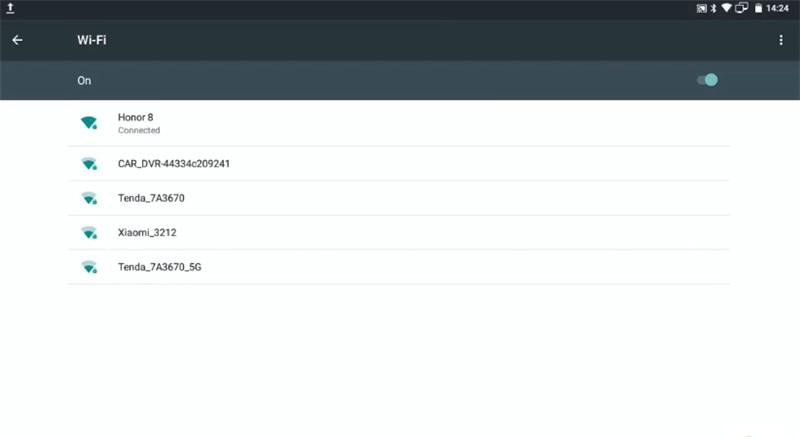
Important! Make sure A80 Pro has connected with an available WIFI before operation.
Path: Go to settings>> Wi-Fi>> Select one available WiFi to connect
Then it will switch WLAN communication and download programming data from the server
Confirm whether you want to continue- Seat memory, driver- get on ‘Programming only’ or ‘code only’ or ‘Programming and coding’ functions

Make sure the ignition switch is on
Ensure that the current-voltage must be 13V above
By diagnosis, eliminate no faults in the vehicle electrical system
Confirm the current system programmed times and go to perform seat memory and driver system programming
It will take approximately 5 minutes to finish the whole programming operation.
Seat memory, driver programming and coding are successful.
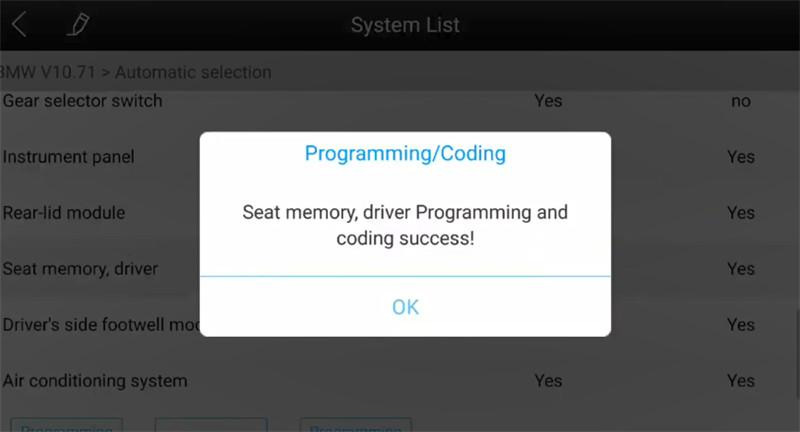
Awesome! BMW 2015 X3 F25 Driver Seat memory online programming and coding are done successfully by XTOOL A80 Pro full system diagnostic tool.
Posted by: Emily white at
05:00 AM
| No Comments
| Add Comment
Post contains 317 words, total size 4 kb.
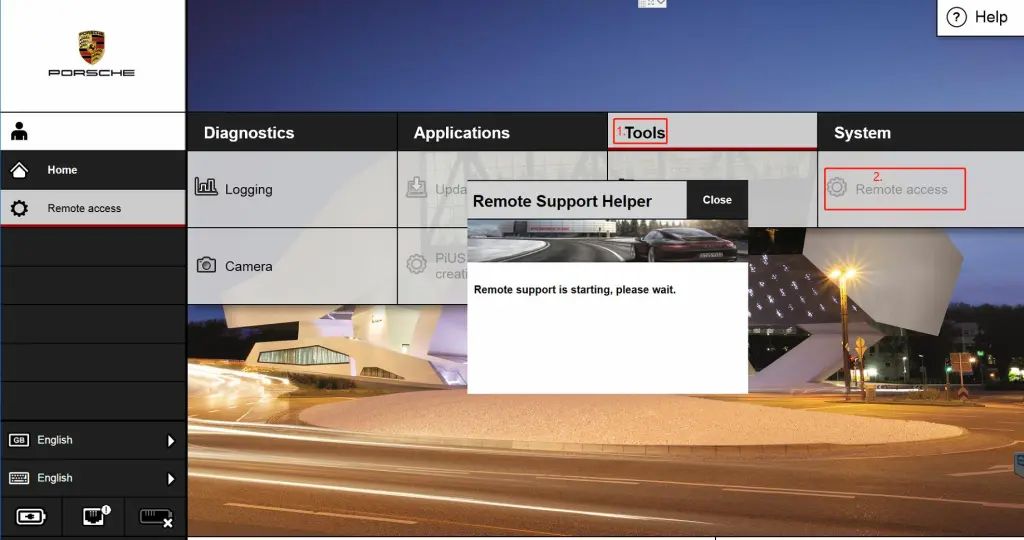
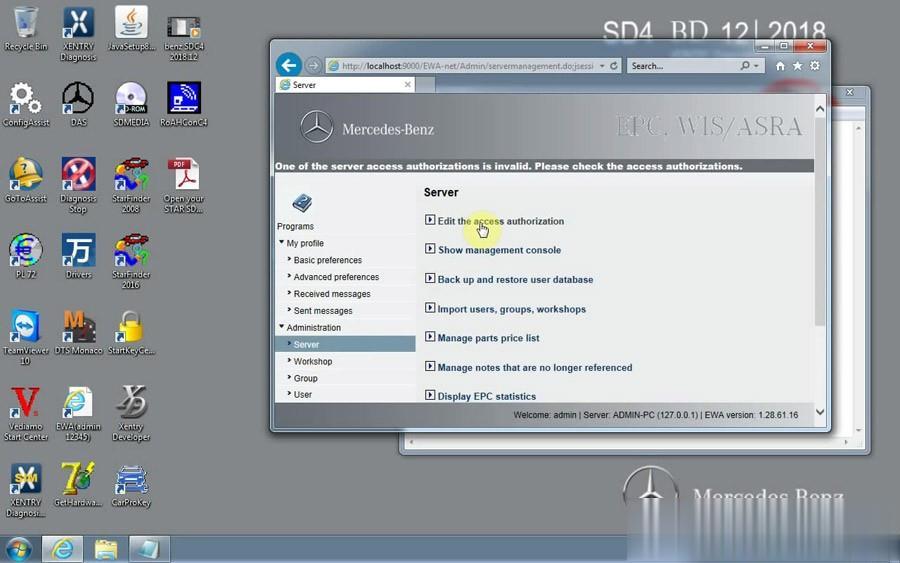
Wifi Benz C6 OEM DOIP Xentry Das EPC WIS Activation
Steps:
Follow the pdf file on the desktop †Open your STAR SDC4 Guideâ€.
Note: the activation method is independent of version.
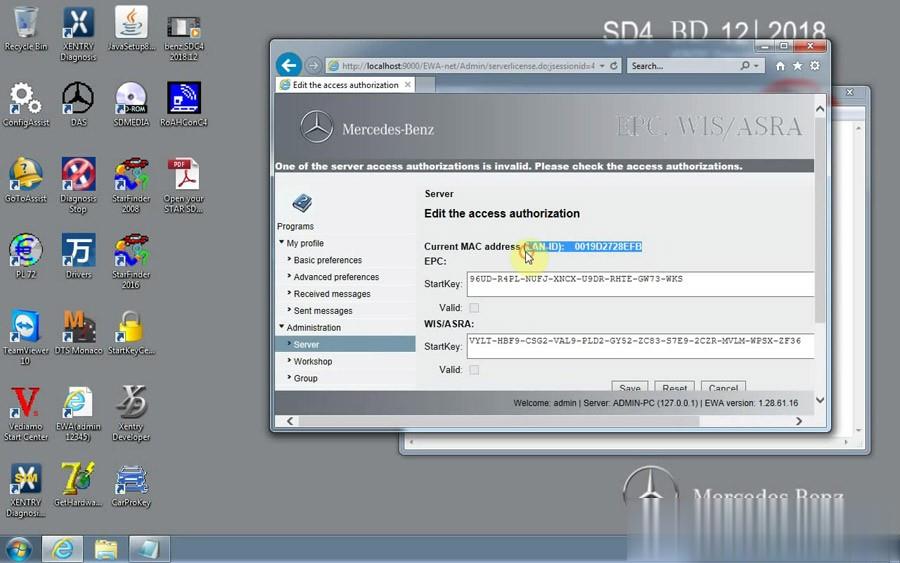
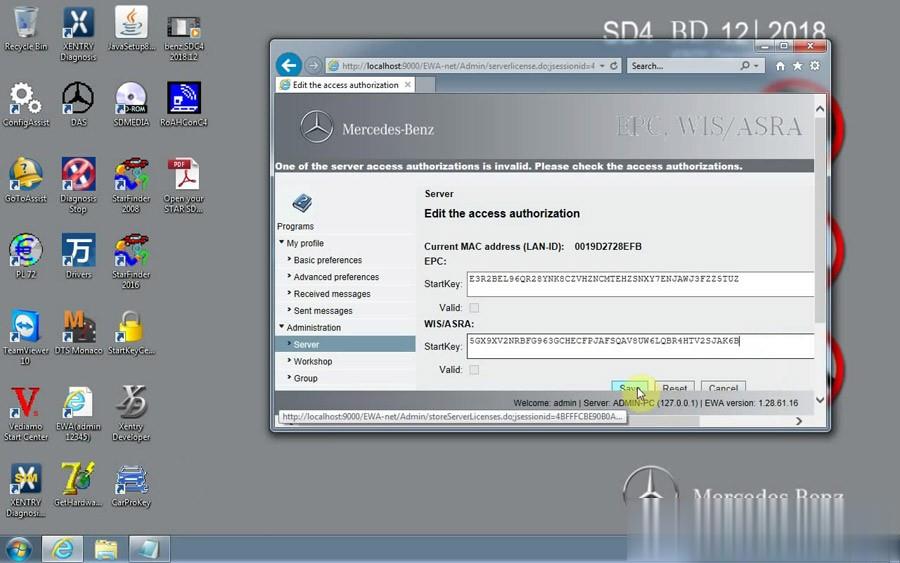
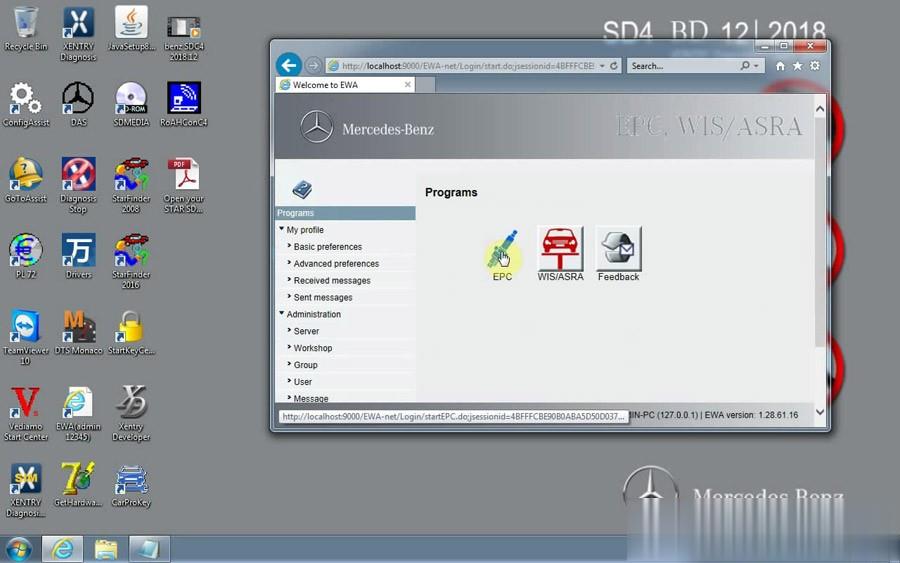
EPC WIS
Openâ€EWA netâ€

Name admin
Password 12345

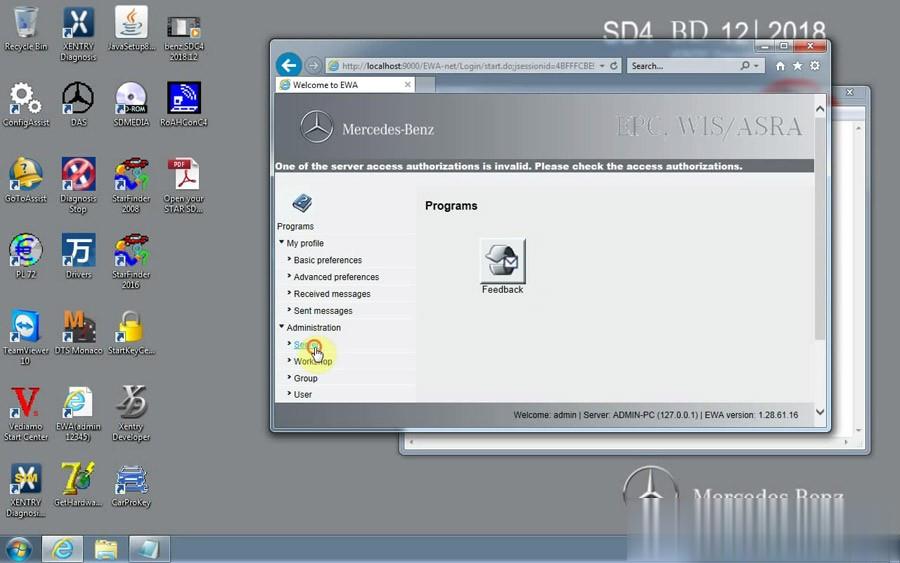
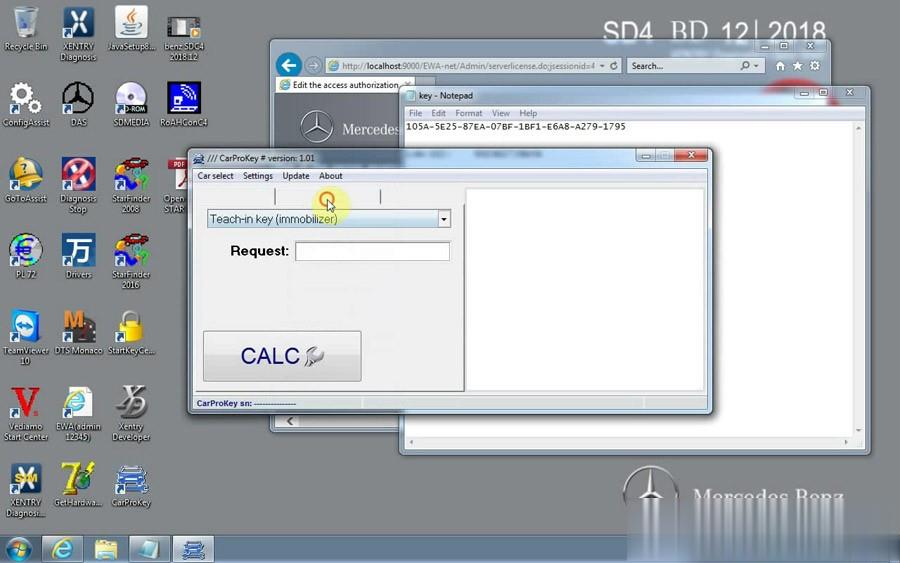
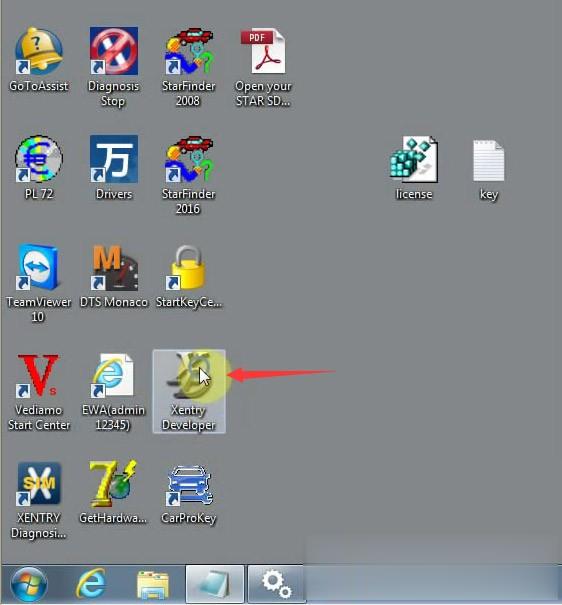
Openâ€CarProKeyâ€
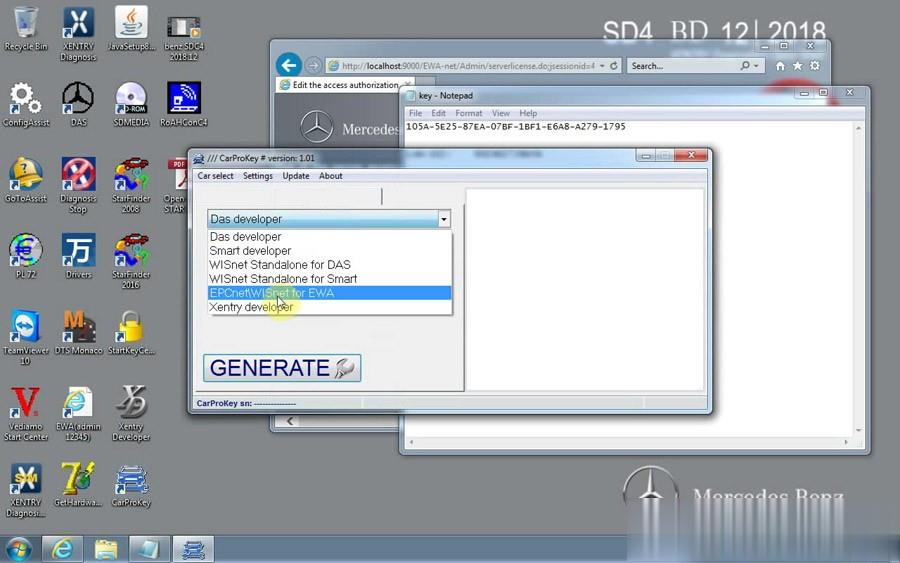
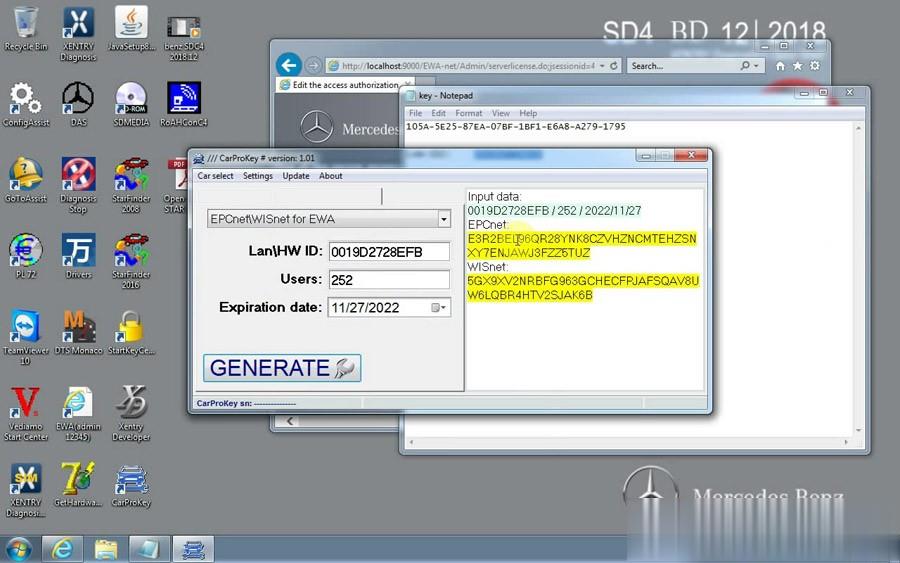
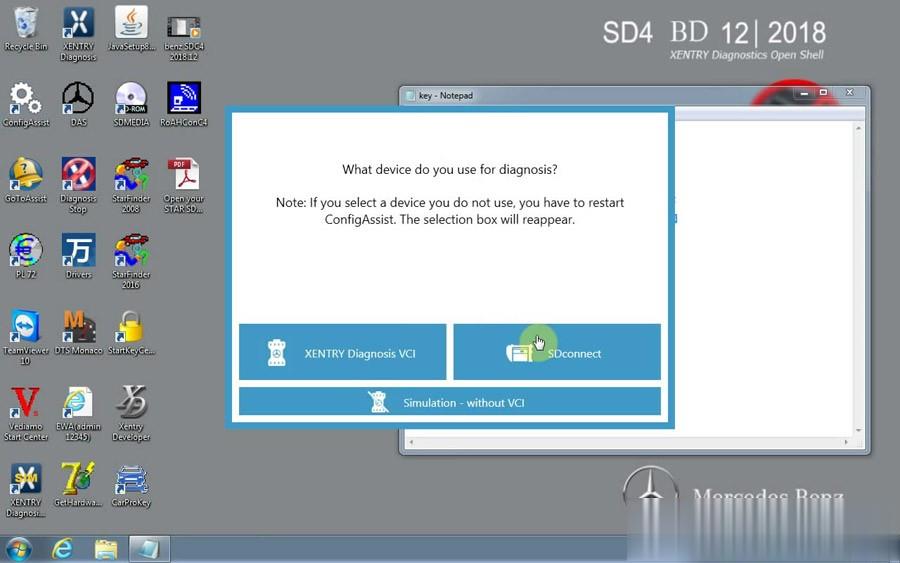
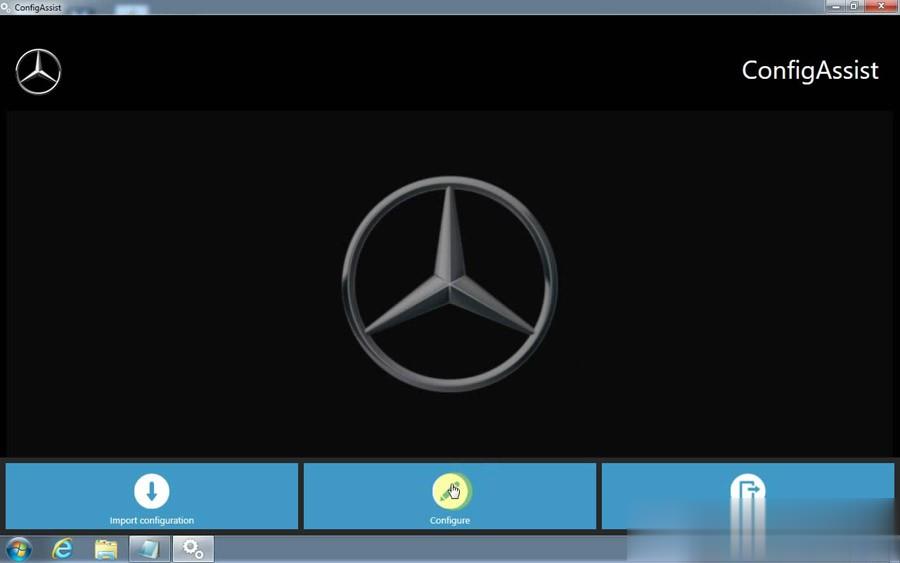
XENTRY Diagnosis
Openâ€ConfigAssistâ€
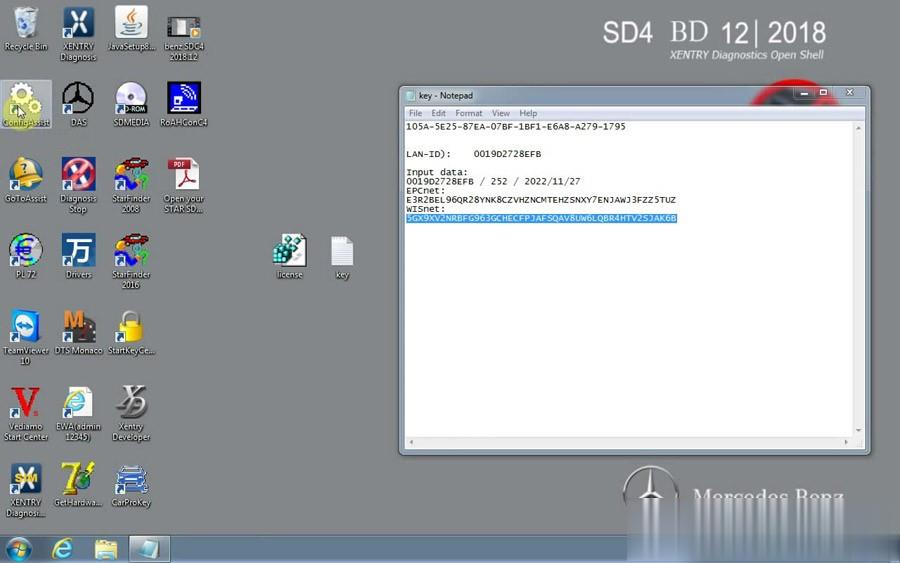

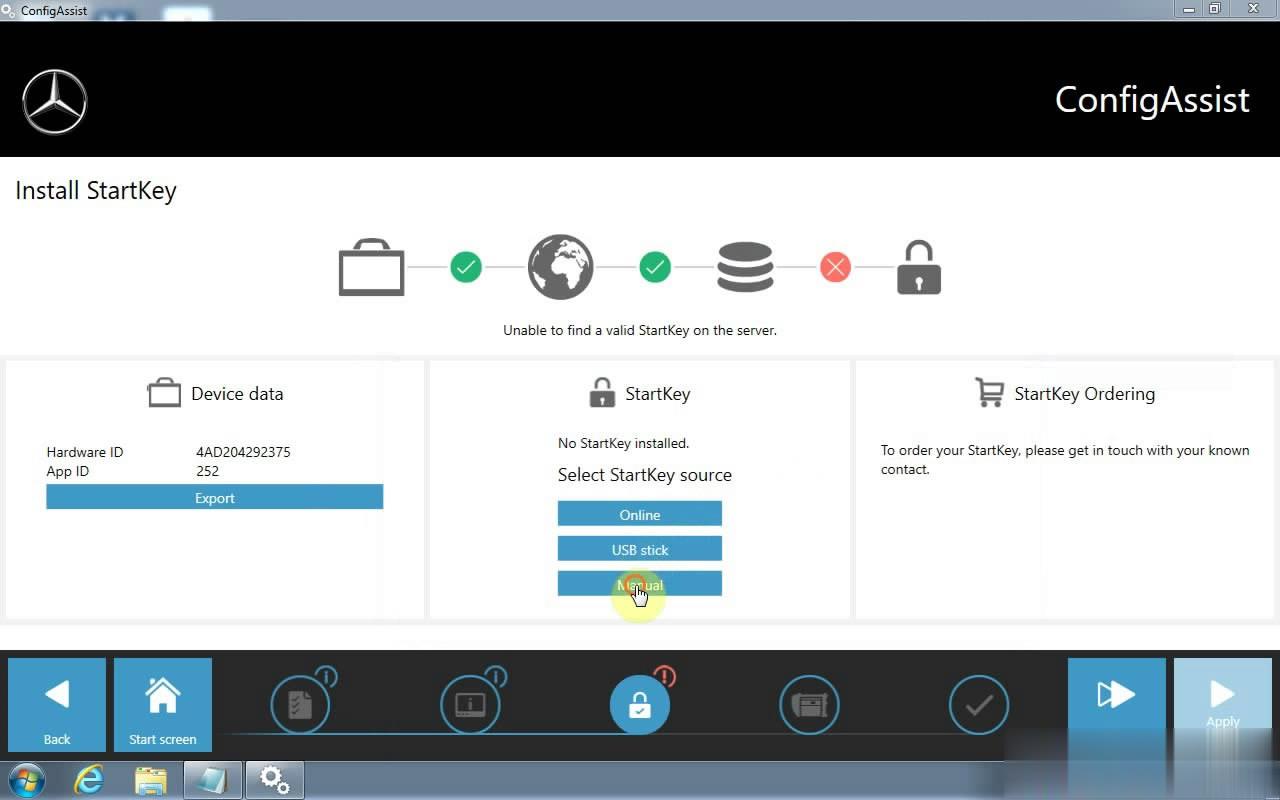
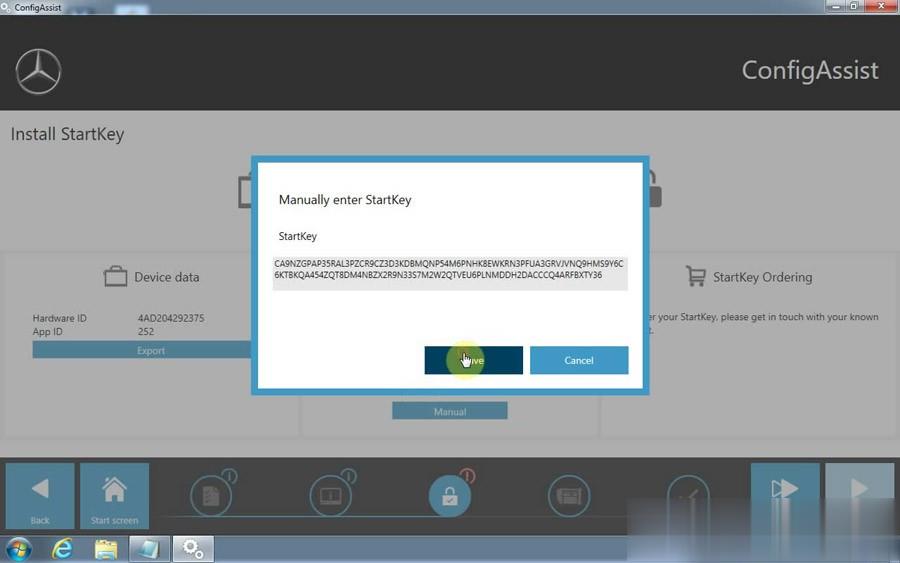
Open Computer –Local Disk C-ProgramData-LicDir copy "lic_key_2.datâ€, rename "lic_key_2.x4711″ Set to read-only file
That’s all.
Posted by: Emily white at
04:53 AM
| No Comments
| Add Comment
Post contains 69 words, total size 7 kb.
September 29, 2021
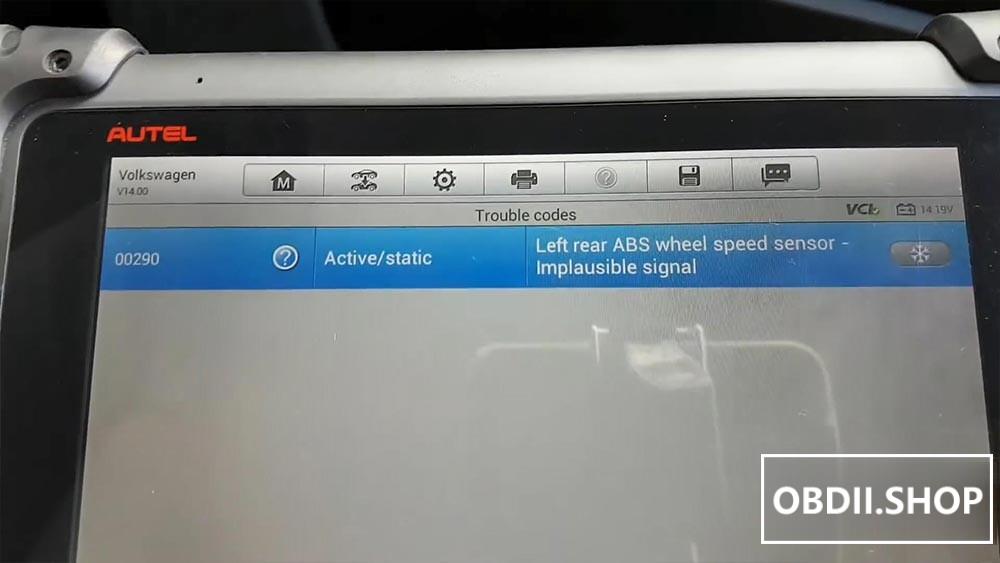
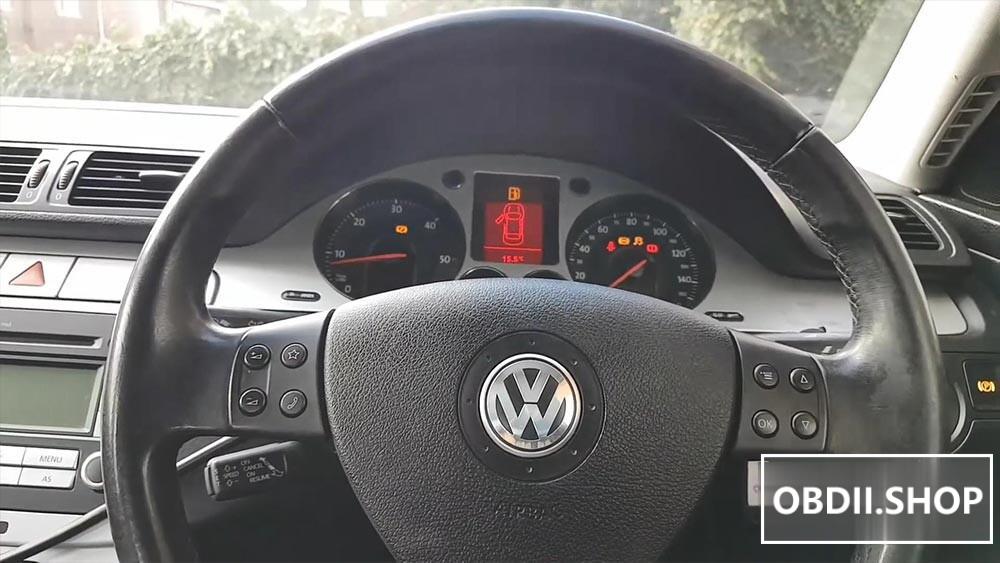
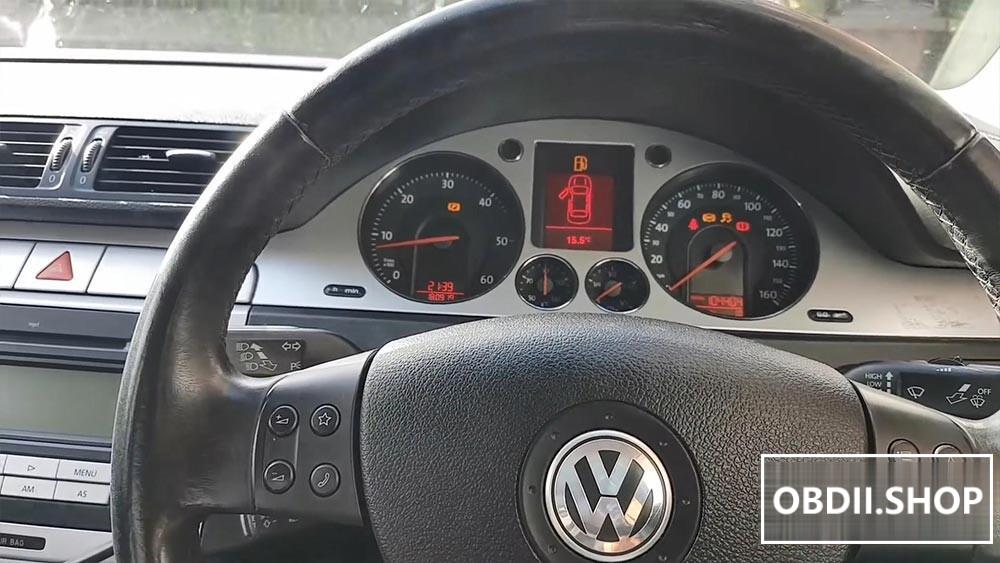
This Passat you activate the ABS every time you would put your foot on the break, this until the ABS, ESP and Brake light was illuminated… A quick scan revealed 00290 by using Autel MaxiSys MS908P… But, was this a sensor problem? Follow me on this article to find out what was the problem and how to resolve it.
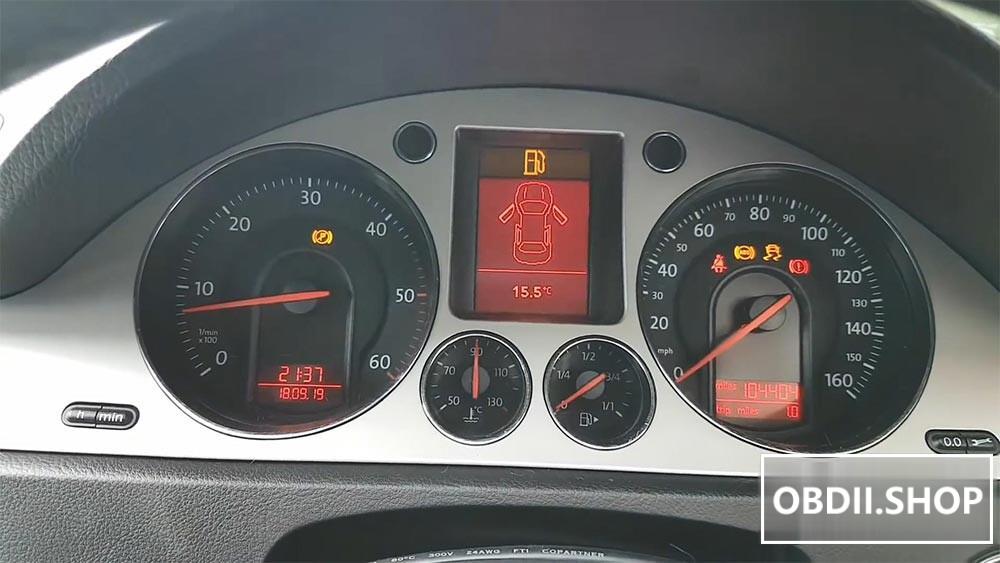
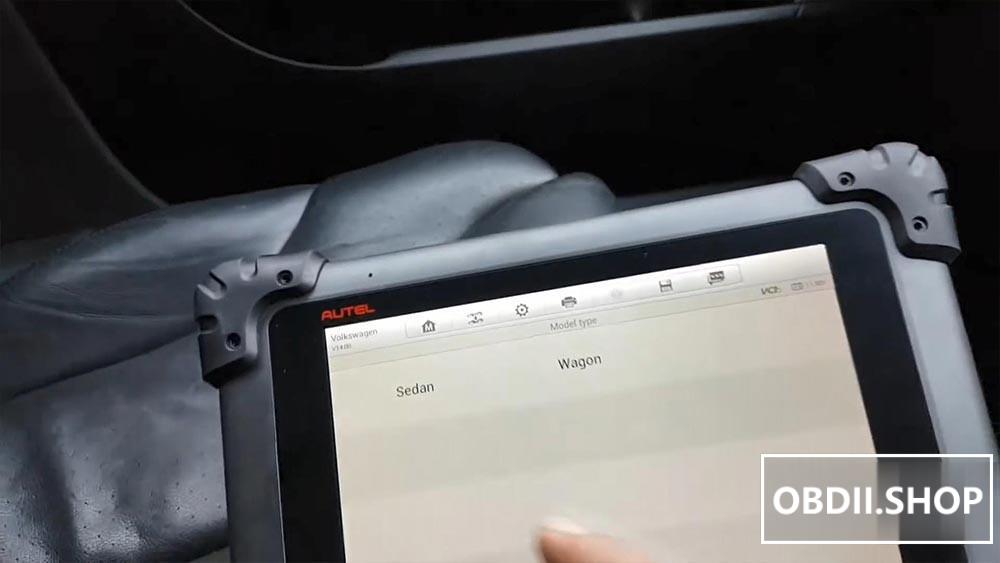
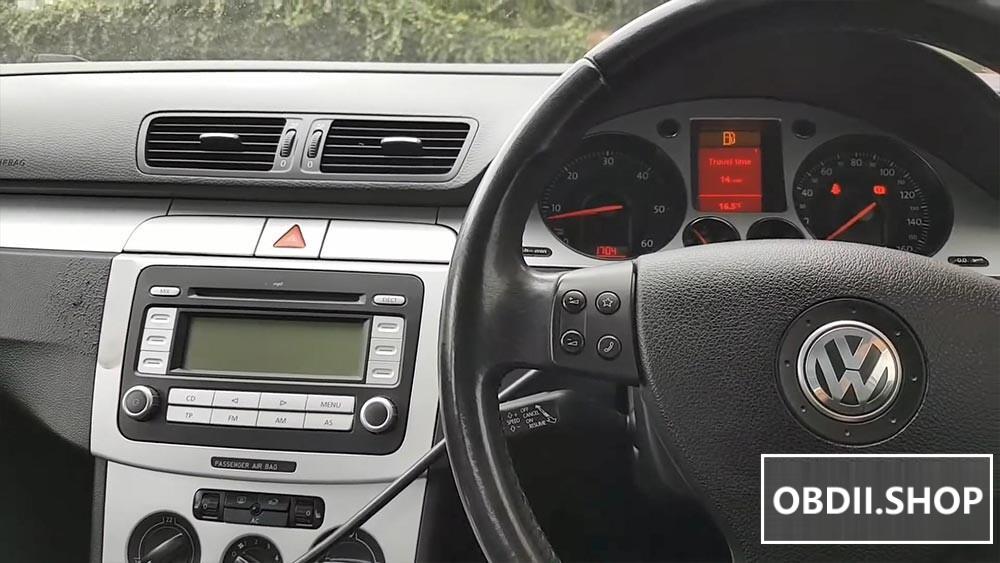
Car model and year: Volkswagen Passat 2008
The issue:
After starting the engine,
ESP light on
ABS light on
Parking brake light on
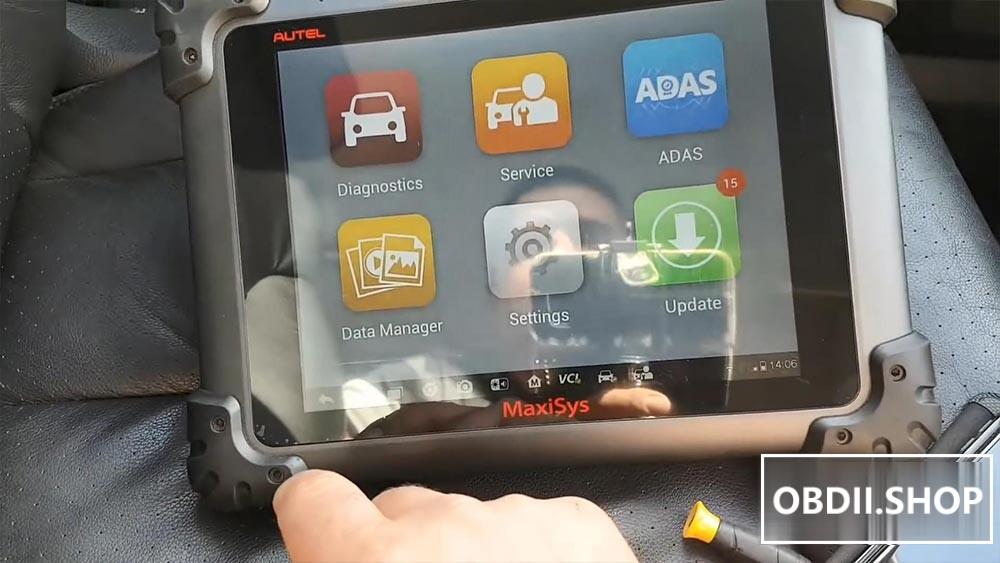
Passat Scanner to use: Autel MaxiSys MS908P
I’ve already scanned the car, the ABS code is 00290 (left rear ABS wheel speed sensor implausible signal).
when I drive the car, one of the things I notice is as soon as I put my obviously now it doesn’t do it because there is a fault, if I clear the fault, the fault goes away, and when I drive the car as soon as I press the brake I can feel the ABS pump working and I can feel it on the pedal and I can hear it and every time you break and you carry on doing this a few times until it daily triggers the light.
What says inAutel Scanner MaxiSys MS908P, there is implausible signals, so the pump or the unit is getting a signal from the sensor. However, when you first press, if I clear the codes when I first press the brake. The unit will get the signal, something the wheel is sleeping or whatever and he’s going to obviously do what he has to do, only a few times later, because it’s always the same thing, the unit is programmed to obviously. See that something is now right and trigger the fault, and that’s the reason why it took me a little bit to make the lights come on.
Driving the car.
We go but they eventually come on as you’ve seen, so, another thing is and let me show you because while I was there driving I did a little bit off.
Enter †Data Managerâ€.
And then "Review Data, then "Volkswagenâ€.
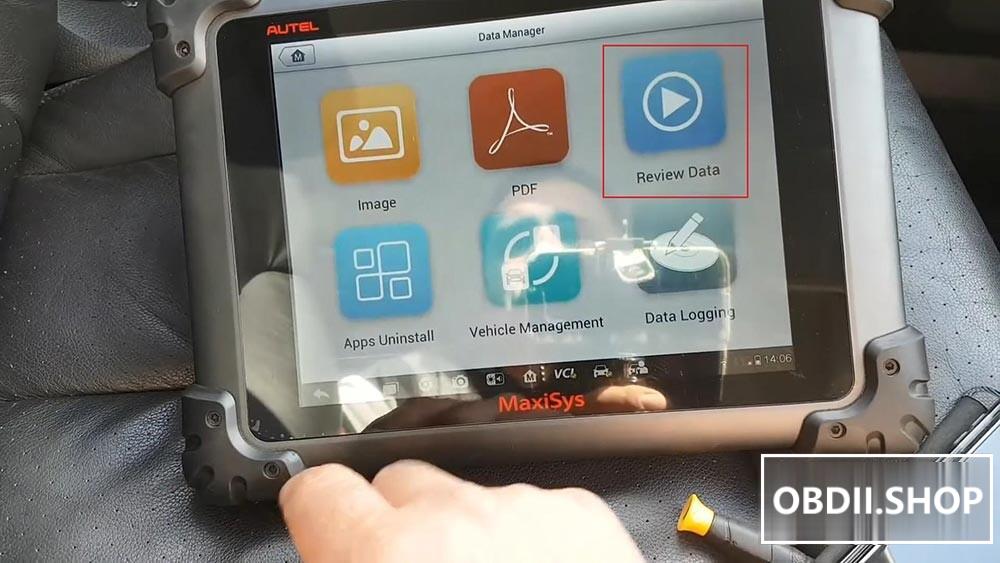
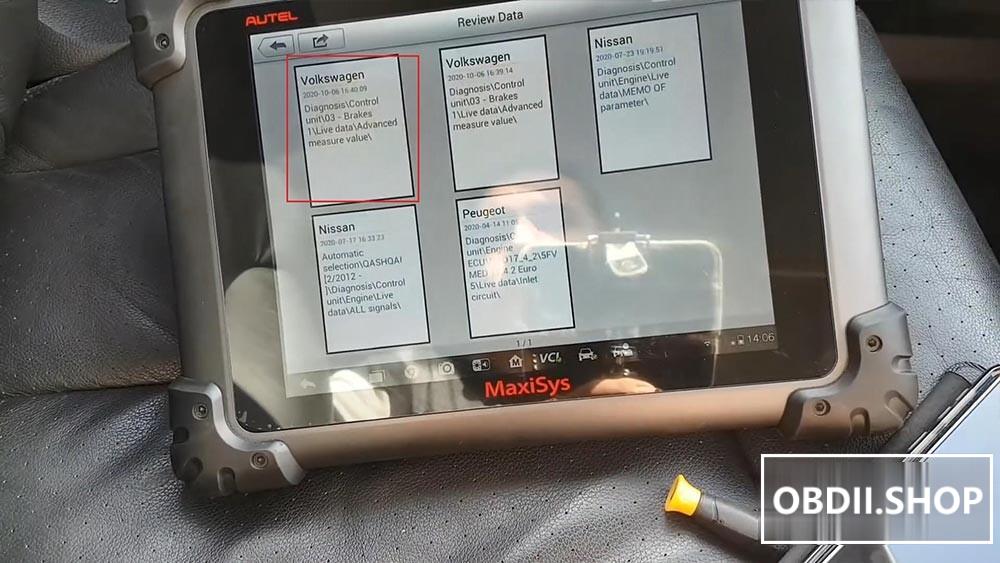
I can only do three here.
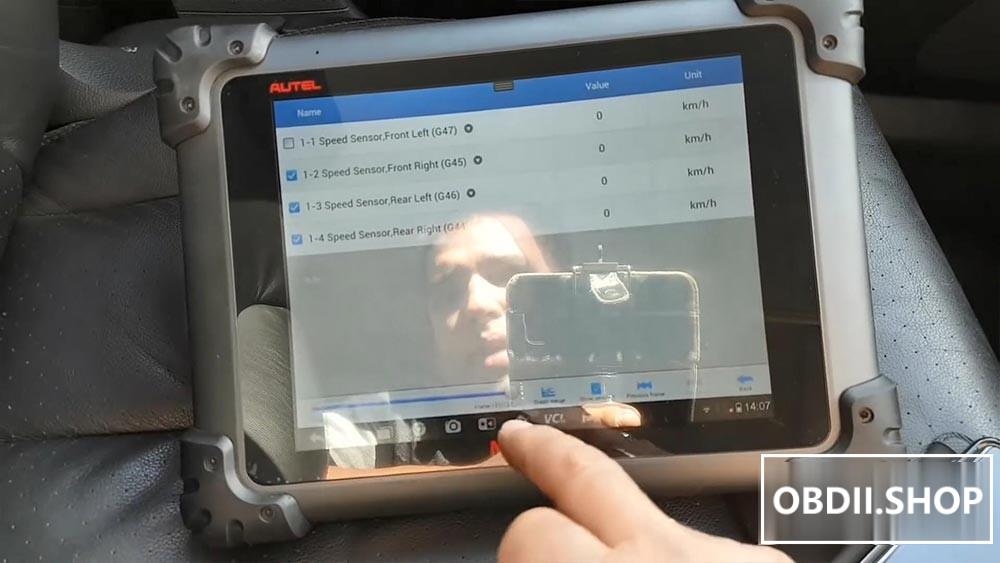
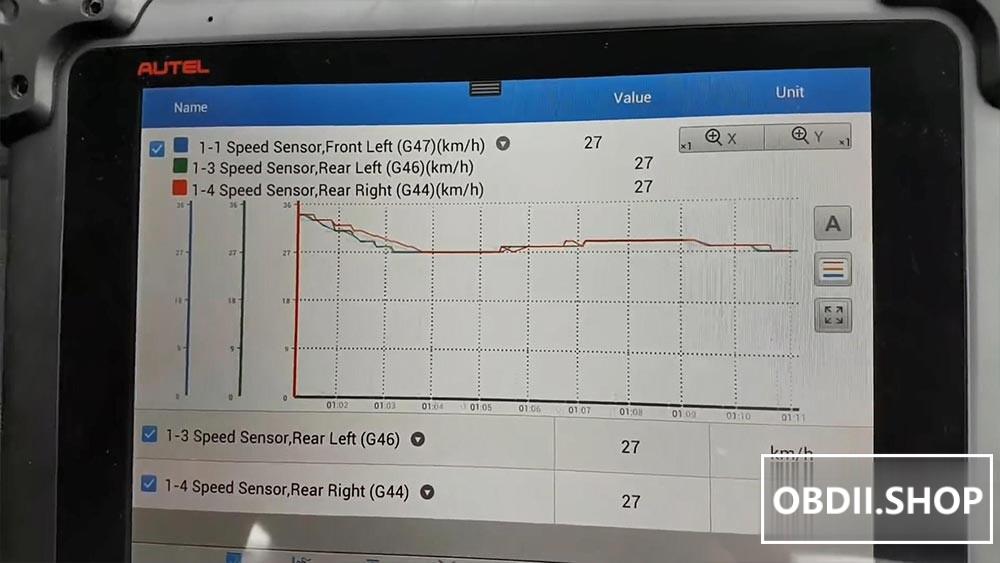
I can only do next frame, anyway I took some live data and as you can see I have my front car, I can only have three, so I have my front right, speed rear left and rear right so the rear left is going to be my green and then so that should be the one that I needed to look at and as I start to go, so I was driving the car.
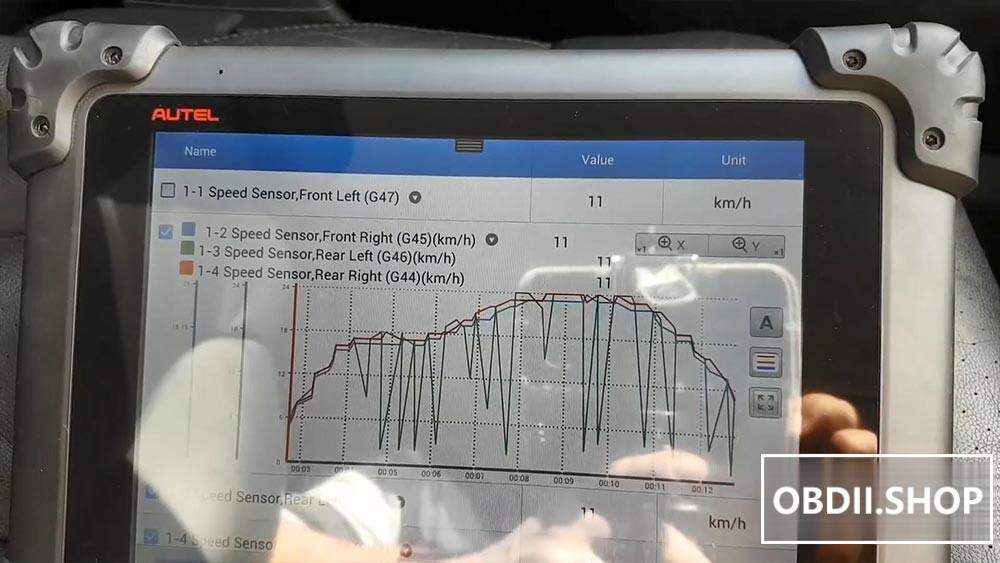
Start the drive. And then look at that the green line.
I think it’s quite self-explanatory what’s going on.
That sensor is breaking either that or a wiring problem, so the sensor is reading and dropped.
Reads again then drops all these is dropping.
So is dropping at a certain speed, so either we have a sense of problem or we have a wire problem, most likely this answer because otherwise wouldn’t read nothing at all I would say, but we don’t know that yet.
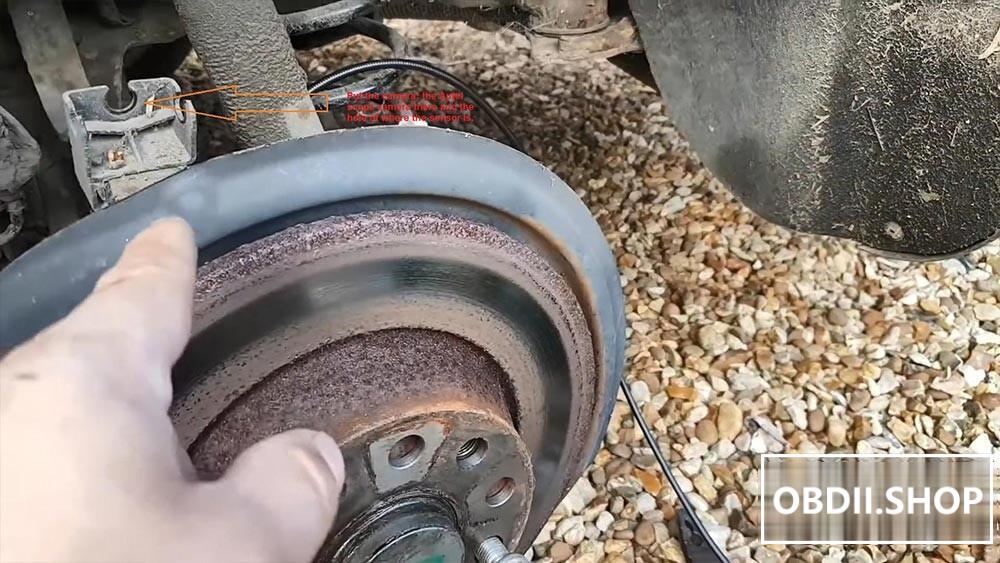
So my next step is going to be take the wheel out take this sensors and do an inspection and go from there really now at the moment.
I think we easily established that the problem is going to be somewhere on the signal from the sensor to the ABS or the sensor itself.
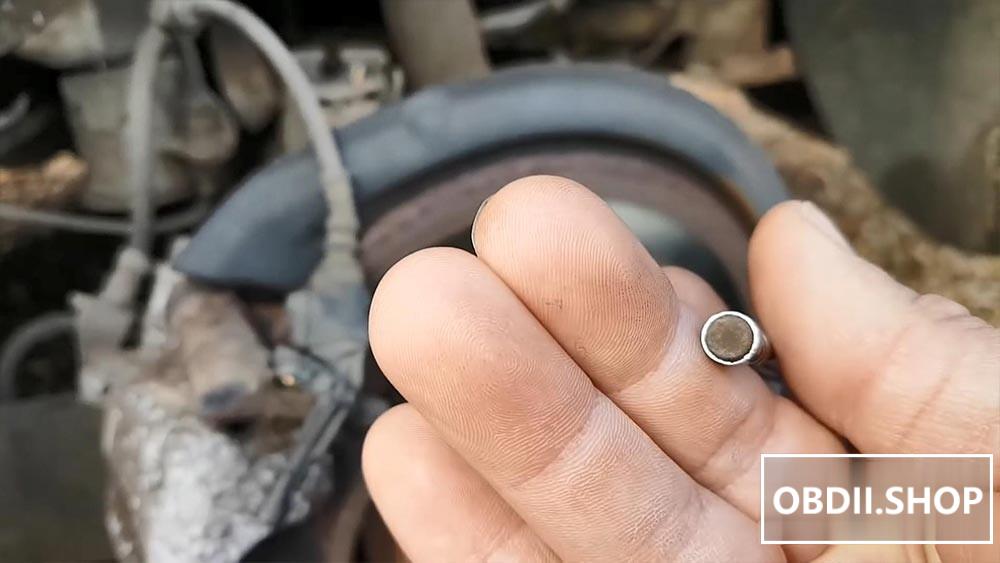
Okay guys problem found so the first thing I’ve done was obviously take the sensor off.
You can easily see that the sensor has been rubbing on the magnetic reflector ring. It’s
marks there now when I cross a magnet in front of this which I have one here.
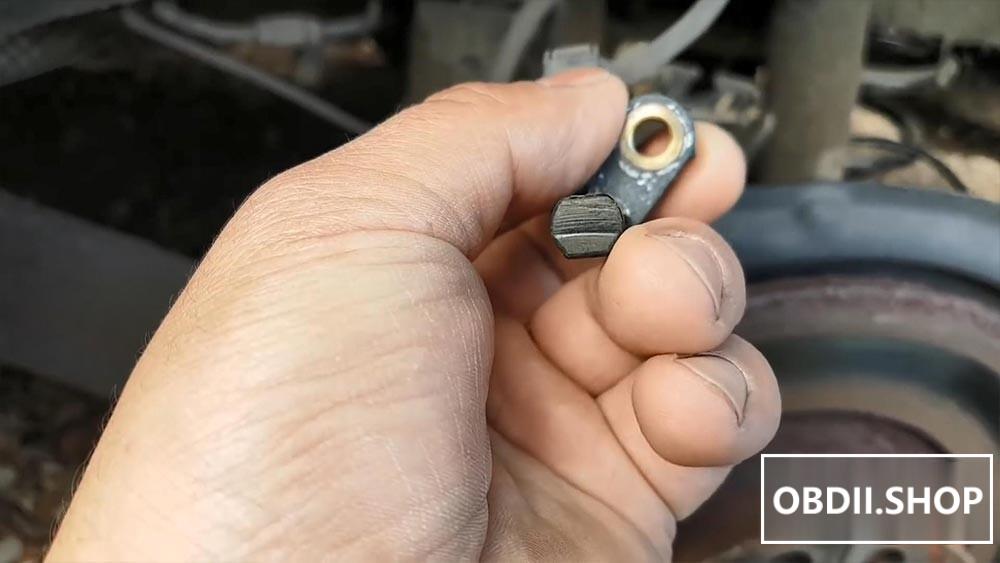
Okay, obviously it’s too big, but I can easily make a numbers to appear on the speed of these wheel, quite erratic but doesn’t matter, it is working cable looks okay, connection looks OK.
So because of the state of this disk and in the fact I was touching what I decided to do was to put the camera, the Autel scope camera there and the hole of where the sensor is and that’s exactly what I’m going to show you now, so that’s the magnetic ring now I’m going to turn the wheel, I know the light is not brilliant, let’s see if I can be slightly different, let me actually put the phone down I can actually look at this properly.
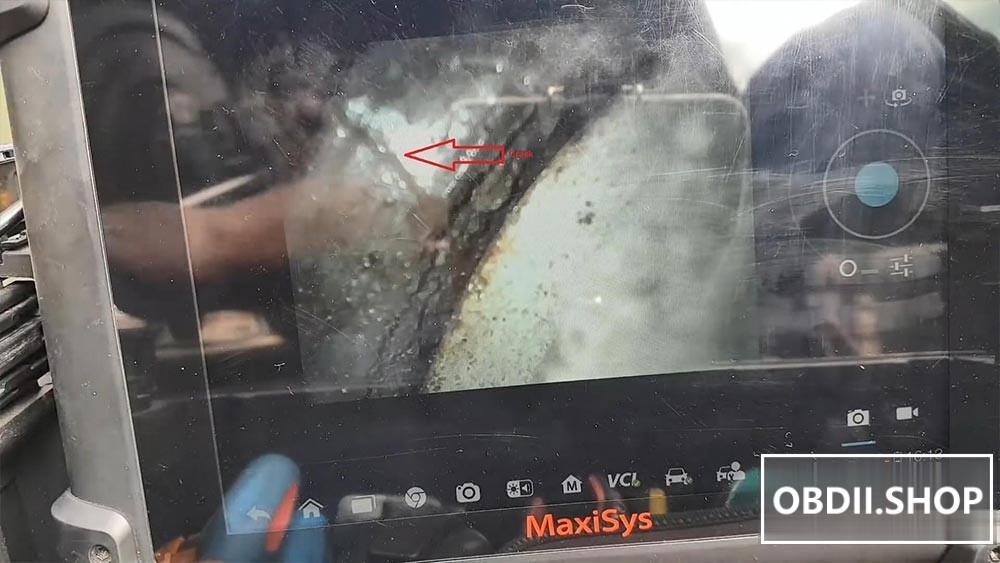
There we go, so I’m going to rotate the wheel.
Okay, so to start with I don’t know if you can see there is a crack where is it okay, I’ll go this way, so quite a little bit of damage in there.
oh, look at that: another crack in there, not very good, it’s a really bad, another crack right there.
Another libya missing there.
And this is the worst point, look at that, so the magnetic layer look at that there is and then there’s there.
You just finished look the other way. It’s missing, you can see how bad it is. It’s completely gone.
So when he goes through this area here is when he fails to read look all gone and then comes up again, you can see there.
Then you have the ring again, if I go back.
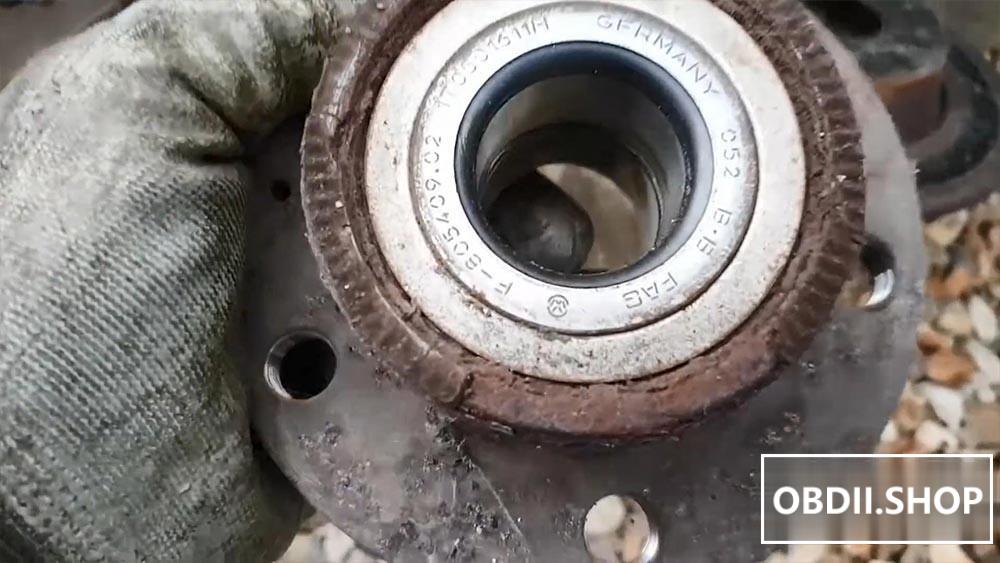
it literally needs a new hub, a new bearing as far as I’m aware, this is attached, is one of those bearings with the reflector ring at the back, so it’s going to need a new hub, there’s nothing else I can do, most likely still okay, so we’re gonna get a hub and when I get a hub and replace it test it.
and should be about it really I think.
Good I have the camera, otherwise it will be very difficult to spot and hold bank it would be a little bit more tricky to diagnose but they we go there, we know what the problem is now that’s going to get the parts and get these going.
And there is a brand new one, so let’s gonna crack on with this and get it replaced.
Right, caliper is out honestly this car is in need of a break job to be honest with you it’s really bad, right now we’re going to take the carrier, so we can then take the disc and then have to take the bearing.
Okay, and he was definitely a challenge to take the carrier out ready hurt myself
And funny enough I didn’t even hurt myself here, hurt myself closing the drawer on the Van, radio anyway so that’s out was definitely a challenge to take these two bolts from the carrier, the bearing I think just a spur the camera.
That we’ve seen: no rocket science.
Just come out.
so the new bearing, so just curiosity comes with a new cap comes with a new bolt so we’re not going to reuse the bolt it comes with a new bolt.
And I’m going to put everything back on, I’m not going to take you through the law, I’m just literally gonna put everything back on. I’m going to probably take the calipers give you a good clean and a little bit of Chris at least on this side because I’m touching it.
For now I’m going to put everything back on because it’s getting dark even though it might not look on the camera but it’s getting dark and I want to get things done today and tomorrow, I’ll try the car tomorrow morning, but yeah for now I’m not going to take you through anything else just put everything back on.


Alright, I’m glad I did the thing yesterday because.
right, let’s go to clear these lights to start with a vision clear the car yet so I’m going to clear the lights and then we’re gonna go for a drive and fingers crossed, the problem is solved.

Okay, we cleared fault free let’s go.
Okay, first thing: no lights; secondly, I definitely can see oil I can’t feel that and what you call it I can’t feel the pedal a vibrating anymore, so there is no activating the ABS, anymore, when I press the pedal which would happen like.
Even like now if I press the pedal I could feel it, it’s absolutely perfect now, no lights come back on everything’s good.
I’m just gonna turn around and load the live data from Autel MaxiSys MS908P once more, just curiosity really because I know we fixed, but just to show you guys, I’ll show you the live data just for you to see that and this is OK now, so let me just turn around here and I’ll show you.
Okay, so here we have it so real left as you can see up there is the green line, so I’m going to start to drive.
There we go. I think is self explanatory. Beautiful.
That’s it.
And back home and ready to move to the next, and last issue with this car, so stay tuned, but for this one guys as you’ve seen problem is fixed cars driving absolutely spot on and in the end was just that reflector ring on the bearing, sensor is OK, the sensor is the same one as before, and yeah that’s it guys, we got it fix.
One thing that I would probably say is that the way I look at this unless the other side has been changed recently it might be very close to having the same who knows, but for now he’s fixed guys and that’s the main thing, so that’s gonna wrap up these guys, I hope you enjoy this article, hope there’s some information, whatever you’re going to find useful.
https://autelscantools.blogspot.com/2021/08/autel-maxisys-ms908p-passat-absesp.html
Posted by: Emily white at
09:18 AM
| No Comments
| Add Comment
Post contains 1641 words, total size 19 kb.
What is Diesel Particulate Filter ?
Diesel particulate filters (DPF) are devices that physically capture diesel particulates to prevent their release to the atmosphere. Diesel particulate filter materials have been developed that show impressive filtration efficiencies, in excess of 90%, as well as good mechanical and thermal durability. Diesel particulate filters have become the most effective technology for the control of diesel particulate emissions—including particle mass and numbers—with high efficiencies.
How Diesel Particulate Filters Work?
As with any filter, they ‘filter’ or trap particles, in this case harmful diesel exhaust soot particles, so they have to be emptied regularly to maintain performance. The DPF needs to be cleaned regularly, through a process called regeneration, either active, passive or forced regeneration, the accumulated soot is burnt off at high temperature (around 600°c) to leave only a residue of ash, effectively renewing or regenerating the filter, ready to take on more pollution from the engine.
Here share a easy guide on Ford Diesel Particulate Filer(short call DPF) Regeneration.Below detail the step-by-step procedures,please check and hope you can get useful information from this article.
Here is Ford Diesel Particulate Filter Static Regeneration Video Guide.
https://www.youtube.com/watch?v=dROqN9YBGMI
What device you need to do DPF Generation?
Here we take X431 Pro as example,you can choose other devices.
Ford DPF Generation detail procedures:
Connect X431 Pro Bluetooth DBSCar connector to your car via OBD2 socket.
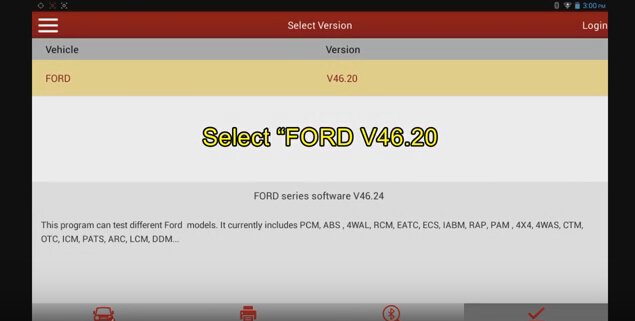
Open theLaunch X431 Software to select "Americanâ€â€“>â€Fordâ€
Select "Ford series software V46.20â€
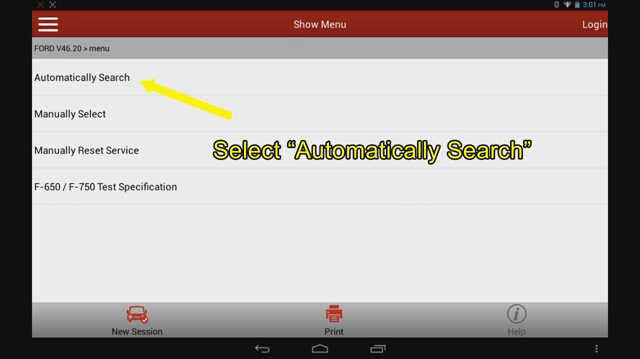
Selectâ€Automatically Searchâ€
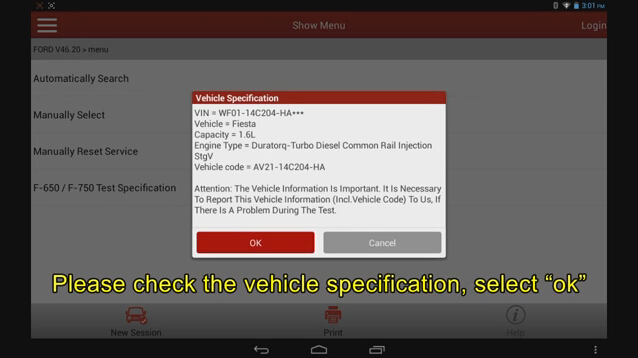
Please check the vehicle specification,selectâ€OKâ€
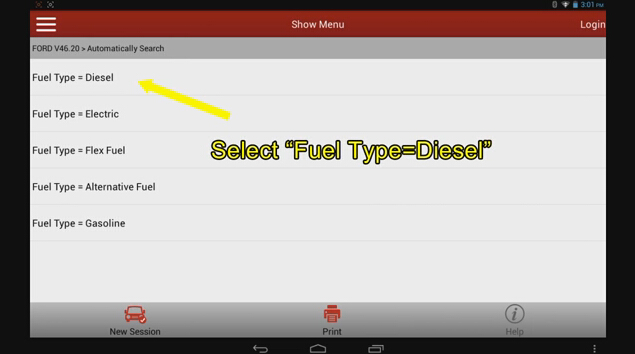
Select "Fuel Type=Dieselâ€
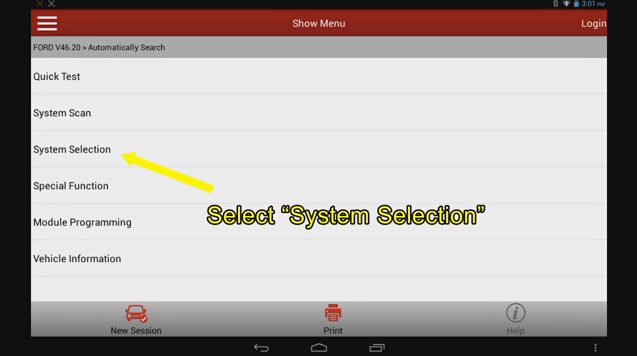
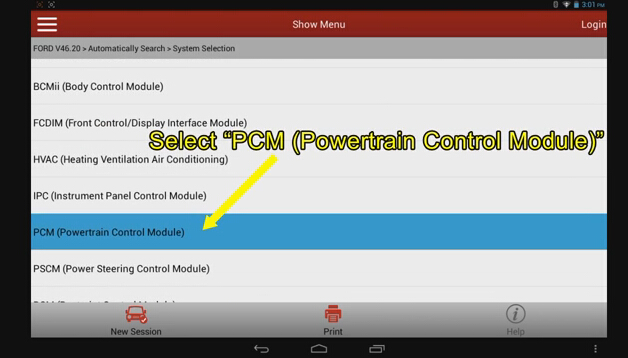
Select "System Selectionâ€
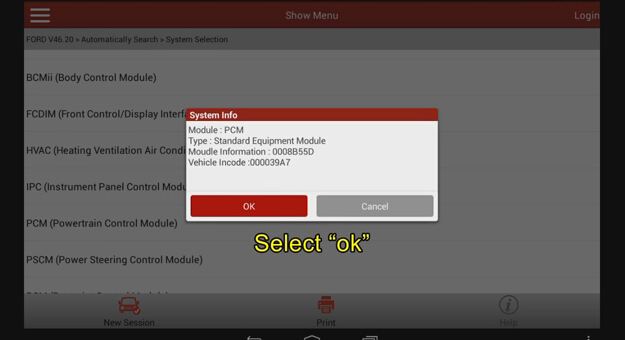
Select "PCM (Powertrain Control Module)â€.Then Select "OKâ€
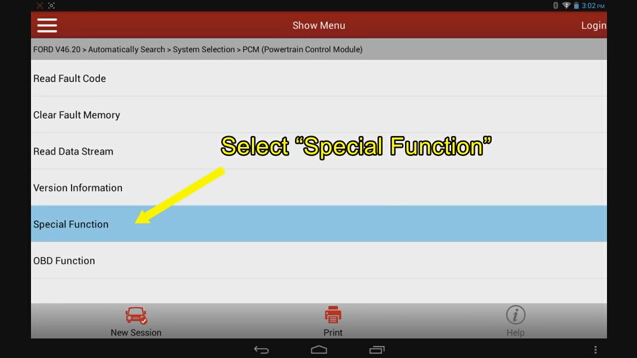
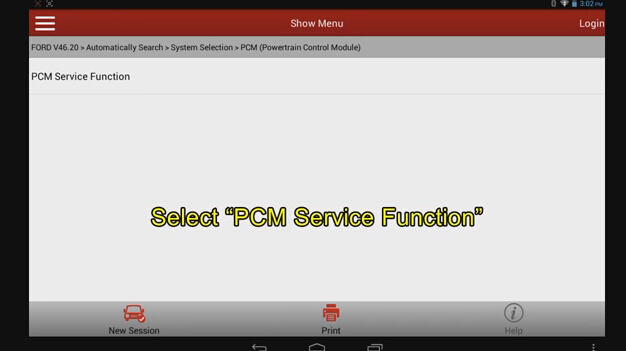
Select "Special Functionâ€â€“>Selectâ€PCM Service Functionâ€â€“>Select "OKâ€
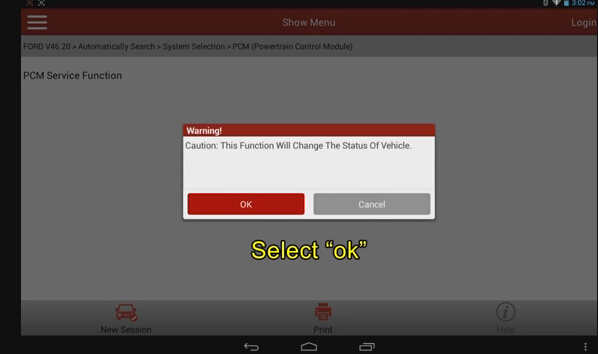
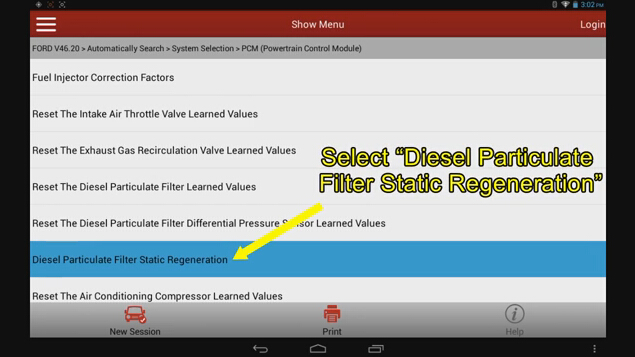
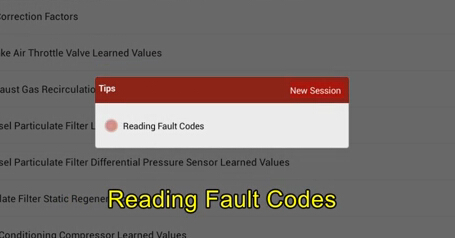
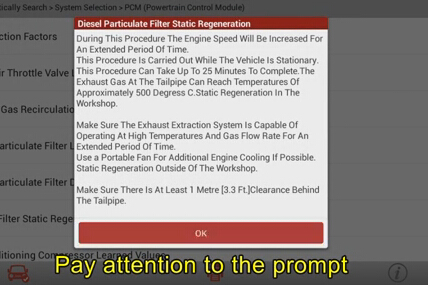
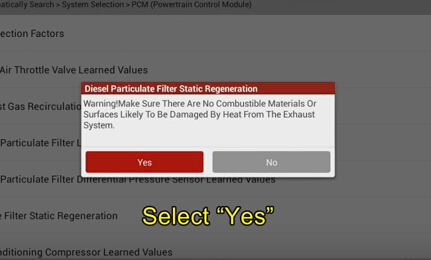
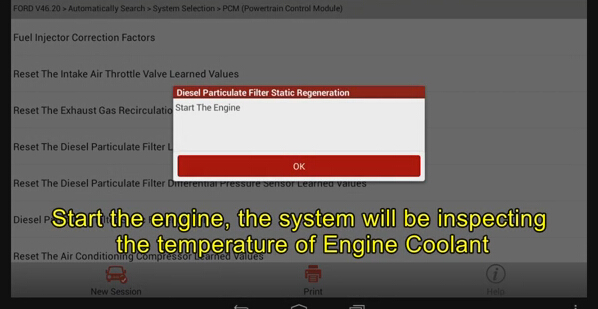
Select "Diesel Particulate Filter Static Regenerationâ€
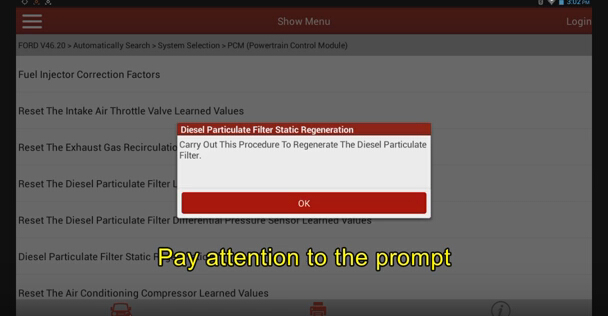
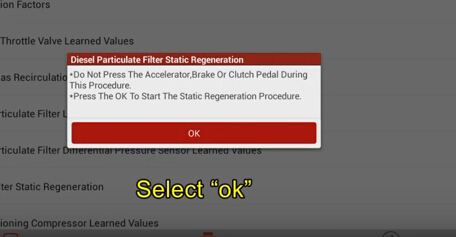
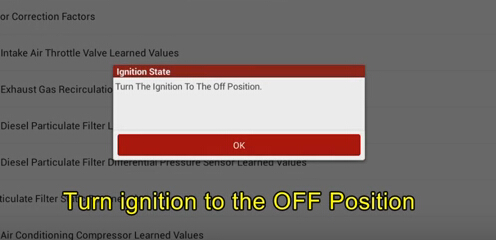
Pay attention to the prompt
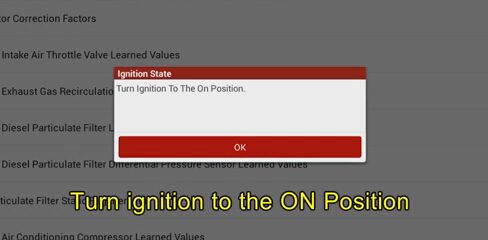
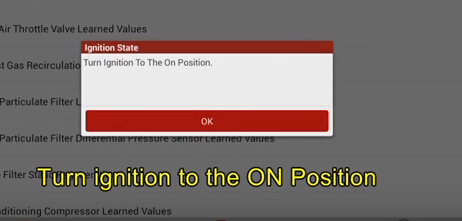
Turn ignition to the ON Position.And wait system to Reading Fault Codes
Turn ignition to the OFF position.And pay attention to the prompt and click "yesâ€

Turn ignition to the ON position
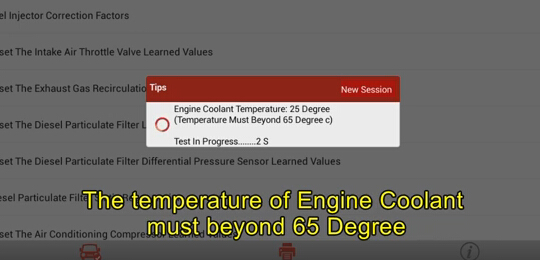
Start the engine,the system will be inspecting the temperature of Engine Coolant
The temperature of Engine Coolant must beyond 65 Degree.Then selectâ€OKâ€
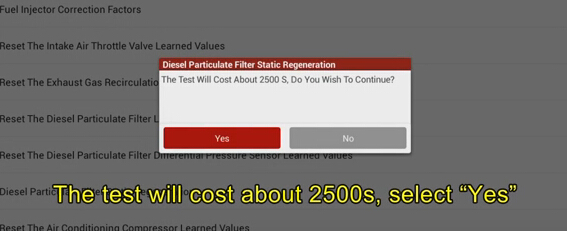
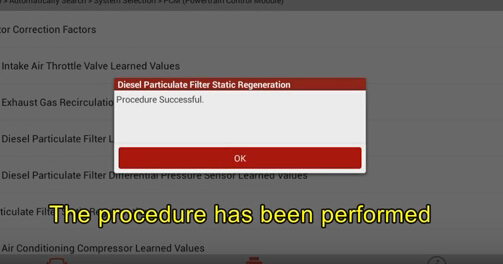
The Test will cost about 2500s,selectâ€Yesâ€Wait for 2500s,when it complete click OK and Turn ignition to the OFF Position.
The procedure has been performed. Done!
Posted by: Emily white at
09:05 AM
| No Comments
| Add Comment
Post contains 366 words, total size 16 kb.
September 07, 2021
Keeps Autel MaxiSys Pro MS908P for some days, usually I use it for diagnosis like reading or clearing
some faults. Today, I try it to program a new key for Acura TSX 2009.
Work like a charm! I have to say that. MS908P with MaxiFlash Pro J2534 box to program keys like a professional key programmer, e.g. SKP900.
Here, I would share my experience of key programming for Acura TSX 2009.
items needed:
The original Acura key
A spare key to be programmed
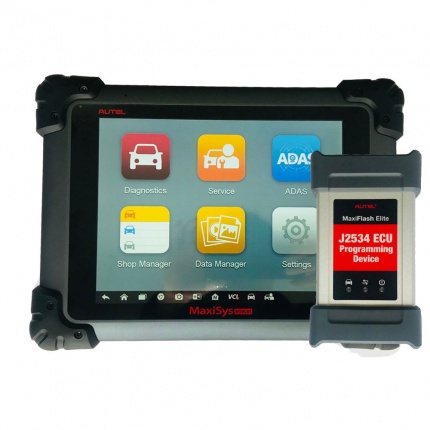
MaxiSys pro MS908P
Autel MaxiFlash Pro J2534 ECU programming tool
My procedure to program a new Acura key
The car starts
Connect Autel MS908P and Autel MaxiFlash Pro J2534 ECU Programming Device with the car
MaxiSys pro MS908P starts
Insert the spare key and original key separately to be ON
When insert the original key, select Acura on MS908P
Then USA
Then Start New Session
Select Diagnosis
Then Control Unit
Then IMMOBI (immobilizer)
Keep the ignition ON until the tester directs you to turn it OFF
Program keys with a T5 stamped on the blade of the key…
Diagnostic system initializing…
Select IMMOBILIZER SETUP
Establishing vehicle communications…
Select ADD AND DELETE KEYS
Establishing vehicle communications…
Then ADD KEY
Establishing vehicle communications…
Turn the ignition switch OFF
Turn the ignition switch ON with an original key
Turn the ignition switch OFF within 17 seconds
Turn the ignition switch ON with an new key within 20 seconds
Turn the ignition switch OFF within 17 seconds
Turn the ignition switch ON within 20 seconds without changing the key
Turn the ignition switch OFF
Turn the ignition switch ON
Is the immobilizer indicator light turned OFF?
Then check the immobilizer indicator light
Turn the ignition switch ON
The registration of keys has been completed.
Turn the ignition switch OFF
Then insert the key newly programmed to have a try and make sure that it works
Successfully programmed a Acura key with Autel MS908P and J2534 ECU programmer
Posted by: Emily white at
04:06 AM
| No Comments
| Add Comment
Post contains 339 words, total size 3 kb.
Autel OTOFIX IM1 Automotive Key Programming & Diagnostic Scan Tool FAQ
Q: Where can I get Autel MaxiFix?
A: You can scan this QR code:

Q: Does it work with Autel APB112, G-BOX2, 8A?
A: Yes, IM1 can work with these adapters.
Q: How many kinds of special functions and IMMO functions? Should I need to pay for them? or free?
A: Full system diagnosis and services functions, 6 special IMMO
functions totally, they are for BMW, BENZ, VW, TOYOTA, Ford, Mazda,
Mitsubishi. Yes, you can buy the one you need.
Q: After I buy these IMMO functions, does it support for a lifetime? or just one year?
A: Just one year. After one year, you need to buy it again if still need an online IMMO function.
Q: Does the smart IMMO function supports online?
A: Yes, after you buy the compatible IMMO function, it works online.
Posted by: Emily white at
03:01 AM
| No Comments
| Add Comment
Post contains 159 words, total size 2 kb.
August 01, 2021
Many of you keep asking me everything about these two things:OBDSTAR X300 DP PLUS and Lonsdor K518ISE. Now the review comes.
Price tag
Let’s start with the most important thing. Basically, everyone is initially interested in the price tag. The price of Lonsdor is 1,100$ and the price of OBDSTAR in package C is 1,550$. Lonsdor is cheaper, and there are all manufacturers for each programmer, not only the Chinese.
Well, everyone is switching to a subscriber, and programmers are being transferred for a monthly fee. So the OBDSTAR subscriber fee is 400$, and 400$ is a subscription fee per year for an upgrade. At a Lonsdor subscription, the fee is 480$. So if you immediately buy OBDSTAR, it’ll be a little more expensive but cheaper according to updates. In principle, the price tags seems to me not so important, the difference is not very big, and let’s see what goes into complete set.
Accessories
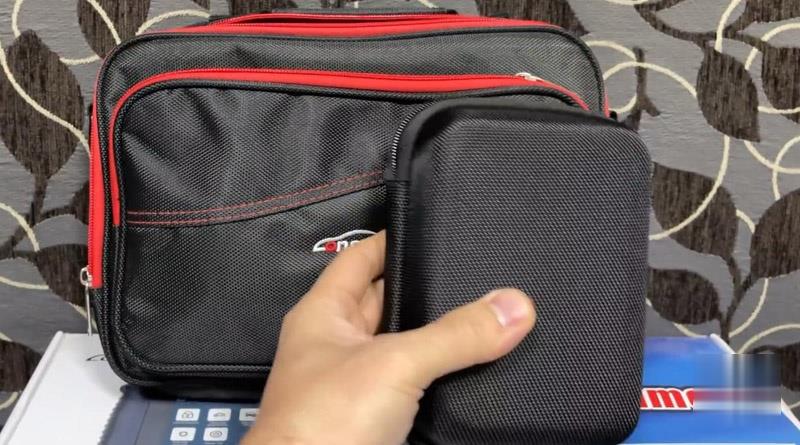
Let’s have a smaller one to Lonsdor what it contains in the handbag, it is convenient of course. It turns out a case. We get the plug-in, a programmer for reading microcircuits with a loop, and it should be connected to such boards. We connect it to the board with needles to read the information. In one pocket we have adapters, old Honda and Hyundai, and a belt for the handbag, the whole thing kits.

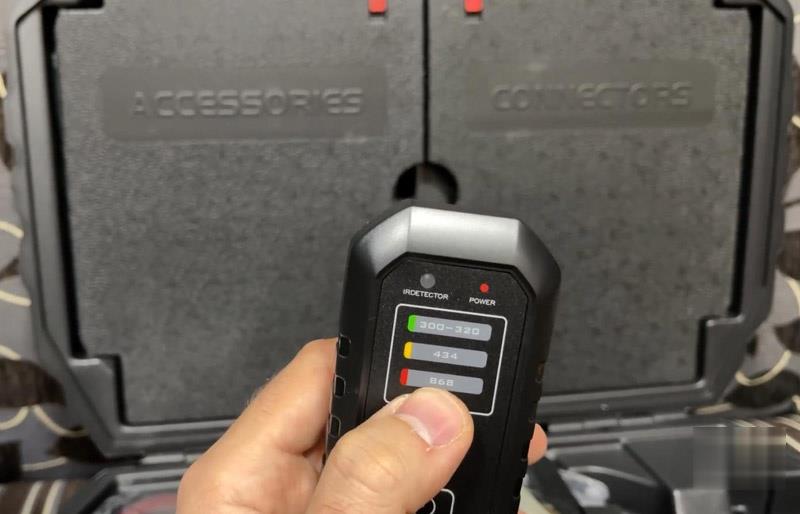
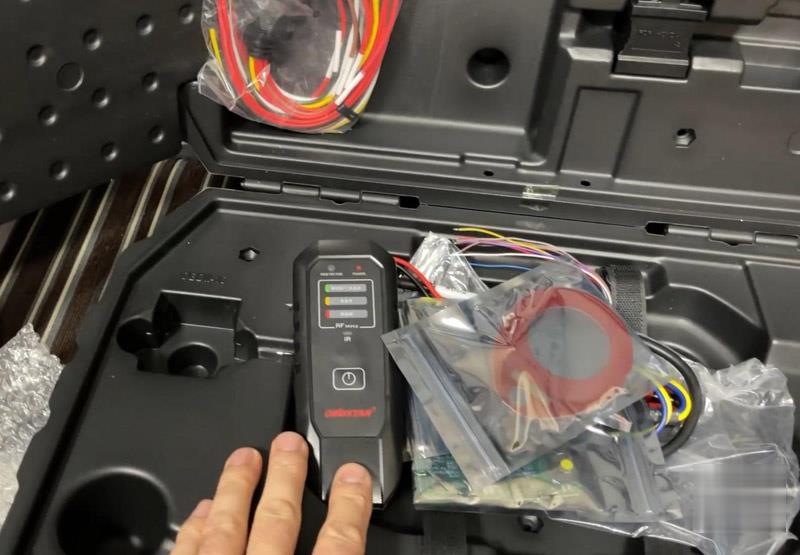
So let’s open the OBDSTAR box. We get the coil, so this is for checking the ignition lock. What else is this, we have a frequency tester. Here we get 868,434 and from 300-320, and this implies if there are 315 and 302 frequencies, but I can say that this is not enough because now Ford’s got a 902 frequency.
Here it turns out the package, which means a device for key unlocking. There is a connector for in-circuit reading, and by the way a clamp, probably all the same for this. These are emulators for complete loss and Toyota smart keys are already included in the set because Lonsdor needs to buy emulators separately. This is already a separate money, therefore, it is accepted for this kit well. And we still have a whole bunch of cables. Here again we get adapters for reading, and adapters for Hyundai, KIA and Honda.
In short, take all these things into account, then it would be more interesting than Lonsdor.
Functions
So let’s back to the difference of 500$. If there we do KIA, Hyundai, ford or something else, Lonsdor doesn’t ask connection with the server. That’s a big plus in certain situations. If there is no mobile connection or mobile connection with 3g, which will not allow the server to work normally. Therefore, I was very much rescued by Lonsdor because for cars like Ford OBDSTAR needs a connection.
Besides, Lonsdor has a built-in antenna. And let’s say OBDSTAR, there is an external antenna. I understand it is not always needed, but if suddenly you forget and go where like VW needs to make a dealer key, you can’t do anything without the thing. But here on the built-in one, so for convenience.
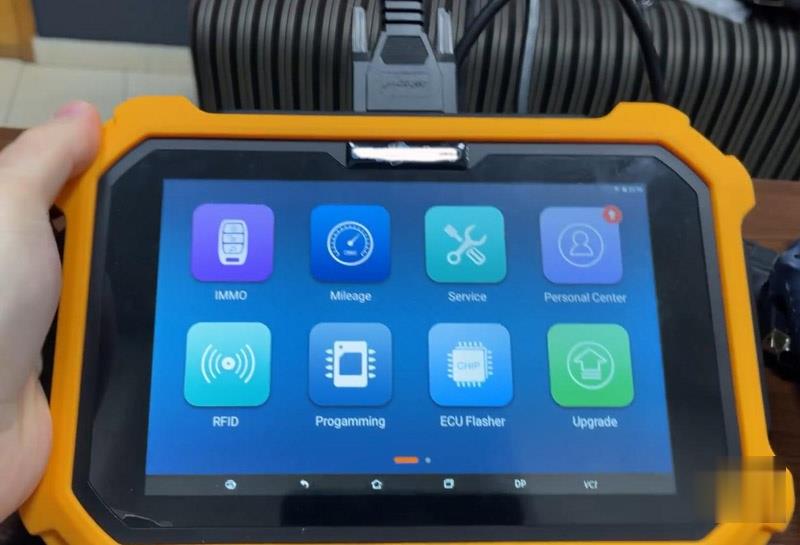
Let’s see the advantages of these two. X300 DP Plus can work with Immobilizer, odometer, service etc. I can tell you that there is a function engine diagnostics, it does diagnostics specifically for the engine. Then "Service†is not the diagnosis, there are certain works that he conducts directly with, but it will not show you an error there. And "Programmingâ€, you can see "SRS Resetâ€, that is removing the errors of the pillow if it explodes. ECU Flasher, it’s displayed separately, 4 brands in the whole list. For "Otherâ€, there are some repair functions. So built-in timber well, in principle, but again this is like a third-party application.
About Lonsdor here the same thing (IMMO&Odometer). But here is interesting, Lonsdor has "Generate remote/smart†directly. Directly generate remote and prepare chips. So we get it with the adapter, that is, edit some dumps. Let’s see special functions. Here’s chip generation and identification and key unlocking. It determines the frequency to simulate the chip, to decode the chip. The lower part is purely informative, so we get 5 tabs that are potentially working.
Summary
These devices complement each other and they are updated a lot, too. It seems to me that a little one step ahead of Lonsdor, because there are certain Fords I did, and when I really didn’t have the Internet and I needed to do, it’s always with me. If you have the opportunity, then buy these devices or others like Autel…every device has some kind of features and they should be different.
Posted by: Emily white at
03:53 AM
| No Comments
| Add Comment
Post contains 785 words, total size 7 kb.
July 29, 2021
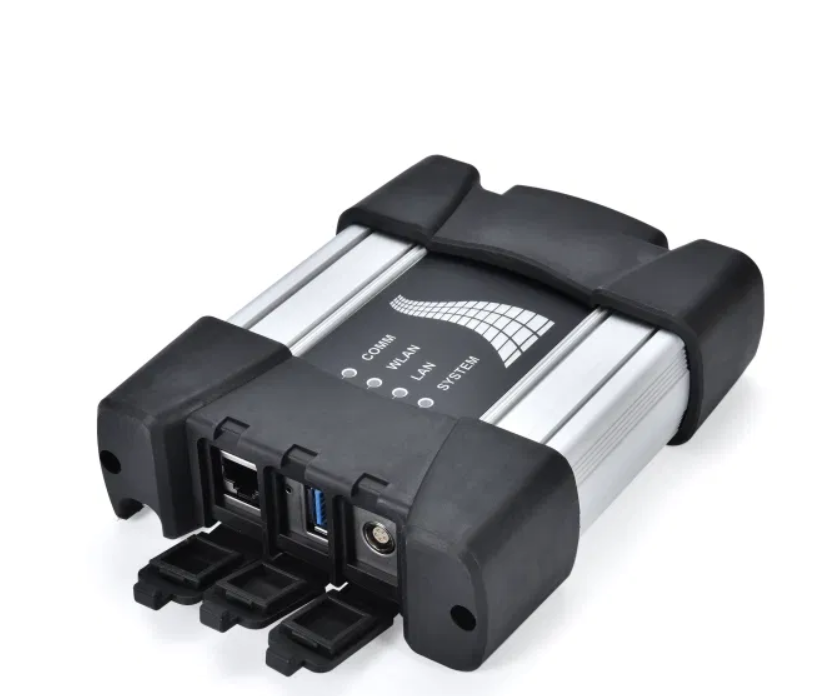
TheICOM Next A is a multifunctional vehicle interface that is designed to be used in workshops worldwide. It has been specially developed for use by workshop and service personnel in support of service consulting, diagnosis, and vehicle programming processes.
The philosophy behind the ICOM Next A is to provide universal deployment capabilities irrespective of the vehicle type and communication interface. To this end, the interface unit is distributed over several components. Each individual module is designed to be used in different combinations for special tasks.
The ICOM NEXT system comprises the following components: diagnostic unit incl. OBD cable, MOST diagnosis adapter, legacy vehicle adapter, and motorcycle adapter. An overview of all the devices is shown in the table below.
OPERATING AND STORAGE CONDITIONS
Electric operation:
Supply voltage KL30: 8V to 18V
Max. power consumption: 1.5 A (incl. MOST diagnosis adapter)
Ambient conditions during operation:
Ambient temperature range: 0 °C to +45 °C
Relative humidity at max. 25 °C: 10% to 80%, non-condensing
Temperature gradient: 5 °C/h
Ambient conditions for storage:
Ambient temperature range: -20 °C to +60 °C
Relative humidity at max. 25 °C: 10% to 80%, non-condensing
Temperature gradient: 5 °C/h
FUNCTION
The ICOM NEXT A is the base component. Physically, it provides the
interfaces for linking up to the vehicle’s OBD diagnostic interface
together with the interfaces for adaptive integration in the workshop’s
network. With its powerful computer kernel, it serves as a protocol
converter and takes over the exchange of data between the tester and the
vehicle’s control devices, as well as processing the signals to the
connection for the measuring device. The ICOM NEXT A is supplied with
power from the vehicle’s on-board electrical circuit (terminal 30) via
the OBD connection.
In electric operation, theBMW Diagnostic Tool ICOM NEXT A is specified for a minimum voltage of 8V.
The unit will only function reliably if the supply voltage does not fall below this minimum level.
Posted by: Emily white at
08:44 AM
| No Comments
| Add Comment
Post contains 323 words, total size 3 kb.
2021 New Added OE-LEVEL Advanced Functions of LAUNCH X431 PRO3S+:
* Cylinder Balance test/Cylinder leakage test/Cylinder Pressure variations
* Component Matching: Compatible with Volkswagen / Skoda / Seat / BMW /
GM / Ford / Opel / Mazda / Fiat / Honda / Nissan / Hyundai / Kia /
Subaru etc.
* Online Coding: Compatible with Volkswagen / Audi / Benz / BMW / Seat / Porsche etc.
* Online Account Login Service: Compatible with Volkswagen / Audi / Skoda / Seat etc.
* Online Calibration: Compatible with Volkswagen / Audi / Skoda / Seat etc.
* Online Parameterization: Compatible with Volkswagen / Audi / Skoda / Seat etc.
* Anti-theft IMMO Serivce: Compatible with Volkswagen / Audi / Skoda / Seat etc.
* Guided Functions: Compatible with Volkswagen / Audi / Skoda / Seat etc.
* Power Balance: Compatible with Chrysler / GM / Ford etc.
* Programmable Module Installation: Compatible with Ford / Mazda etc.
* Flash Hidden Functions: Compatible with BMW / Porsche / Toyota / Subaru etc.
* Key Programming : Add, Delete & Reprogram Keys, Rewrite smart
keys, Replace smart key ECU, Replace KNOB IGNITION; Reset Key: Relearn a
key.
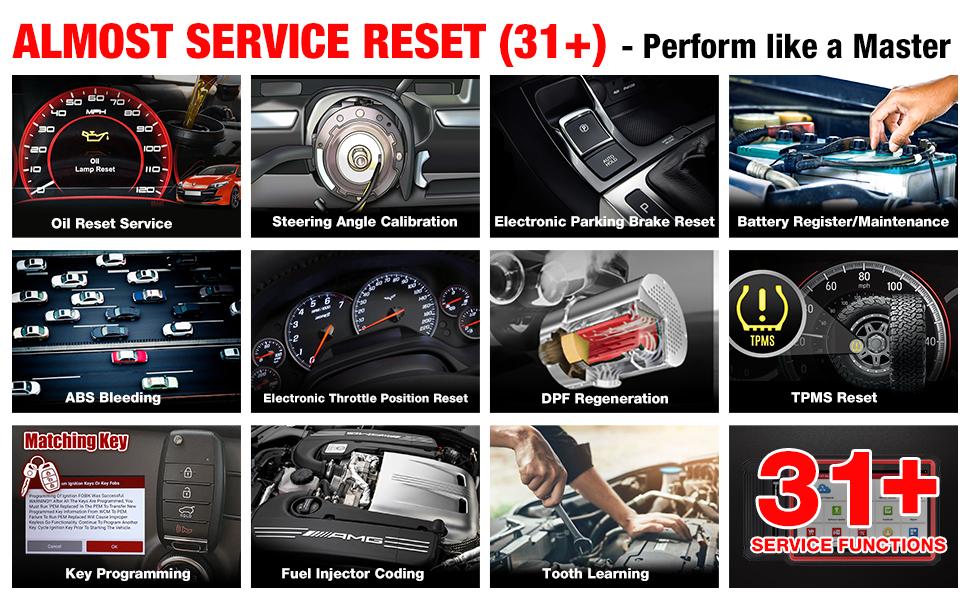
LAUNCH X431 PRO3S + supports 31+ kinds of maintenance functions (varies by model, year):
LAUNCH X431 PRO3S + car obd2 scanner not only has powerful diagnostic functions, but also has a variety of service functions, which can help you easily complete repair work.
* MORE ADVANCED FUNCTIONS ADDED: AutoAuth for FCA, SGW+Windows
Calibration + Seats Calibration + Tyre reset + Language Change + A/F
Reset A/F + Coolant Bleed + Transport Mode + Adblue Reset + NOx Sensor
Reset NOx + Stop/Start Reset + SCN Coding
* ECU CODING – The Coding function is used to re-flash the vehicle
control modules, it allows you to reprogram adaptive data for certain
components after making repairs or replacements.
* OIL RESET – Reset the oil life systems every time the oil and oil filter are changed;
* INJECTOR CODING– Code new injector numbers to replace the previous
one when fitting the new injectors or after the replacement is
completed;
* BRAKE RESET – Deactivate and activate the brake control system,
assist with brake fluid control, open and close brake pads, etc.;
* SAS RESET – Perform steering angle sensor calibration and clear records;
* BAT.RESET – Evaluate the battery charge state, monitor the closed-circuit current, register the battery replacement, etc.;
* ABS BLEEDING– When the ABS contains air, the ABS bleeding function
must be performed to bleed the brake system to restore ABS brake
sensitivity;
* ELEC.THROTTLE RLRN – Initialize the throttle actuators so that the
"learned†values stored on ECU are returned to the default state;
* TPMS RESET – Tire pressure resetting is required to be performed after maintenance is performed;
* Key Coding: Help ECU to recognize the new keys when you need to add new keys.
* DPF REG – Clear PM (Particulate Matter) from the DPF filter through
continuous combustion oxidation mode to stabilize the filter
performance;
* GEAR LEARN – Perform gear learning for the car when the engine ECU,
the crankshaft position sensor, or the crankshaft flywheel is replaced.
https://launchscanner.blogspot.com/
Posted by: Emily white at
08:27 AM
| No Comments
| Add Comment
Post contains 540 words, total size 4 kb.
June 21, 2021
Works ok on my car 96 LT4 Corvette, You have to manually step through
each test though. And you have to guess which standard your car is by
manually trying each selection which is annoyingly slow to do. When you
finally figure it out, then it goes faster.
Big thanks to @ grandspt for his experience sharing.
I purchased a 1996 PCM that was used for short money, my goal was to
keep it as a spare for my ’96 LT4 Vette since parts are getting harder
to come by.
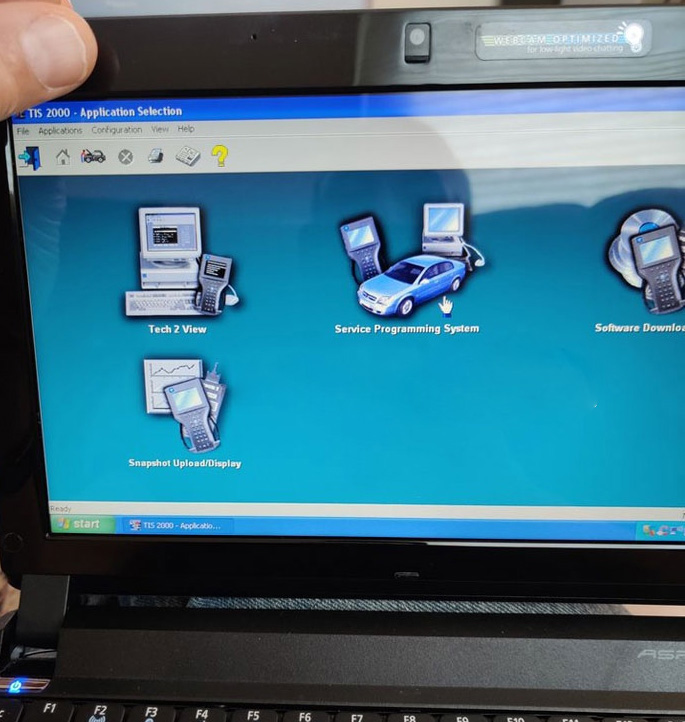
I removed my PCM and installed this used PCM. I took out myGM Tech 2 Clone, opened my Windows XP Netbook that I had previously installed the
TIS 2000 software (this software disk came with the Tech 2 Clone). I
opened the TIS 2000 application and went to the "Service Program
Application†and followed the steps to "Reprogram ECUâ€.
Now this used PCM obviously had a different VIN. So during the program
when it prompted me to see if the VIN was correct I deleted the old VIN
and entered in my cars VIN.
Then I uploaded the program for my VIN into the TECH2 Clone per the
prompts, disconnected the Tech 2 Clone from my Netbook and connected my
Tech 2 Clone to my OBDII port. I turned the ignition ON without starting
the car and selected "Service Programming System†followed the prompts
and watched the TECH 2 Clone load my VIN programming for my car.
It worked great, in fact I bought a second 1996 PCM for $150.00 and
performed the same procedure and that one worked just as well!
After I used my JET DST to upload my Tune for my engine into the PCMs.
The Tech II will obviously only install the factory calibrations. Now I
have two spares in case my original fails.
Hope this information is helpful.
TIS2000 Application
Here is where you select Reprogram ECU.
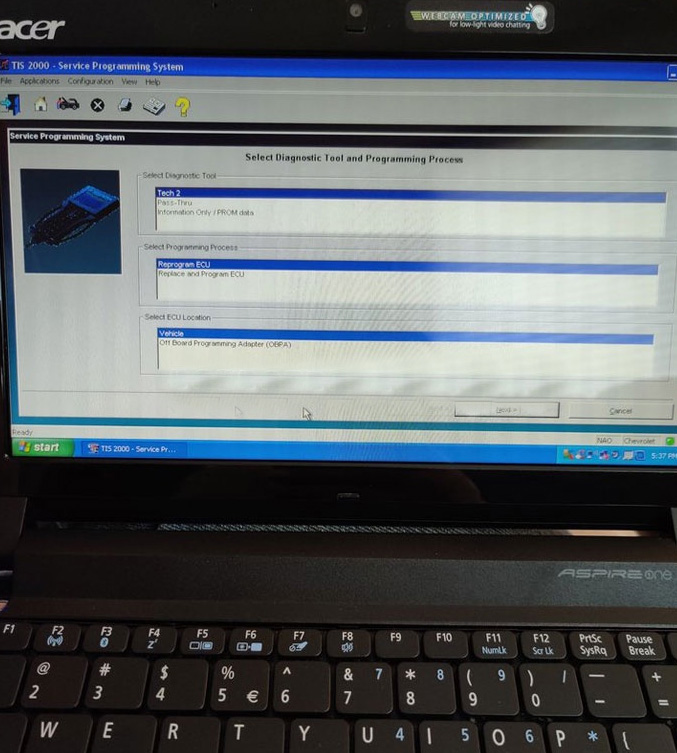
These are the prompts for the Tech 2 setup.

First I only have a 1996 with the OBD II, this is all I could experiment with so I can’t check other years.
I think it can also work on the 94, 95 model years as well, but I could be wrong.
The TIS 2000 software comes with the Tech 2 scanner.
https://gmscantool.blogspot.com/2021/05/clone-pcm-reprogramming-on-96-lt4.html
Posted by: Emily white at
08:46 AM
| Comments (1)
| Add Comment
Post contains 394 words, total size 4 kb.
May 27, 2021
New test report:
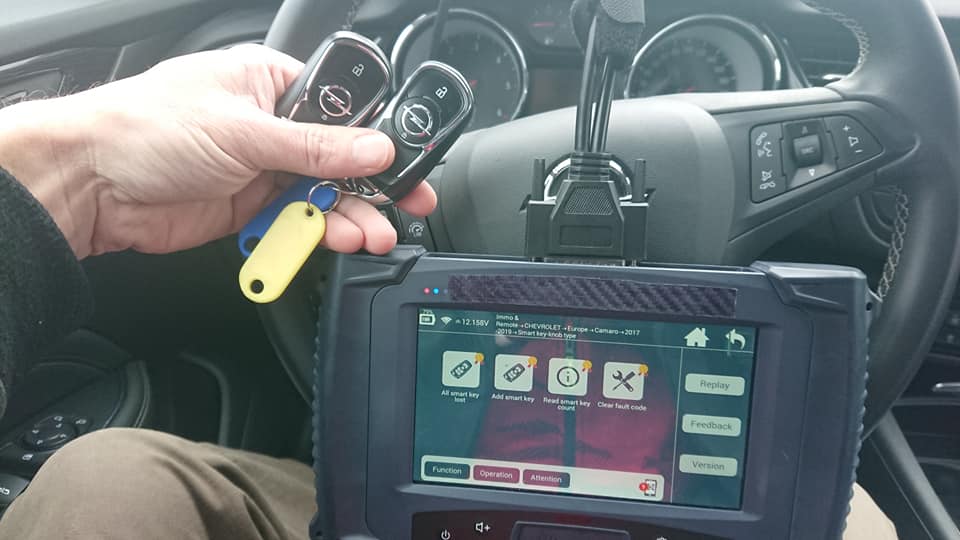
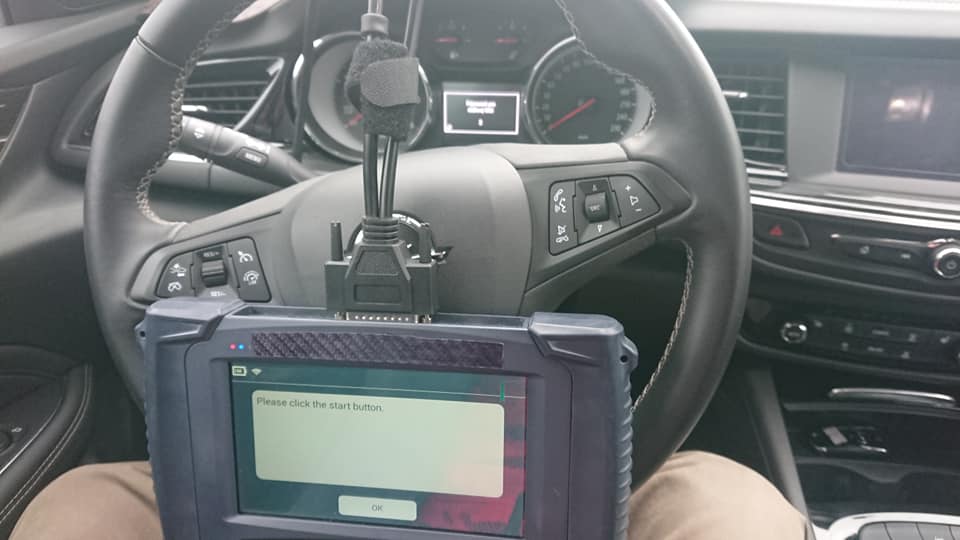
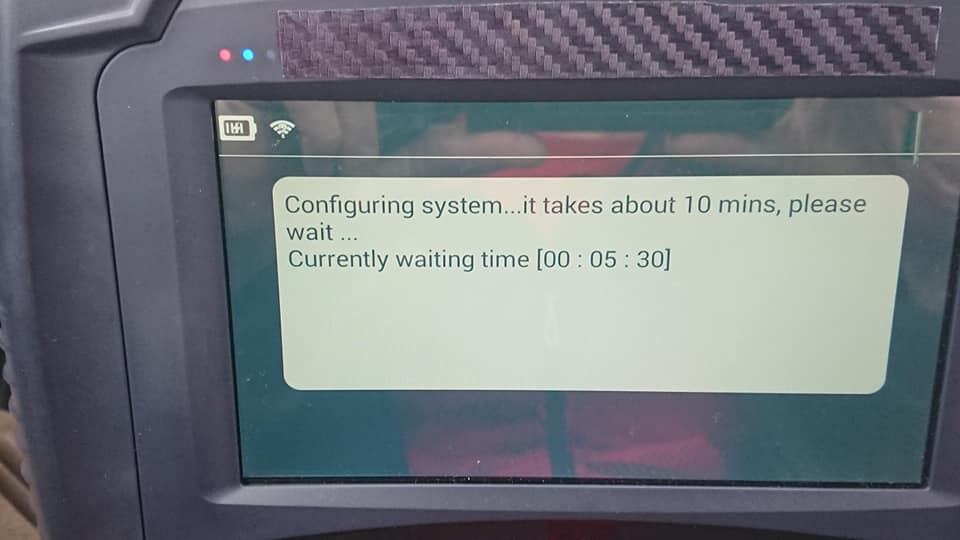
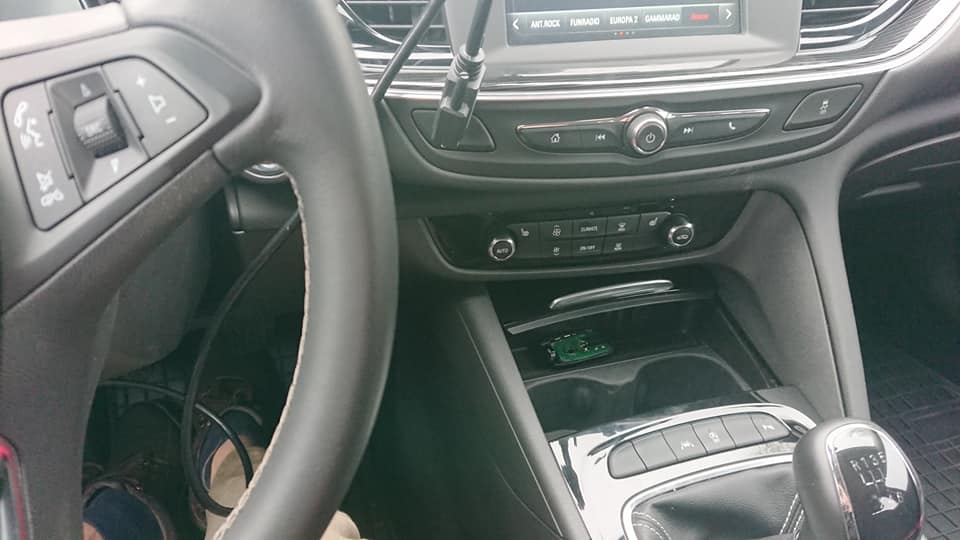
I have successfully added key to Opel Insignia B 2018 with Lonsdor K518ISE. Insignia menu is only for model A, older type – 2016. first i read PIN under menu Astra K. I tried menu Astra K smart key but didn’t work. I made this smart key under menu Chevrolet Camaro 2017-2019 smart key.
If you want to know more key programming tools, please visit our website https://www.obd2tool.com
Posted by: Emily white at
09:18 AM
| Comments (1)
| Add Comment
Post contains 81 words, total size 2 kb.
May 26, 2021
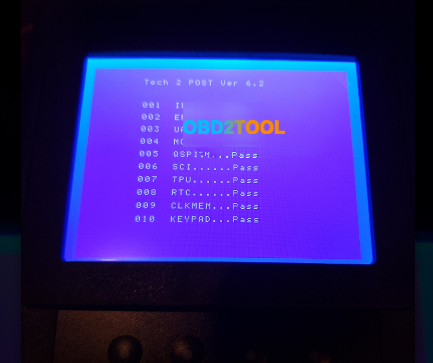
My husband bought one of your tech 2 scanners. When we plug it in and turn it on it says system initializing. Then goes to a screen that says tech 2 post ver 6.2 if 10 items that say passed. It will not go out of this screen. I believe its not making connection with the card for the software.
I do have pictures of what its doing, these are the only image the tool gives me. It does this with and without the card in it. I have also attached pictures of the inside of the device where the card goes and the card. I believe they are not making a connection with each other .


Finally Solved!!!
I found that the memory card had a couple of plugged holes. I tried opening they holes up and was also able to straighten the pins in the tech 2 device. I finally got the card to connect with the tech 2 correctly and now everything seems to be working. Thanks for your help.
Thanks to this user, hope it helps.
Posted by: Emily white at
08:51 AM
| Comments (1)
| Add Comment
Post contains 190 words, total size 3 kb.
36 queries taking 0.1264 seconds, 200 records returned.
Powered by Minx 1.1.6c-pink.

